Peaking into the Fiery Ferments

You have heard about it and hopefully reserved yourself a copy. Now you can sneak  a peek at what will be arriving. Our publisher has just released a sneak peak which includes quite a bit of content. 

How about a Spicy Horseradish Mustard that you can be eating by the weekend? Chocolate-Cranberry Mole anyone? Went a bit overboard buying kimchi and looking for a new recipe? Kimchi-Stuffed Jalapeños could be just the thing to polish off a jar. Finally the Lemon Achar Roast Chicken will be tough since you don't have the recipe yet for the Lemon Achar but is great to look at and dream...

Make Basic Fermented Pepper Mash

Here is a look inside the pages of our pepper fermentation book Fiery Ferments. Make your own fermented pepper mash—the first step to many a delicious hot sauce. We created a video of this lacto fermentation hot sauce process as well.

Hot sauce is not all the same. You might think its just cholula hot sauce, crystal hot sauce or your favorite Louisiana hot sauce and if you are talking about what is available on your local store shelf maybe. But if you want to make hot sauce its a new world of opportunity. How do you make hot sauce? Its actually really easy and usually it starts with a pepper mash. Pepper mash fermentation is the key to a great hot sauce by developing the flavors of the peppers before acidifying with an acid like vinegar.

Check out our fermentation masterclass on fermented hot sauces. You will learn to ferment hot sauce with any pepper you love. Learning how to make hot sauce from scratch is fun. You can choose blazing hot or super mild peppers, fresh or dry and blend in other flavors. This fermentation class will teach you everything you need to make your own safe probiotic hot sauces. If you are new to fermentation and just trying to figure it out you might start with this article that helps you to understand it from the beginning—what is fermentation and what are the benefits of fermented foods like this basic pepper mash.

Basic Fermented pepper mash from Fiery Ferments
Mastering Basice Pepper Mash from Fiery Ferments

Fermentistas: Beware the Storage Cabbage!

Dry, tough storage cabbage that doesn't easily release a juicy brine

Dry, tough storage cabbage that doesn't easily release a juicy brine

Let’s talk about fermenting storage cabbages. Last week I taught a hands-on class. I’d bought each student a beautiful small head of cabbage. Later, that evening during the demonstration portion of the class, I realized that the students would have to make their first ferment with rebellious cabbage.

Here’s the thing: as I stand in front of the impressionable new fermenters, I am often slicing, salting and then massaging a cabbage while talking. (No, I can’t pat my head and rub my belly at the same time but I can talk and build a jar of sauerkraut at the same time.) So it throws me off when I am massaging and telling the good people about brine and the cabbage refuses to give it up. I continue to talk as I am working harder and harder, smiling, trying to make it look effortless.

In this case, they were about to use the cabbages themselves so I stopped and said, “You guys are going to have fun with this cabbage; it’s a tough storage cabbage, you will want to make sure to take your time and slice it thinly.” (Which was a challenge as the venue had provided everyone with boning knives, but that is beside the point.) “The good news is, this is about as hard as making kraut will ever be, so it’s smooth sailing from here.”

Let me digress a moment to share a story about the first time I’d learned that storage cabbages can be a problem for fermenting. The lack of inherent moisture, the thick waxy leaves, all the qualities that keep these cabbages from rotting in storage are exactly what inhibit the fermentation, because what is fermentation if not controlled rot? In the following tale of a small sauerkraut company and the Storage No. 4 cabbage variety this lesson was learned—the hard way.

This small company I speak of operates with the triple bottom line and is exceedingly committed to supporting the local foodshed by using only local ingredients when in season. So when one of the local farmers came to the company with the idea to provide cabbages for a longer season by growing a keeper that was harvested in the fall and capable of surviving storage through the spring it seemed like a win-win situation. The kraut company would have local cabbage in the late winter and early spring for production. The farm would also extend its income stream. Done. Acres and acres were planted. The cabbages did what cabbages do and grew and grew. They were harvested and stored and eventually processed and set in fermenting barrels as needed to keep supplies fresh and abundant. When the first barrels were opened after three weeks, the cabbage had not yet fermented. At first this was strange but can happen so they closed the barrel and allowed more time. Eventually, after waiting for a few months they had to concede that this kraut wasn’t going to be good.

You are most likely to run into these cabbages in grocery stores in February, March, and into April when the winter cabbages are sold and the spring cabbages have not yet matured. It is hard to tell at first glance, and even upon deeper inspection it can be confusing. I admit, when I am out buying cabbage I look for crisp and fresh, not wilted, but I don’t even think about checking the head for signs of being a storage variety cabbage. And while I want you to know all about these varietals, this post is really about what to do when you find yourself with a tough cabbage—you may discover this when you are slicing through extremely dense interiors with thicker, waxier leaves, or later when you are squishing along and not seeing brine.

Tips for a successful ferment with a dry, coarse cabbage:

·      Slice as thinly as possible (breaking more cell walls)

·      Add salt, mix thoroughly, and allow to sit for a half hour before massaging (will break down the tough leaves and coax out moisture)

·      Make a mixed-veggie kraut instead of a plain, naked cabbage kraut (other veggies will bring their juice to the mix and help create enough brine to allow the microbes to do their job)

thin cabbage shreds for fermenting a dry cabbage
Favorite veggies for a juicier kraut: Onions, shredded carrots, shredded beets, shredded turnips (these will give you a flavor the most consistent with a plain kraut), and other shredded root veggies. Pictured here is Curtido (recipe in Fermented Ve…

Favorite veggies for a juicier kraut: Onions, shredded carrots, shredded beets, shredded turnips (these will give you a flavor the most consistent with a plain kraut), and other shredded root veggies. Pictured here is Curtido (recipe in Fermented Vegetables) it is delicious and the many onions create a juicy brine.

Ruby Red Sauerkraut

Making Ruby Kraut Ferment Works.jpeg

Why this kraut? Crimson and earthy, sweet and sour…what’s not to love?

The color alone makes it worth making, and not only because it looks good on the plate. You may have heard the term “eat the rainbow”, and this ferment pulls from the red and purple vegetables. The quick story is, veggies with these colors contain flavonoids, lycopene, vitamin C and folate which are all important for general health and more specifically heart health. Anthocyanin is also in the mix which is thought to help prevent aging, especially when it comes to memory and our brain, as it has twice as much antioxidant power as vitamin C.

Probably the best thing about this kraut is that it is delicious. It wants to be tucked into a simple grilled cheddar cheese sandwich or served alongside a warm, winter pot roast. It is also a friendly ferment for those who may be a little, shall we say, kraut adverse. This sauerkraut not only has a mellow sour but also a nice sweetness as a result of the cranberries.

Ruby Red Kraut

Makes about a quart and a half

1 small red cabbage (about 1 ½ - 2 pounds), shredded

1 large beet, grated

1 crisp tart apple, cored, quartered and sliced thin

3 tablespoons, fruit-sweetened dried cranberries

1 tablespoon + ½ teaspoon salt

Optional: 2 teaspoons caraway seeds

Prepare the cabbage: remove the coarse outer leaves, rinse a few unblemished ones and set them aside. Rinse the rest of the cabbage in cold water. With a stainless-steel knife, quarter and core the cabbage. Thinly slice with the knife or a mandolin, then transfer the cabbage to a large bowl. Prepare the beet and apple and add to cabbage along with the dried cranberries and optional caraway seeds.

Add a tablespoon of the salt and, with your hands, massage it into the veggies, then taste. You should be able to taste the salt without it being overwhelming. Add more salt if necessary. Quickly the cabbage will glisten and liquid will begin to pool. If you’ve put in a good effort and don’t see much brine in the bowl, let it stand, covered, for 45 minutes, then massage again.

Transfer the cabbage a portion at a time to a ½ gallon jar, a small crock, or the fermenting system of your choice. Press down on each portion with your fist or a tamper. You should see some brine on top of the cabbage when you press. Weight down with fermentation weights or a simple bag trick. Set aside, somewhere nearby and out of direct sunlight for 10 - 14 days, or as long as 3 months - or until it achieves a flavor and sourness you enjoy.

The most important thing during the first few days is to make sure all the veggies are submerged and under the brine. Check daily in the beginning, pressing down as needed to allow the CO2 to escape and bring the brine back to the surface. Using a utensil, you can start to test the kraut in one week. You'll know it’s ready when:

·      You will be able to smell that pickle-y smell

·      It’s pleasingly sour-pickle-y tasting without the strong acidity of vinegar

·      The veggies have softened a bit but retain some crunch.

This kraut will keep refrigerated for 1 year.

Make Fermented Garlic Paste

Garlic Trials at Ferment Works

Fermented garlic is the ultimate in probiotic convenience food. No, really, if you spend a little time fermenting something you want it to be garlic. Full disclosure: fermenting garlic takes a bit of time—there is all the peeling! Please don’t stop reading though a) its so worth it and b) you’ve got this!

Think about those big jars of minced garlic that are steeped in citric acid that have a flat fresh flavor, not so with fermented garlic paste. This stuff is just as easy in that you can use garlic to your hearts desire at a moments notice. However, there is no comparison on flavor and the added bonus is its live and probiotic. I know, sounding a bit like a used car salesman, but I want you to try lacto fermenting garlic. We are totally addicted to the stuff. One more small advantage to fermented garlic is that in the way it the part of garlic that lingers in your mouth and on your breath. (This has to do with the allicin being an unstable compound, but there are many chemical things at work here.) The important part is you can get away with eating raw garlic without turning everyone away! (Garlic lovers—how cool is that?

This post is to encourage you and to share a recipe for fermented garlic paste, but it is more fun than that. Last fall my farmer friend (and instigator) Mary, brought over 9 types of garlic. She grows seed garlic at Whistling Duck Farm. We did some trials to see how garlic changed with the different varieties. You can see some detailed results on a post I did for Mother Earth News . We used a pound of each variety to ferment in brine as whole clove pickle. And used another pound for fermented garlic paste. We did it all in one day to keep all the factors as even as possible, and for those of you doing the math—that was 18 pounds of garlic peeling!

One of the most fascinating parts of the experiment was seeing the distinguishing characteristics of a fresh variety of garlic might come out totally different when fermented. Fermenting brings out entirely new flavors—even within the same variety the whole clove ferment vs. the fermented paste can be very diverse. The first variance was that the jars all fermented at their own rate. A week in we had an array of colors among the pastes from unchanged to light pink and yellow yet after the fermentation period they all settled on a coppery orange color.  Some of the spiciest varieties mellowed out and some of the sweetest varieties took on some heat. The take away, though, is ferment your garlic—all varieties are good! (And for those of you reading this and sad that it is springtime and all the fresh cloves are past you can also ferment the scapes (the flower stem of garlic that is clipped in order to send more energy to the bulb.)

Garlic Paste

Yield: about 1 pint

6–8 heads garlic, cloves separated, peeled, and minced in a food processor

2 teaspoons salt

Process the garlic and the salt to a paste consistency in a food processor. This paste has a sticky, thick gooey consistency. You won’t see a release of brine, in fact you won’t really see a change. Don’t worry—it will work.

Top the ferment with a quart-sized ziplock bag. Press the plastic down onto the top of the ferment, and then fill it with water and seal. This will act as both follower and weight. Set aside out of direct sunlight in a cool spot (55 to 75°F), for 14 to 21 days.

While you monitor this ferment watch for air pockets. While there isn’t much lift action by the CO2 there is some, you will want to press down as needed. We have found that sometimes you can get a bitter, or even chemical flavor which seems to be a result of the trapped CO2 pockets. If you find this has happened stir the paste, press down, and allow it to ferment a few more days. It will right itself. If it still tastes bitter. Again stir the paste, this time place in fridge for a week and the undesirable flavor will dissipate.

Test the ferment on day 14. It's ready when the garlic is milder than when it’s raw, and has a mild acidity.

Tighten the lid and store in the fridge. This ferment will keep refrigerated for a year, though you will use it up much sooner than that.


Fermentation Magazines

Updated: February 15, 2021

This post was first written when the fermentation community was anticipating a “big kid” magazine. All of us in the community thought we were growing up, hitting the big time. This new magazine —a visually evocative, sensually stimulating magazine called CURED crash-landed with just one issue. Just one issue! At its heart was food preservation—you know, the stuff we geek out about all the time. Its focus was to be how humans have kept their food nutrient-rich, available and (hopefully) flavorful through the lean times, whether for surviving the next season or for a long journey. Fermentation was a big player in this new publication’s look at these ancient techniques through science, art, culture and travel.

Why am I leaving this post up? Partly to archive what this dream looked like. I think for the most part the existence of CURED exists only in the minds of those who were involved. The folks at Ogden Publications, who have given us Mother Earth News Magazine, for around half a century also tried.

Fermentation described itself as a premium quality magazine that covers the history, production, uses, science and health effects of fermented foods across cultures and generations. Content will include in-depth cultural and scientific histories, newsworthy and noteworthy current events, profiles of noteworthy fermented food creators, recipes for using fermented foods, instruction for creating fermented food safely, instruction on procuring or isolating appropriate microbial cultures, instruction for creating or procuring appropriate tools required for making your own ferments. The magazine will satisfy the needs and curiosities of beginners through advanced practitioners and will provide the reasons and science behind the ferments to the entire audience. Kirsten and many of my colleagues were on the advisory board. Again we applauded this step for the community.

This effort lasted for four information packed issues. Then Covid-19 hit and suddenly it was gone.

Okay, let’s go back in time to this post and meet its editor, Darra. Darra incidently is still doing wonderful things and her latest book Beyond the North Wind has a wonderful chapter on Russian fermentation. (Remember it started with feeling like big kids.)

…I want you to think about this for a moment because this is a milestone. We’ve hit a point where we have got a lush magazine (as in heavy paper and jaw dropping visuals) being launched by an established media company, Zero Point Zero Productions (who has given us Anthony Bourdain: Parts Unknown and Mind of a Chef) with a strong editor at the helm—Darra Goldstein. Darra is an award-winning cookbook author, world-renowned food scholar, and founding editor of Gastronomica.

Darra Goldstein photo by Stefan Wettainen

Darra Goldstein photo by Stefan Wettainen

Recently, Christopher and I had the opportunity to talk with Darra in a delightful conversation that meandered through time periods. Darra effortlessly guided us from a late 19th century banished Russian nobleman who observed that “sour” foods kept the peasants healthy to the modern allure of the bright packaging of industrialized food juxtaposed with the rediscovery of these ancient techniques having a certain luxury associated with them.

After the New York Times article (about CURED's debut) was published, Darra’s inbox lit up with email from folks all over the country who told her about their regional fermentation groups. She said, “there is an interesting subculture that is no longer marginal; it is really out there. Preservation has become much more mainstream but there is still a lot more to discover, particularly about other traditions of fermentation throughout the world.”

From our conversation we got a sense that it is this discovery that moves Darra. She is excited by the opportunity with CURED to take the DIY movement to a deeper level by bringing to the table the stories behind our preserved foods. CURED will seek to choose foods that we may or may not still eat and ask, what is the culture that surrounds it? What is the lore? What are the exigencies? How were these things created?

So what do we have to look forward to? Darra shared a sampling of some of the voices that will be heard. "There will be a wonderful article by Moises Valasquez-Manoff looking at the gut microbiome and probiotics. He went through many studies to try to determine if there is quantifiable scientific evidence and," Darra said, "everything points to something pretty intriguing."

There will be articles exploring Asian fermentation such as Japanese Zukemono, and a profile piece on Los Angeles chef Kwang Uh, whose kitchen uses a strong dose of fermentation, and there will be a piece on persimmon vinegar (can't wait to see that myself) by Edward Lee.

We had to ask, will there be recipes? While CURED is not a recipe-driven publication it will have recipes. "Recipes," said Darra, "are an important part of the story. A recipe tells the story in a different format and is like a continuation of the narrative that precedes it." All of the recipes are tested in CURED’s test kitchen in NYC but that doesn’t mean they will all be the centerpiece of your next dinner party. In part because some may not conform to the modern palate and in part because as we all know, fermentation doesn’t always conform to a consistent recipe.

She shared a wonderful example of a recipe by food historian Charles Perry for a medieval Persian cheese. In ancient Bagdad, yogurt and salt were added to milk that was then left on the roof to cure in the summertime. It works perfectly in Los Angeles, where the humidity is low. On a rooftop in NYC the summer humidity causes this to behave quite differently. And at Darra’s home in rural Massachusetts where the humidity is lower it is different yet again—but that is the wonder and beauty of it of it all now isn’t it?

Head over to CURED and put your name on the list to find out when it can be ordered. We sure did!

Make *KIMCHI* The Video

Formidable Vegetable Sound System's new single, 'KIMCHI' (from their forthcoming kids' permaculture album 'Grow Do It') is out on August 19 and can be downloaded here.

We are pretty excited to post this video clip and interview with Charlie Mgee of Formidable Vegetable Sound System a music group with fun antique-beats and a fantastic message!

FermentWorks:  It sounds like you grew up with an unusual childhood. Did food play a part in defining you? Did you grow up with fermentation? (Until recently that alone would be grounds for middle school social suicide—a fermenting crock on the counter. For me (Kirsten), it was being sent to school with garlicky hummus sandwiches that sent the garlic odor wafting from my desk through the classroom. It was the early eighties in rural Arizona...)

Charlie Mgee: I actually didn't discover fermentation until my mid twenties! The only fermentation I remember as a child was my Dad forgetting about the apple juice and opening it up a month later to find it had turned into cider. (We didn't have refrigeration, so this happened on more than one occasion.) I thought it was gross and actually had a bit of food paranoia growing up. Discovering fermentation certainly changed that!

FK: Formidable Vegetable immediately struck us as sounding like fermented vegetable and for some people a fermented vegetable is a formidable thing indeed—daunting, disturbing, and frightening—though that is changing quickly. We are curious how the name Formidable Vegetable Sound System came about?

CM: Haha! I've often considered changing our name to the "Fermentable Vegetable"! I came up with the band name pretty much on the spot as we were getting on stage for the first time and the MC wanted to know what to call us. It was just a random concoction of words that I blurted out! Seems to have stuck, though.

FK: Why kimchi? How does FVSS see kimchi as a fun solution to our toughest challenges?

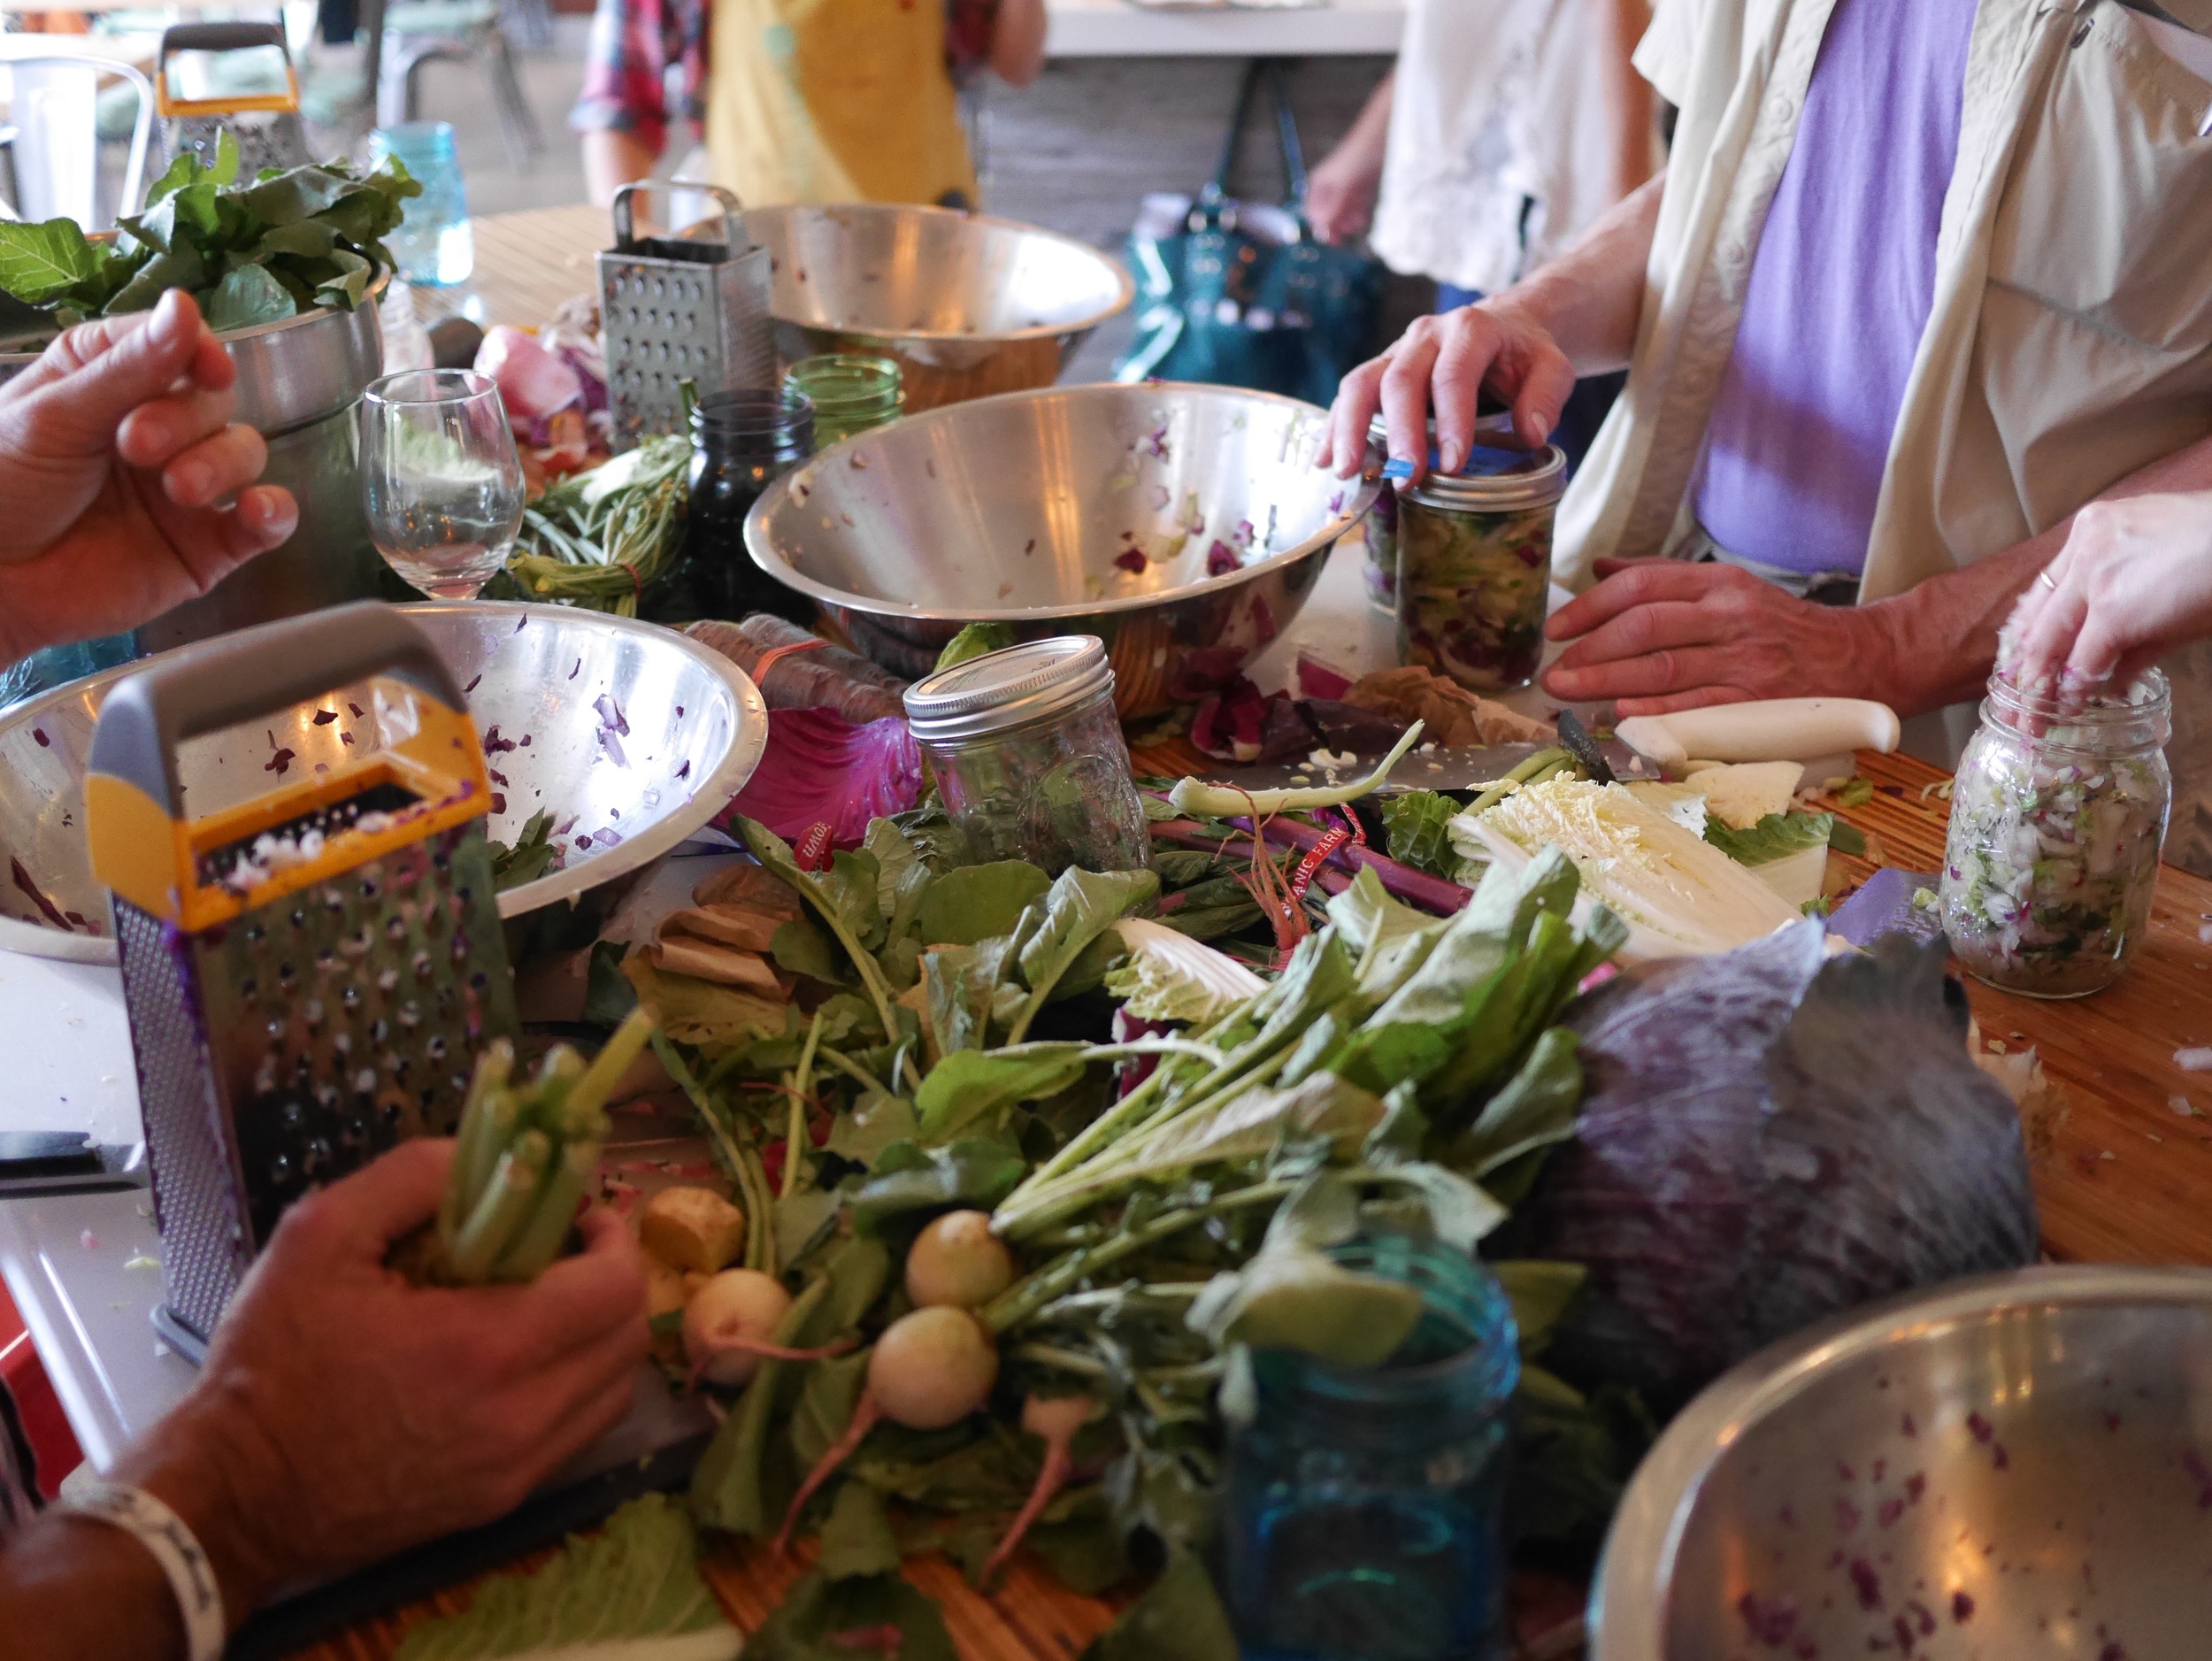
CM: I see the production and preservation of our own healthy foods (fermented and otherwise), grown and prepared in our own homes as an incredibly fun and rewarding solution to some of the challenges we face globally. For instance, we'd reduce carbon emissions by making our own kimchi from locally grown produce instead of importing it pre-made from Korea or elsewhere. If people ate more fermented foods, the general health and wellbeing of the population would most likely improve, which could take a lot of pressure off the health system! On a deeper level, (and anyone who has ever fermented anything may have experienced this) there is some kind of profound, intangible meaning you get out of connecting with your food by inoculating it with the local, indigenous strains of bacteria and yeast and then consuming these into your body. I see it as a way to sort of become 'native' to any place where you live by literally 'eating the culture'! Also, it's just yum! There are just so many benefits from this simple food!

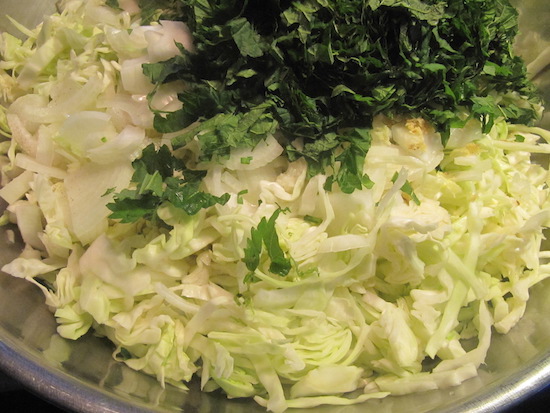
FK: It looks like you guys had so much fun with this song and the video. We would love to hear the backstory on how a kimchi how to song came about?

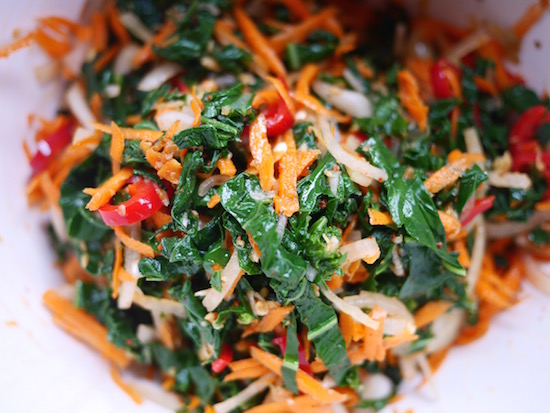
CM: After touring the world in 2013 with our first album, Permaculture: A Rhymer's Manual (link: http://music.formidablevegetable.com.au/album/permaculture-a-rhymers-manual-2 ), I decided to write an album for kids that would encourage them to grow and eat healthy food. You might think it a challenge to get a 4 year old to eat kimchi, but I'm happy to say that it can, and has been done! One of the ways to get kids to eat good food is to make it super fun, and maybe even a bit silly - which is exactly what we did with the Kimchi song! Getting covered from head to toe in radish, chilli and fish-sauce on a stinking hot Australian midsummers day is not the most comfortable experience, but the result was hilarious! Suffer for your art, I say!

FK: On the serious side FVSS has a real mission through “pounding sustainability deep into our consciousness in the funkiest way possible.” It is great to see a positive spin on getting the ideas of sustainability that in FVSS’s case are rooted in permaculture principles. (Christopher is trained in permaculture and we have a food forest on our farm.) Where do you see it all going?

CM: I'm really excited to explore the kids' show idea a bit further, so we're looking to do a heap more in that area. After playing mostly adult festivals for three years and somewhat 'preaching to the converted', I realised that the people who most need to know this stuff are the kids! Permaculture has some incredibly helpful solutions to solving problems of climate change and energy-descent that would no-doubt be of great use to kids growing up in these uncertain times. I really feel like it's our obligation to empower them as much as we can to take care of the planet and other people better than we have!

FK: We invite you to share your fermentation story. Where did it begin? What is your best flavor invention? And because one always has to ask—any epic fermentation fails?

CH: Kimchi is where it all began for me. After a friend gave me a jar she'd made, but could no longer stomach, due to her being pregnant, I was hooked! I have this wild theory that fermented food also inoculates your brain, leaving you craving more, so I was on a mission to try out as many different styles as possible after that. My favourite invented flavour I think was a berry kombucha I made once using flavoured herbal teabags... It tasted like healthy, probiotic soda! There have been oh-so-many epic kimchi fails! On entering a festival in Canada, we were given a warning that they weren't letting any glass into the campground, so I frantically jumped into the back of the van and stashed all of my nicely-bubbling jars of kimchi into my rolled-up futon mattress to hide them from security. We got them in, but on going to bed that night, I discovered to my dismay that they'd exploded all over the place, leaving me with the pungent odour of kimchi juice to lull me to sleep for the next few weeks on the road!
 

Grow Do It will be out on September 2 here!

Fermenting Finger Limes

Finger limes FermentWorks

This might feel like an esoteric post as first question is likely—what are finger limes? And in all honesty it is a bit esoteric but I do want you to look out for these limes if you love to experiment with fermentation flavor. Australian finger limes are just starting to show up in US markets and are often described as lime caviar, which is a surprisingly accurate description and exactly what makes them an exciting ferment ingredient.

When squeezed little tapioca like pearls (or caviar like fish eggs) spill out of the lime. Whenyou bite into them the erupt little bursts of limey goodness. They stay whole through fermentation so the lime isn't lost in the acidity developed by the lactobacillus. This means the ferment is double as exciting in flavor. There is the wonderful funky acidity of the now fermented vegetable combined with extra lime flavor pops.

I love simple fermented red onion relish and thought this would be the perfect medium for trying out these limes. This little experiment did not disappoint—one red onion, 3 finger limes, a pinch of salt and time. I haven't developed this into a specific recipe but it really was that simple. So if you happen upon a curious little collection of citrus like I did pick a few up and play with your food. 

Notice the little lime baubles in this Fermented Finger Lime Relish

Notice the little lime baubles in this Fermented Finger Lime Relish


More Fermented Vegetable Recipes Means More Fun

These are all posts Kirsten has written for Mother Earth News. We wanted to make sure you had access to more great recipes from FermentWorks. Click on the photos to link.

From Left to Right:

Enjoy!

Lacto Fermentation Tools: Silicone Lid Liners

Silicone lid liners are a game changer for mason jar fermentation. These lid liners by Mason Jar Lifestyle are a great new find. There are two places that I like to use these liners, one is the intended use—as a liner.  They prevent corrosion to your metal lids from salt and acid. We have even used them without the lid, clamped down by the ring. They also fit under Ball plastic storage caps, making them leak-proof.

Avoid corroded lids and messy plastic (that clearly didn't work) with silicone lid liners.

Avoid corroded lids and messy plastic (that clearly didn't work) with silicone lid liners.

But…

How I really like to use them is to use them is on fermented pastes, or other barely moist ferments, as a ‘ferment cartouche’. What? Isn’t a cartouche the Egyptian oval that encloses the name of royalty? It is, but in cooking terms it is a round piece of parchment paper placed on the surface of food, often under a saucepan lid to reduce evaporation. In the case of fermented pastes, we use a cartouche on the surface of the ferment to reduce evaporation as well as air exposure. It can take many forms:

·       A cabbage leaf, grape leaf, horseradish leaf, or other vegetable leaf

·       A circular piece of parchment paper cut to fit the surface of your ferment

·       A piece of plastic cut from a ziplock bag (more inert than plastic wrap)

·       A small circle of silicone—enter the silicone liner (note: While touted as more more inert than plastic the jury is still out on whether silicone is truly inert.)

Here at FermentWorks we don’t have affiliate sponsors or advertisers. We do however get offers now and again from folks hoping that we we will review their product. Since we do not profit from our reviews they are our honest opinions. Often these offers come with giveaway samples which we are happy to share with our readers. We have a nice little jar fermentation kit from Mason Jar Lifestyle with 2-packs of lid liners, a fermenting weight, air-lock lid, and decorative lid.

Mason Jar lifestyle silicone liners - Ferment.works post

Mastering Basic Cheesemaking: The Fun and Fundamentals of Making Cheese at Home by Gianaclis Caldwell

Fromage Blanc made from Gianaclis's new book in a class here at our farm. The students had a grand time decorating the cheeses with flowers and herbs from the garden.

Fromage Blanc made from Gianaclis's new book in a class here at our farm. The students had a grand time decorating the cheeses with flowers and herbs from the garden.

Before vegetables there was cheese—at least when it comes to big fermenting projects on our homestead. Well, that is not totally true—let me back up a moment. We fermented a bit of sauerkraut in a crock early on, but the full on “let’s do this!” commitment came later. In the meanwhile, I spent many years teaching myself cheesemaking.

The year was 1999 and I had my “Little House” fantasy. Just like Ma, I would pull perfect cheeses from the press while my wide-eyed children gazed in wonder at the awesomeness. Making your own cheese—romantic right? Imagine unwrapping a cheesecloth-swathed bundle to reveal the perfect creamy dense alchemy that took place in the pot between the milk, rennet and bacteria.

I, of course, had no clue how to make cheese. And believe me the reality is that without proper guidance this nuanced process can quickly go from dream to frustration.  At the time, there were no local folks making cheese, neither old-timers nor back-to-the-landers. There were no classes at the extension and there was only one book for the beginning home cheesemaker.

The one and only how-to book gave recipes and instructions but it was not instructional. I followed along but did not learn. And when things went wrong I had no clue why, and therefore had no idea how to fix it or make sure it didn’t happen again. My determination to create our homespun life outweighed the frustrations—or was it the milk literally kept flowing?  Meanwhile, cheesemaking was becoming a thing. I bought each new book and gleaned a little more knowledge from each and slowly taught myself.

So when I read, and I mean read every page, of Gianaclis Caldwell’s new book Mastering Basic Cheesemaking: The Fun and Fundamentals of Making Cheese at Home, I kept wishing that this was the book I started with.

Gianaclis expertly guides the fledgling cheesemaker through the craft in an accessible manner. Gianaclis’s writing and presentation is clear and informative.  She begins with understanding the ingredients and the tools, making it clear that you can make cheeses without all of the expensive equipment, and explains the options. In other words this book makes this culinary art accessible!

This user-friendly approach takes the reader through a progression of the process, unlike some that are too scientific, overwhelming, and hardly accessible. Others don’t move the reader beyond dabbling in vinegar cheeses and other unripened fresh cheeses. Mastering Basic Cheesemaking is different and it is as the title suggests—Fun!

Each of the cheeses is set up as a lesson; each type of cheese is designed to build skill, confidence, and knowledge. Gianaclis includes what is happening with the milk as it acidifies with each of the cheeses so that the new cheesemaker is learning the craft. The first cheeses are simple with acidification happening through added acids such as vinegar. Then it’s on to cultured soft cheeses, fresh cheeses, semi-firm cheeses and finally aged hard cheeses. Each lesson outlines what you will need, gives the process in a nutshell, then the step-by-step instruction and perhaps the most useful detail—a recap and trouble-shooting.  With all the reassuring instruction you will not stare at your aged Gouda, so beautiful on the outside and then upon opening, full of small holes and splits. Instead you will know what happened, whether it is safe to eat, and how to not make that mistake again.

I see this book as becoming the new classic in beginning cheesemaking. You won’t be disappointed in Mastering Basic Cheesemaking: The Fun and Fundamentals of Making Cheese at Home.

Fermented Golden Beet Salad

Fermented Sweet and Sour Golden Beet Salad at FermentistasKitchen

In the last year or so, we have been experimenting with texture and how it affects the flavor of fermentation. We want to offer this recipe as an example of how this plays out with beets. Fermented beets are delicious and can be intense due to the high sugar content of the beetroot. Often beets are grated into krauts—mixed with cabbage to help cut the intense syrupy brine. Over the last few months I have been working with beets that I slice finely on a microplane slicer or mandolin. (It is important that they are paper thin as if the slices are to thick the beets will be tough—like eating raw beets.) The advantage of slicing the beets is a salad like consistency without the thick brine. 

Sweet, Sour and Spicy Beet Salad

Yield: About a quart

Heat Index: 1

The heat level is entirely dependent on the fresh pepper that you use—for a higher heat use Fresnos, jalapeños or equivalent choice. You can use red beets for this recipe but they tend to takeover the color and the flavor of the ferment.

2 large golden beets, sliced thinly

¼ pound fresh red pimento peppers, chopped finely

2 tablespoons goldenberries. left whole

1 tablespoon dried cranberries, left whole

2 tablespoons candied ginger, sliced

1 lemon, juice and zest

1 teaspoon salt

Prepare the golden beets and peppers. Sprinkle in the salt the mixture should become moist right as soon as you start massaging. When you have a nice brine add the berries, ginger and lemon. Mix everything together. Press the mixture into your favorite fermentation vessel. Follow the instructions that come with that vessel. Otherwise choose a jar that is just the right size for your ferment.  Press the mixture into the jar. When you have pressed the beet mixture into the jar, releasing any air pockets, press a Ziplock bag against the surface, fill the bag with water to weight, and close the bag.

Put this in a corner of the kitchen to cure. Watch for air pockets forming in the ferment. If you see air pockets remove the bag, or open the lid, and press the ferment back down. If the lid starts to bubble up, simply open the lid for a moment to “burp” the ferment.

Allow to ferment for 10 – 21 days. Usually you will know it is ready when you see the colors of the ferment mute, you also might see the cloudiness develop in the brine. There is a pleasing acidic smell to the ferment. It will taste pickl-y and may also have a bit of an effervescent zing.  Allow to ferment longer for more sour and punch. When it is ready tighten the lids, then store in the fridge. This ferment will keep, refrigerated for 10 – 12 months.


Fermented Valentine! Chocolate Cranberry Mole

Fermented Chocolate Cranberrry Mole

If you are looking for something new and crazy, a bit spicy, a bit sweet, but complete with requisite Valentine’s chocolate, look no further—it is time for saying love with a fermented valentine.

Love your sweetie—love their guts!

Chocolate Cranberry Mole

Yield: About 1½ pints

4 cups (1 pound) fresh cranberries

1 cup dried cranberries

½ cup dried unsweetened cherries (or increase dried cranberries)

5 tablespoons (2 ounces) pasilla chile powder

2¼ teaspoons cocoa powder

¾ teaspoon salt

½ cup fresh orange juice

Process all of the ingredients to a paste consistency in a food processor. Sprinkle in the salt, since the cell walls of the ingredients are already broken down the paste will become moist right away. However, this type of ferment will not look juicy, instead it will be drier than you think is possible. Press the paste into your favorite fermentation vessel. Follow the instructions that come with that vessel. Otherwise choose a jar that is just the right size for your paste. 

Press the mixture into the jar, there won’t be an obvious brine; when you have pressed the paste into the jar releasing any air pockets, press a piece of plastic wrap against the surface, again without trapping any air. Screw a lid tightly on the jar.

Put this in a corner of the kitchen to cure. Watch for air pockets forming in the paste. If you see them open the lid and press the paste back down. If the lid starts to bubble up, simply open the lid for a moment to “burp” the ferment.

Allow to ferment for 7–10 days. You will know it is ready when the cranberries have a delightful lemony flavor and all the elements have mingled together.

Keep a small round of plastic or wax paper directly on top of the paste to prevent evaporation and contamination. Tighten the lids, then store in the fridge. This ferment will keep refrigerated for 12 months.

Fermenting Carrots 3 Ways

These three easy carrot ferments (no crock, no cabbage) are delicious. The demonstrate how fermented vegetable flavor magic can be changed simply by changing the chop. How you treat your veggies can give you a completely different end result. This video and accompanying blog post shares an example of this action. These recipes use different ingredients but we encourage you to use the Carrot Salad ingredients in the grated krautstyle ferment or the Carrot Kraut ingredients sliced like the salad to see what a difference chop can make.


Make Gochujang :: Recipe for Traditional Gochujang and Quick Gochujang

Traditional Gochujang from Fermentistas Kitchen

Gochujang is a velvety, deep-red, rich Korean fermented hot pepper paste. It has a wonderful mix of sweet and hot, sour and salty. This paste is showing up in all manner of recipes (almost like it’s the new Sriracha or something.)

It is, however, a commitment to make in the traditional authentic sense (three months for one thing.) We have experimented quite a bit this last fall with the process and with recipes we have found in our research.  We were surprised that it was hard to find definitive recipes. We did learn that all Korean households used to make their own but now very few do. We shared some pictures of the process on Instagram and soon our in-box had a number of requests for the recipe; unfortunately with the long fermentation time, we couldn’t really say what was great and what was not (and a few were not so good). Finally the “results” are in and we found the following two recipes to be quite delicious.

We based the first (traditional) recipe on the recipe by Emily Kim from her book Maangachi’s Real Korean Cooking: Authentic Dishes for the Home Cook, which incidentally has some wonderful ferments and recipes. We first used her blog recipe before the book was available and our adjustments came from her original blog recipe. Perhaps our biggest adjustment in all the traditional recipes that we tried was to significantly reduce the salt. The final flavor of this paste still has the important salty flavor element along with the rich sweet heat.

The second recipe is one we just came up with as we wanted to find away to make a gochujang-like flavor paste without the long-term extra credit fermenting project. We wanted something that would help folks make a natural no-additive fermented paste that doesn’t take as long or need a bunch of difficult to procure ingredients. This paste is quite complex and delicious despite being a “cheater’s gochujang”.

Note about Korean hot pepper powder: the commercially available powders ferment beautifully. The English translations on the labels can be off or confusing. Some are quite sweet and mild, while other powders in your kimchi will make your head sweat. If you are at an Asian market or on-line shopping for flakes,  “maewoon gochugaru” means very hot, spicy, pepper flakes, and “deolmaewoon gochugaru” means milder. Try to find powders without added sugars or other additives, though most of the plain ones still contain a bit of salt. Here is a link to growing your own Korean kimchi peppers.

Traditional Gochujang

Yield: about ½ gallon

8 cups water

2 cups barley malt powder*

5 cups sweet rice flour, also called glutinous rice flour

1 cup fermented soy flour

6 cups Korean hot pepper powder see gochu, not flakes (gochujangyong gochugaru)

3 cups brown rice syrup

¾ cup salt

Mix the barley malt and warm water in a saucepan with a whisk, you want the water warm to the touch, about 100° F. Whisk in the rice flour. Allow to sit two hours.

Return pot to stove and cook at medium low heat until reduced by a third, about 1 to 2 hours. Stir regularly—this wants to stick to the bottom of the pot. Let this cool completely.

Stir in the fermented soy flour, hot pepper powder, rice syrup and salt. Mix until thoroughly mixed. It will be shiny and creamy.

Transfer to gallon jar, onggi pot, or your favorite fermenting vessel.  Cover with cheesecloth and secure with a rubber band. Place the lid on jar or crock. Keep it at room temperature in a sunny window. On sunny days remove the lid and allow some sunlight to shine through the cheesecloth onto the ferment. In mid summer or in a hot climate move it to a cooler location in the afternoons. (Note: We have made it in the winter when the sunlight is minimal and have still had a delicious ferment.)

Ferment for 3 months. Transfer to the refrigerator to store.

* Barley malt powder: Malt is the key word here—it means that the barley has gone through a soaking and drying process that converts the starches into sugars. If you can find the kind that is labeled diastatic which has been soaked long enough to get the enzymes that break down the starches. Be careful though as some labeled as such contain dextrose and even wheat—not sure why. The takeaway is read your labels to get the pure product you are looking for. It can be found in Asian stores under the Korean name yeotgireum.

**Fermented soy flour found in Asian markets under the Korean name meju garu can be hard to source and can be replaced with Bob’s Red Mill organic soy flour. This works well as long as you use the malted barley.


 “I-don’t-want-to-wait-3-months” Quick Gochujang

Yield: about 1 pint

2 cups water

3 tablespoons rice flour

3 tablespoons salt

1¼ – 1¾ cups Korean hot pepper powder see gochu (page 000), not flakes (gochujangyong gochugaru)

Add after 2 weeks of fermentation:

2 – 3 tablespoons brown rice syrup

Whisk the rice flour and salt int the water and then add the gochu powered. Mix until you have a smooth even consistency.

Follow the instructions for the type of fermentation vessel you are using. Press the paste into your fermentation vessel. If using the simple jar method select a mason jar that is sized appropriately to the amount of mash. Place the mash inside the jar leaving about 3 inches of airspace. Tighten lid. Set on your counter for 14 days.

This paste may float, leaving the brine below. This can be remedied one of two ways: open the lid slightly to “burp” the jar, reseal, and shake the jar to redistribute the contents. Or, open the jar, stir with a clean utensil and reseal. Test the ferment on day 14, though we like to let it go an extra week. It's ready when the flavors have mingled and there is an acidic vinegar-like quality to the flavor.

Stir in the brown rice syrup to taste. Allow to ferment for a few more days.

This ferment will keep, refrigerated for 12 months.


Five Ways To Make Sure You Will Not Go Wrong Fermenting Your Vegetables

A few of these ferments have some Kahm yeast on top--not to worry this is easily removed. The ferment underneath is fine! Tasty in fact!

A few of these ferments have some Kahm yeast on top--not to worry this is easily removed. The ferment underneath is fine! Tasty in fact!

All you have to remember is to salt and submerge. We like to tell people, “Sinking in brine conquers evil every time. 

1. Keep your ferment comfortable. If the temperature is too cold the bacteria cannot eat and multiply fast enough to acidify your vegetables properly. (It is this acidification that preserves—not the salt.) If it is too hot they may work to quickly to do a good job.

2. Watch for the air pockets building as the CO2 releases. If your ferment looks like a glass of champagne you know it is time to press down the vegetables so that the brine surrounds the vegetables again. 

3. It should smell. But make sure it is a pleasing smell, like vinegar and pickles, not rotten like compost or rotting potatoes.

4. Scum happens. Maybe you see something growing on top of your ferment. This is where the air and oxygen are mingling with your ferment. Sometimes this can cause yeast or even mold to grow. Don’t worry. Just take this top layer off and throw it into your compost pile. Everything under anaerobic brine is safe and delicious.

5. Sometimes you will feed the worms and not your family. If something went wrong and you have air-pockets and stink and scum and maybe even slime throughout, just throw it out.  You will know it is bad—there is no question, all of your senses will tell you so. Most importantly, don’t worry; we all have unsuccessful batches now and then.  If you do, it's okay—don’t be afraid to try again. 


What is a fermentation airlock and should I use one?

In fermentation an airlock is a set up that allows the carbon dioxide gas created as the bacteria break down the sugars and starches to escape the fermentation vessel, without letting new air into the environment. They have been common standard equipment in alcohol fermentations but are fairly new to the lactic acid fermentation scene. This will talk about using an airlock with fermented vegetables.  There are many ways to achieve this airtight environment and it often involves a bit of water. The ceramic water-seal crocks were likely one of the first ways that humans figured out that a simple ring of water would trap the air.

Airlocks like the ones pictured above also use water as the seal. The carbon dioxide bubbles out through the water but the outside air can’t find a path back through the water and into the ferment. Simple ones like these have been used in alcohol ferments for years but as lactic acid fermentation has gained popularity many folks have adapted these to use on canning jars.

These systems take most of the babysitting out of the curing time during the fermentation. We admit to setting ferments in their air lock topped jar and forgetting them—with delicious results. That said, its only fair that you know all ferments have a mind of their own (just like kids). So while you think they are safely sleeping in bed, they just might be under the covers reading ghost stories with a flashlight. Then they get scared and there is a whole lot of excitement…same with the microbes.

If your ferment is particularly active and your jar is particularly full this moving brine may just bubble right out of your ferment. When the ferment appears to be “making” brine what is really happening is it is expanding due to the trapped carbon dioxide. This movement in the brine is sometimes called a “heave” or a “surge.” Therefor weights are another important piece of the worry-free ferment as they help keep the veggies in place during the most active phases of fermentation. We have found out ferments are infinitely more successful if we manage the air pockets. Even if the oxygen is not present and the vessel is completely sealed in these pockets the flavor can have a bitter quality if they aren’t pressed down. This brings us back to using small weights or simply opening your ferment as needed to press the veggies back down under the brine (with a clean utensil) before sealing it up again for more fermentation.

So, the second part of the title—should you use an air lock? The answer is it depends. It depends largely on you, your style, your setup, and your comfort level with fermentation. Fermentation is an ancient, very low-tech, and forgiving process, but it’s important to note that LABs (the friendly bacteria we talked about earlier) are happiest and most productive in anaerobic environments (again, ones without oxygen). Enter the airlock systems, which allow carbon dioxide to escape from your container, while keeping oxygen out—creating the anaerobic sweet spot needed to foment your ferment. This takes some of the babysitting out of the process, allowing you to forget about your jar a bit while the good bacteria process the fruits and veggies. While airlocks aren’t necessary, they can give newbies the confidence they need to get hands-on fermenting experience. They also made to fit nicely on any wide-mouth Mason jar, making them a cost-effective solution with a relatively small footprint.

It is important to note that not airlocks are foolproof. Though it’s unlikely, even with an airlock, scum (mold and yeast) can still make their way into the jar. We have built these troubleshooting pages just to help you out. If you want to master vegetable fermentation and feel confident in fermenting any vegetable with or without an airlock be sure to check out our fermentation masterclasses, especially Mastering Fermented Vegetables, where we look at all kinds of fermentation vessels and their pros and cons.

Fermentation Festivals are the New Harvest Festivals

A decade ago no one had heard of a fermentation festival as there was no such thing. And let’s be real—even if you had, you would likely have wrinkled your nose at the thought. Well most people would have, but you, dear reader are probably in the club of lover of all things fermentation. That is why you visit our pages. I thought this is a longer than usual post with more links and photos would give you a peak into the whirlwind of some of the festivals held around the country.

The first two festivals I knew of were the Freestone Fermentation Festival in California and the Reedsburg Fermentation Festival in Sauk County, Wisconsin. They both have undergone name changes—Farm to Fermentation in Santa Rosa and Reedsburg is now Fermentation Fest A Live Cultural Convergence.

Last year I had the opportunity to go the Fest in Wisconsin as a speaker. It was a fantastic event where all the definitions of culture are alive—from large art installations to good food—it was a good time. In 2011 I went to the Freestone Festival, which you can also read about way back in the early days of this blog. I had the opportunity to go back to Santa Rosa in August this year as a speaker, the season opener for me.

Farm to Fermentation is headed up these days by Jennifer Harris. It took place this year in a community center; the day was beautiful and I enjoyed meeting many of the folks that I have come to know virtually over the last year as part of the community of fermentistas. This includes Kate Payne (Hip Girls Guide to Homemaking), Alex Lewin (Real Food Fermentation) ) and Nicole Easterly (FARMcurious)—As a result we are doing a class together in November.  This festival had a healthy wine and hard cider section, but it is Sonoma County—when in Rome as they say. (And the little tasting glasses—so cute.) I taught a chutney class and here is the recipe from the class. On a personal level I was able to visit with my bestie from college (always a soul recharge) and reconnect with our production editor of Fermented Vegetables. We hadn’t spoken since the book went into production in January of 2014 so it was fun to catch up personally but also share the ride the book has taken us on.

Beautiful day, walking in a vineyard with my bestie—life is good!

Beautiful day, walking in a vineyard with my bestie—life is good!


The first day of fall was a popular day—Oregon had its first festival and the Santa Barbara Festival happened. I had been invited to both—if only I could have cloned myself for the day. Don’t feel sorry for me though—I was in Seven Springs, PA for the Mother Earth News Fair where I continue to meet amazing people and find inspiration. I was especially touched to meet folks who already knew our work and thanked us for making vegetable fermentation approachable. I can’t quite describe the feeling when somebody says, “your book has changed my life.” Wow, right?  I, in turn, was moved by the work of Tradd Cotter in the realm of mycelium. Seriously, you should check out what he is doing. Meanwhile stay tuned; I hope to write a post on his work this winter. 

In case you ever wondered what the view from the speaker's stage is like about 15 minutes before the presentation. At MENF the smart folks come get their seats early so they don't have to stand in the back. 

In case you ever wondered what the view from the speaker's stage is like about 15 minutes before the presentation. At MENF the smart folks come get their seats early so they don't have to stand in the back. 

Festival goers found these fungi during early morning forays into the woods with Tradd Cotter.

Festival goers found these fungi during early morning forays into the woods with Tradd Cotter.

A few weeks later I was headed back across the country to the Boston Fermentation Festival. The first stop was Storey Publishing. It was fantastic to meet the good folks who put our book together and have supported it wholeheartedly. For fun we put together a little instructional video for fermenting carrots three ways. 

The Boston festival is headed up by Jeremy Ogusky and a group of enthusiastic volunteers calling themselves Boston Ferments. Again one of the best parts of this was meeting more of my virtual friends in this community, Jeremy, of course. It was a pleasure to finally meet (and taste their ferments) Addie Rose and Dan from Real Pickles who contributed their Eggplant Wedding Pickle recipe to our book. I also got to visit with some fermentista divas from NYC—Michaela Hayes of Crock and Jar who contributed the amazing chocolate cake recipe to the dessert section of Fermented Vegetables, Cheryl Passwater of Contraband Ferments, and Angela Davis of Fermentation Matters.

The Boston Festival had vendors and speakers and all of the important elements of a fermentation festival but I really liked all of the places where attendees could engage and learn from the folks who have been at it awhile. The Kraut Mob gives newbies an opportunity to simply get their hands on salty veggies, the first step to making your own, which they did—and they took home the jar of future ferment to prove it.

Early morning, early adopters—not yet the mob in Kraut Mob

Early morning, early adopters—not yet the mob in Kraut Mob

There was a help desk where experienced folks took turns answering questions. I was there with Jitti Chaithiraphant a chef and vinegar master. Our shift was early and we didn’t get a lot of questions. Secretly this was okay as I was able to learn a lot myself. For those that wanted to see these little microorganisms that we were celebrating, Ben Wolfe was there with a microscope and a head full of knowledge that he was ready to share.

Meeting fans is fun and Robyn Wight gets a prize for the furthest flung fermentista—she came from Australia just for the festival. I also had the chance to get to know Karen Solomon (Asian Pickles) at the after party—what a cool gal. I look forward to crossing paths again.

Couldn't resist sharing this parting shot of Boston. This is not touched up. WOW!

Couldn't resist sharing this parting shot of Boston. This is not touched up. WOW!

Goodbye Boston. Hello Boulder. Trail at Chautaugua Park Boulder, CO

Goodbye Boston. Hello Boulder. Trail at Chautaugua Park Boulder, CO


The middle of October took Christopher and me to Boulder, CO for a weeklong celebration—Cultured Colorado put together by the newly formed Cultured Foods Guild. This guild is an interesting group, if you are a fermented food enthusiast you might want to keep track of what they are up to. This festival was a little different in that it is a series of events at various venues throughout the area. Sandor Katz and I divided and conquered by each speaking at many of the events, along with a whole cadre of local makers and farmers.


Our first event was a hands-on class at Zeal on Pearl Street. The class was in the middle of the chaos of an open kitchen and a beautiful day of doors opened to the street. If anybody knows the Russian tale of The Giant Turnip then you will know what I mean when I say I think I met that turnip at the class.  Owner Wayde Jester had bought it and a beautiful array of veggies from the farmers market that afternoon, and I believe that turnip went home in a few different ferments. The energy of the location, the staff, the participants, and the Cultured Food Guild (and the vegetables) was incredible.  The rest of the week flew by with an event at the Nutritional Therapy Institute in Denver, The Flatirons Food Film Festival on the CU campus, Alfalfas Market in Louisville, a fundraiser for Denver Urban Gardens, and a wonderful evening talking to the CSU Fermentation Club.

It was a lot of fun seeing the enthusiasm of students who love microorganisms! Many of the students shared that they had come to the CSU fermentation program for the beer and in the meantime discovered that fermentation has flavors to offer in all manner of foods. 

Christopher and I don't get to present together as often as we'd like. I have thought the duo provides extra entertainment beyond just fermentation. I feel these photos that were sent to us are proof.

Goodbye Moon. Flying into the storm. Austin, TX

Goodbye Moon. Flying into the storm. Austin, TX

Unfortunately we didn’t get to stay for the last few events as I was on my way to Austin, TX for the Austin Fermentation Festival. (Click the link for a great photo slideshow) I flew in about the same time that Hurricane Patricia was blowing in as a downgraded tropical storm. One would think a girl from Oregon would be used to rain, but honestly it was a novelty as at that point we hadn’t seen rain since spring. (It finally rained a little this week, not enough to put water in the streams but at least the ground got wet.)

I went to two museums (a great way to spend a rainy day and what treat to have the time.) I ate some of the most amazing meals (which I did photograph but I will spare you) and I saw a friend since I had not seen since high school graduation. (Okay, that was surreal.)

The festival was held at Barr Mansion, a beautiful mostly outdoor venue. But a Fermentation Festival must go on and it did—under tents. Participants had a chance to taste delicious local ferments, meet and talk to the makers, and catch a demonstration or two.  I love talking to the makers of each region. It brings me joy to see these small local fermentation companies capturing their area’s unique flavors.  Partially because I have stood on their side of the booth purveying ferments myself and partially because it is a place where I see hope for the local economies and their foodshed

I have been studying the Himalayan fermentation tradition, so I was delighted to meet Kala of Kala’s Kuisine and taste her Nepalese and fusion ferments. I have been working on an overripe cucumber achar which I was happy to see she had brought to taste. She can only make one batch a year because nobody grows overripe cucumbers on purpose in this country, but she said that she has a local farmer who will grow them for her at the end of the season. I love that a truly local, truly regional, seasonal product is inspired by a traditional flavor from far, far away.


Two New Fermentation Books :: A review

Two new fermentation books reviewed at Fermentista's Kitchen

Who doesn’t like new fermentation books, right? I can’t think of anyone…except maybe our teenage daughter, who to her credit likes whole food smoothie books. The ‘love good food gene’ is in there…

Two recently released books have caught my attention and excited me, so much so that they now grace our bookshelves—Ferment Your Vegetables by Amanda Feifer and Preserving the Japanese Way by Nancy Singleton Hachisu. (Opinions are my own I have not received anything for these reviews. We also do not receive any affiliate funds for these books.)

In this wonderful renaissance of fermented foods and fermented vegetables in particular, author Amanda Feifer is truly in the camp of fermentistas. Based in Philadelphia she is creator of the blog Phickle.com where she pushes the art in fun and flavorful ways. Her book Ferment Your Vegetables is no exception—while we have been on the road and I haven’t had a chance to try any of the recipes, I have read this book and have a number of recipes bookmarked.  Quite a few of these bits of ripped pieces of paper are holding space in the Kvass chapter. I admit I have not thought outside the beet kvass jar at all—beets with other flavors yes, a vegetable other than beets, no.  Cucumber Fennel Kvass, Lettuce Kvass—intriguing. Given the time of year I plan to start a batch of the Winter Herb Kvass this week, which has the potential of becoming a Woodsy Gin and Tonic—mmmm—I’m thinking tasty.

Ferment Your Vegetables--Review at Fermentista's Kitchen

Ferment Your Vegetables has clear instruction and approaches some of the methods differently.  The recipe sections contain inspired krauts, kimchis, pickles, and alternative ferments. One of the beautiful things of vegetable fermentation is that unlike canning, the rules are simple and flexible. Keep everything anaerobic so that it acidifies is the overarching goal—the methods and ingredients to get there can vary. 

Preserving the Japanese Way is more than just a collection of recipes – it is a beautiful journey into life on a sustainable farm in Japan. Nancy Singleton Hachisu sets the stage of her life in the introduction and we are brought along through the rest of the book with recipe headnotes and vignettes. The poignant afterword also reminds us of the fragility of the farming life.  I once again have to admit I have had the time to read this work but not actually make any of the recipes so, again, torn bits of scrap paper poke up from the pages inviting me to ferment miso, koji and many other traditional Japanese ferments.  The Salted Cherry Blossom recipe inspires me to experiment with other edible flowers (after all Spring Cherry blossoms seam a long way off. So I wonder about borage, calendula, and one of my favorites: nasturtium blooms, which I happen to still have in the front yard.

Preserving the Japanese Way--Review at Fermentista's Kitchen

The recipe section is complete with recipes for meals employing your new Japanese style fermentation project. There is something for everyone —some of the ferments are very simple in ingredients and time—like the lactic acid fruits and vegetables while others (perfect for the DYI, fermentation overachievers) require procuring special ingredients or cultures and months of waiting. (There is a complete resources list.)

Writing this post I’ve encouraged myself to quit waiting for some mythical perfect time to dive in to these recipes. I am headed out on this bright fall day to pick some nasturtium flowers to salt, and rosemary, sage, and thyme to kvass. Meanwhile, I would love to hear what you are fermenting these days. 


Coming out World Series Game 6


Dear Fermentista,

I've got two questions for you, one technical and one more of a social kind of thing. First the easy one. Lucille and I have been together for a long time now and she has gotten me through a lot—lost jobs, car accident recovery and two wives. Lucille is a kegerator that I built during my college days from an old refrigerator left out on the curb. She has been with me through thick and thin. The past few years there's been a lot more of the thick. So, it was like February, when my girlfriend made me try real kraut. Man was it good! I just dove in. Now I have a couple of crocks going all the time, and I bring jars of the stuff to my buddies on the site. I love trying new things, especially anything hot or with smoked salts. Anyways, I make so much of the stuff that I need a place to keep it so I moved my keg out and started using Lucille. That was about the time the season started. What I need to know is what temperature should I keep Lucille at? Are krauts more like a Stout or a Pale Ale?

Second question: Do you have any advice for how I am going to talk about this to the guys when they come over for game 6 at my place? Most of them don't rib me anymore about eating because now that they are hooked on the stuff too but they don't know about Lucille's makeover.  I know the first time somebody tries to pull one and gets nothing and then opens that door they are going to give me some s***.

Go Mets!
Michael

______________________

Dear Michael,

As you know, a big part of pouring that perfect glass is managing the temperature of the beer because of the relationship between temperature and CO2. I suspect that is why you asked if it’s more like a pale ale than a stout because different beers absorb and hold CO2 at different temps. For your krauts and pickles you should think of them as at least a Lager but best as a Brown Ale, ie. 45° F to 40° F. Stouts at 50° F is getting too close to a temperature that allows the bacteria to wake up and start working, which means your ferments will continue to get sour and build up CO2 in your jars. 

Your second question is easy—there will be no game 6. Sorry. I should explain I was born in KC, George Brett was my hero growing up. I wore that stupid plastic batting helmet through those muggy hot summer days until my brother shattered it one day with a bat while it was still on my head. I firmly believe you will not have this problem as the Royals will take the next two games. Sorry.

Hopefully Kirsten won't see this post as she grew up in New York State and always roots for the underdog...

~Christopher