Dear Fermentista :: Will my mobile ferments keep me from love?

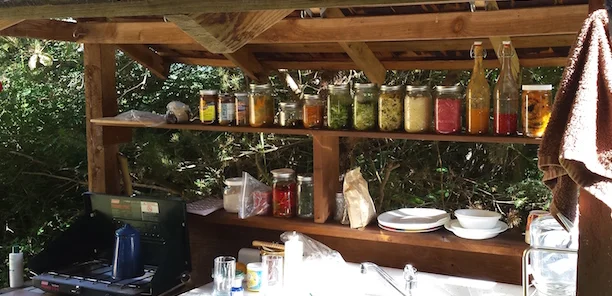
My mobile ferments at a campsite

My mobile ferments at a campsite

Dear Kirsten and Christopher,

My name is Ben and I am an addicted fermenter.  

I have an older VW Jetta diesel that has faithfully carried me down some of our country’s most wild and scenic areas.  (I named her Rachel Carson) My problem is her smell.

About a decade ago I gave up fast food and committed to eating real food while traveling.  I began making my own kombucha and fermented veggies on the road. It is so easy! Recently I discovered foraging and wow can I make some wild ferments now. There is nothing like adding a little beach mustard to my kraut…but I am getting side-tracked.

A corner of Rachel’s trunk is my fermentation station which produces tasty ferments and, well, this is my problem: odor. She smells! Especially when I am bumping along a dirt road.

Don’t get me wrong. I love the smell of kimchi and all things fermented. It still surprises me when I open the car door after a long hike in the mountains and am blasted by that steamy scent of fermenting veggies. It makes me smile. 

I am starting to think that it is going to keep me single as I have noticed when I am parked along a street people wrinkle their noses when they walk past my car. My mother is less polite. “Ben,” she says, “you are not going to find yourself a nice girl with that smell.”

I believe the right partner will love the smell. I imagine that we will meet in a busy trailhead parking area as I come hiking out of the woods with a handful of fresh sorrel. We talk and soon sample each other’s creations and spend the rest of our lives together. My friends and my mother say I am dreaming and slightly delusional from eating too many ferments at high altitudes.

Should I give up my mobile ferments for a better chance at romance?

—Ben

Dear Ben,

We often find ourselves traveling with curing ferments—biohazard of the biz, we suppose. The natural gas produced by some of the particularly odoriferous ones seems like they should be able to power our vehicle, doesn’t it?

We can help you a little here with some management strategies. Ferments on the move need to be sealed—go ahead and tighten that lid. Airlocks are wonderful on a counter but in a trunk seem to burp on every bump in the road.  So set aside your water seal vessels and use canning jars. You will need to let the CO2 out of the jar every day—sometimes twice a day. Do this away from car; the parking lot, a grassy spot, some place that won’t be offended by a little brine. This burping can cause a lot of brine to want to bubble out of your jars so be ready with your clean tamper and push the ferment down quickly. You probably know that though. Once your ferments are cured and tasty you should keep them in a ferment cooler. This will be another barrier to the smell.

Meanwhile we think that you should keep on fermenting. Eating ferments could help you with the confidence you need when the right girl comes along. She will love ferments and that pickle smell will be perfume to her—besides your addiction could be a deal breaker if she doesn’t share your passion.

Good luck,

Kirsten and Christopher


Fermented Nettle Kimchi

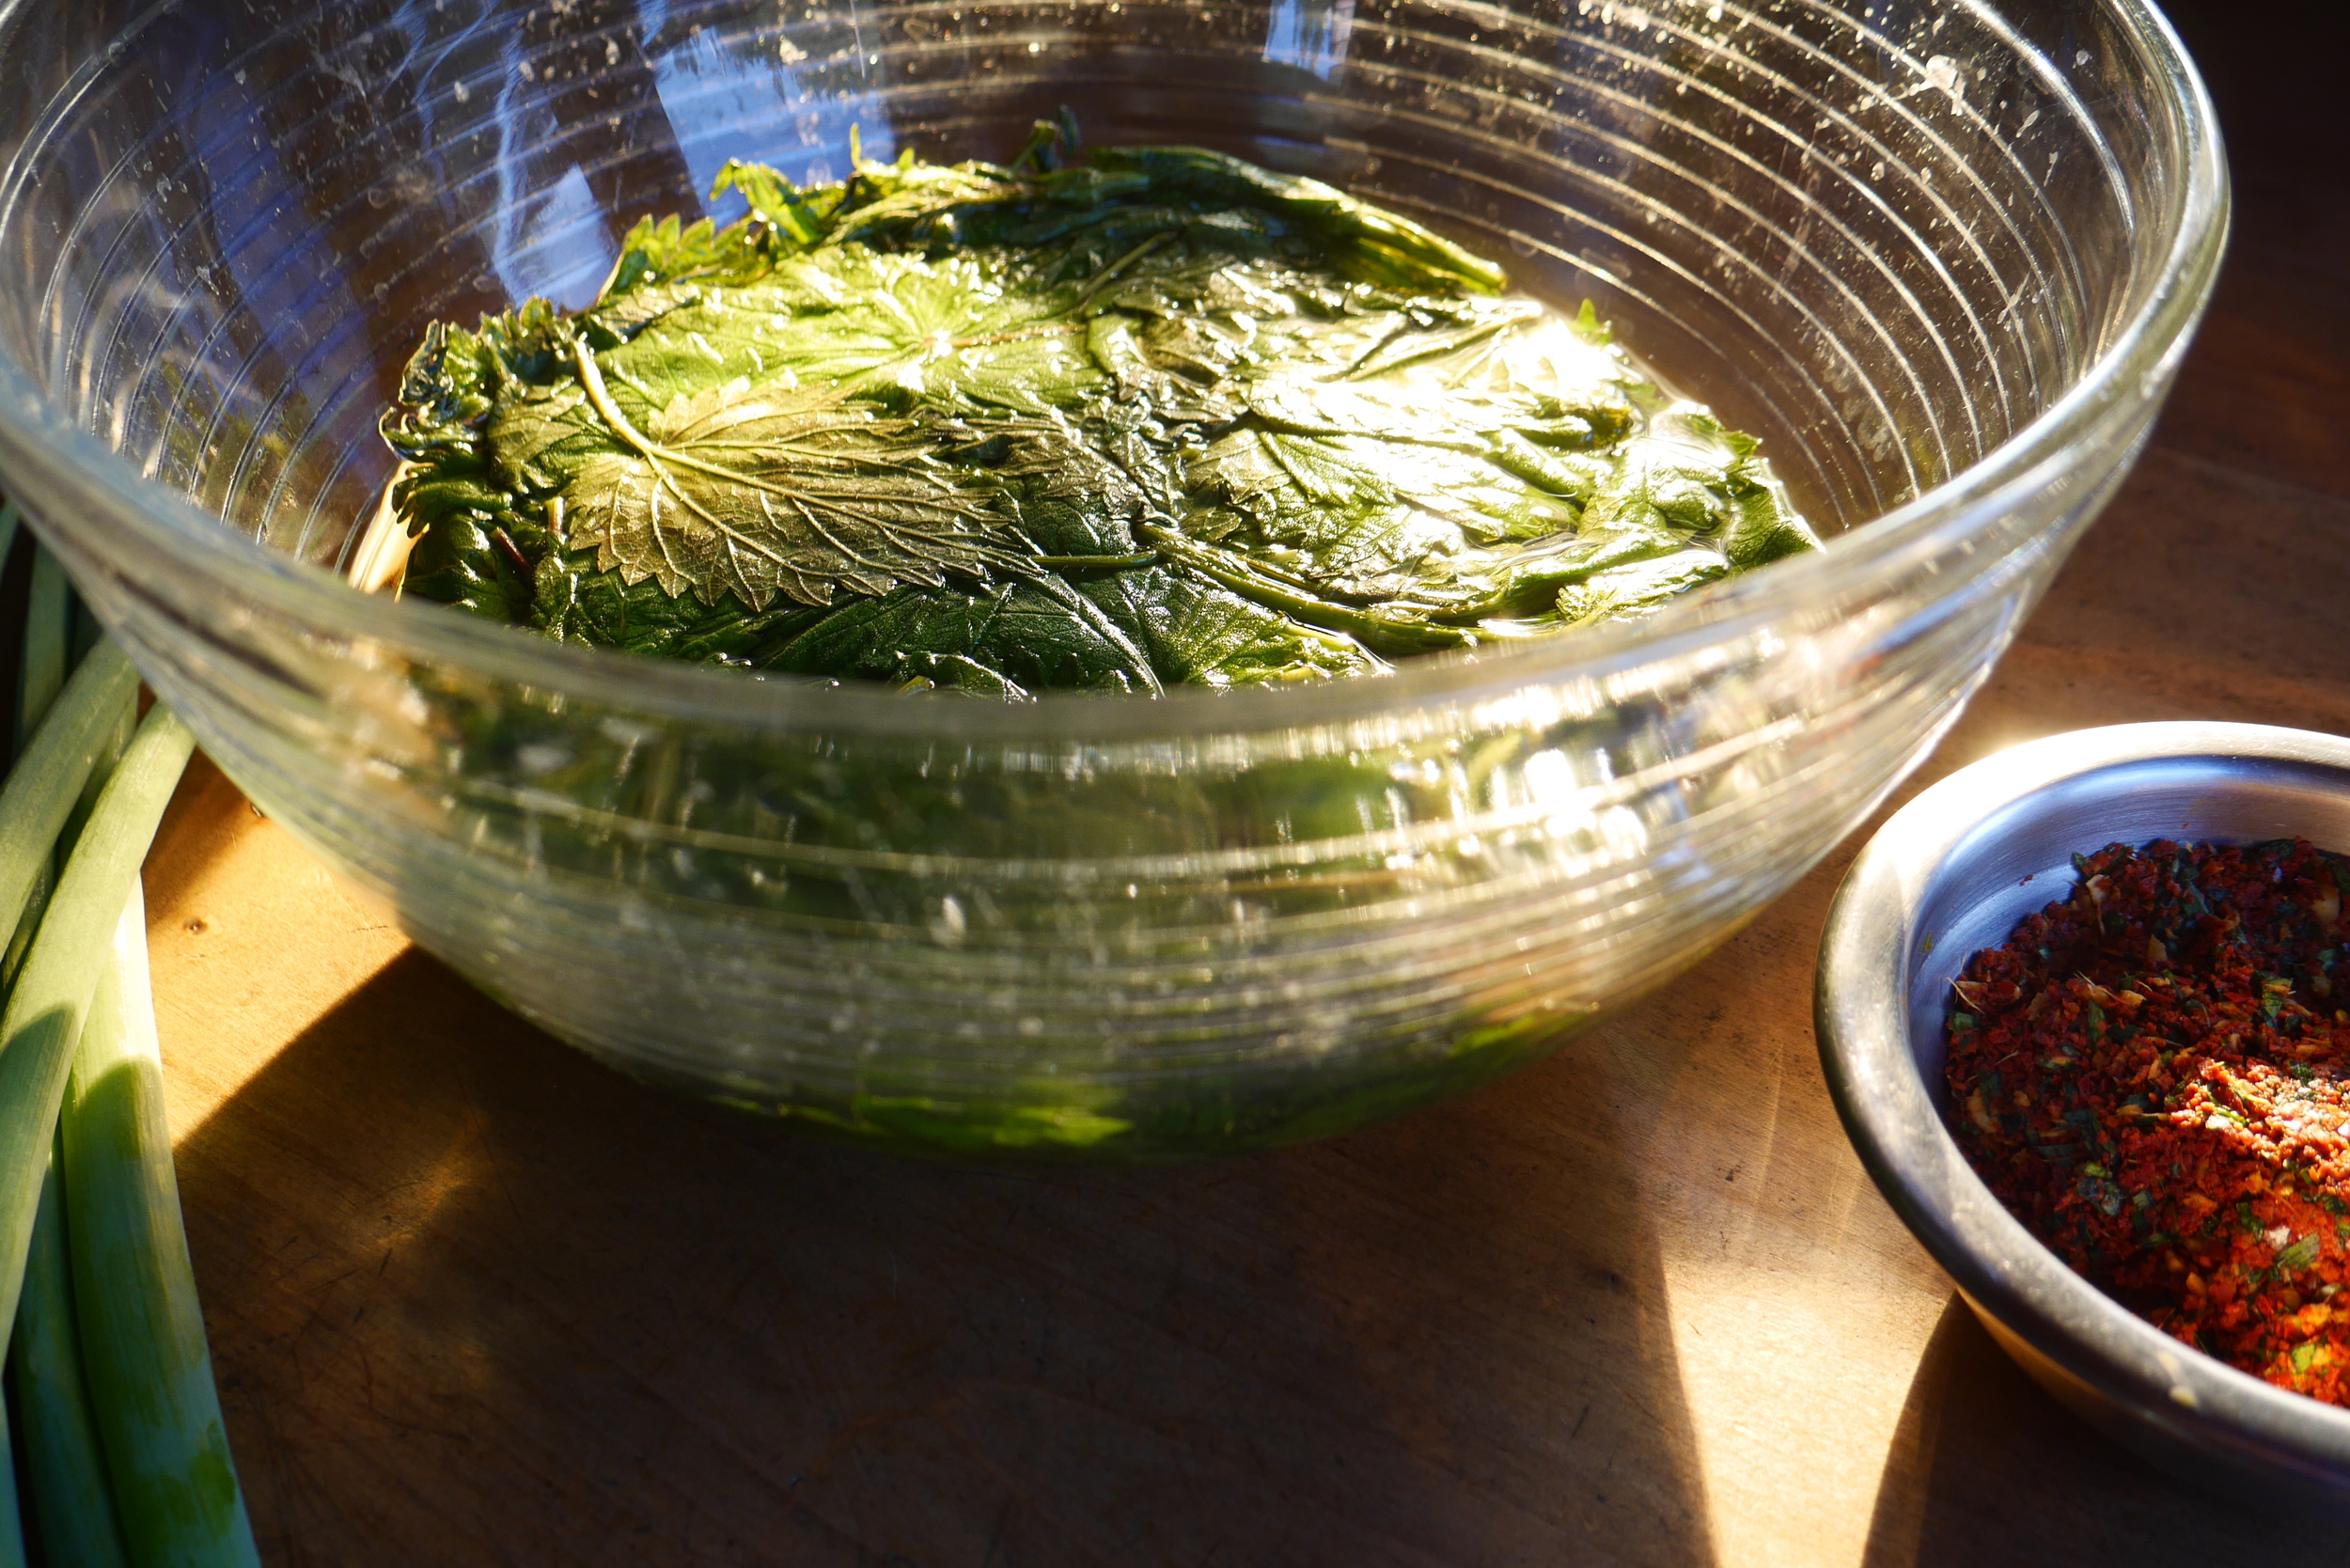
The morning after...nettle leaves soaking in a brine bath overnight—ready to become kimchi.

The morning after...nettle leaves soaking in a brine bath overnight—ready to become kimchi.

Living as we do on land at the edge of wilderness, has infused a much closer relationship to the rhythms of the year and subtleties of each individual season. This year, for example, our landscape donned the growth of spring a full month earlier. An important early harvest is the wild nettles that grow in a patch along the creek that runs through our property. Nettle kraut is a standard favorite and it is easy to stick to what I know we love. This year I knew it was time to do something different. On a bright morning Christopher and I headed to the creek with snips, a basket, each wearing long sleeves and good gloves. 

I find harvesting nettles thrilling (maybe we’ve lived out here too long); on this day there was extra excitement. As we walked through the thicket of young cedars we happened upon two freshly killed wild turkeys; one was half-eaten, the other was still warm. It was the middle of the day and we wondered what predator we might have scared off—likely a coyote. However, we do live in cougar country and when we got to the nettle bed there was a trampled down area that looked as if something of significant size had been bedded down there. There was an unmistakable odor of cat and suddenly the nettle patch seemed much less benign. As I cut nettles, Christopher surveyed the trees towering over us for a large kitty. I doubt there was a cougar anywhere near, but once our minds imagined there might be, the activity became extreme foraging.

I decided to make a pure nettle ferment and a kimchi-style ferment (and a nettle kraut just in case).  We were pleased with the results of both new ferments.


Nettle Kimchi

Yield: About 1 pint

Nettle kimchi is delicious in the magic pungency that is created by the combination of garlic, ginger and chiles, and yet the nettles hold their own. This recipe requires a little advanced thinking as the nettles are soaked overnight. Nettles grow in the early spring. If you are gardener and have a patch of garlic greens add them to the mixture. And remember to use your glove working with the nettles; they still can sting after sitting at room temperature in salt water for 10 hours.


About ½ pound of nettles, the first 2 – 3 rows of leaves still attached to stems

Soaking brine 
½ cup salt
2 quarts unchlorinated water

Kimchi mixture
 4 green onions, sliced crosswise in ½ inch pieces
1 tablespoon fresh ginger, ground or minced
3–4 cloves garlic
1–2 tablespoons chile flakes or gochugaru powder 
    Note: As always, adjust the spiciness to your palate. Also the gochugaru is not as hot at the chile flakes and may require more for desired heat.

In a crock or a large bowl, combine the brine ingredients and stir to dissolve. Rinse the nettles in cold water then immerse in the brine solution. Use a plate as a weight to keep the veggies submerged. Set aside, at room temperature for 6–8 hours. 


Using a colander set over a large bowl, drain the nettles reserving the liquid. Combine the ingredients of the kimchi mixture, blending thoroughly. Set aside. The nettles will clump together. Take this whole clump and roll it up to cut crosswise into 1 – 2 inch pieces and put it in a large bowl. Massage in the kimchi mixture.

Follow the instructions for the type of fermentation vessel you are using. If using the simple jar method select a mason jar with a tight fitting lid that is sized appropriately to the amount of mash. Place the mash inside the jar leaving about an inch of airspace. Add reserved brine as needed to make sure the ferment is juicy and veggies stay submerged. Tighten lid. Set aside, somewhere nearby and out of direct sunlight, in cool spot, for 10 – 14 days. 

Check daily to make sure there aren’t CO2 bubbles developing and that the vegetables are submerged; simply press down as needed. If using a plain jar, burp once a day or more often if you see pressure under the lid. Using a utensil, test the kimchi on day 10. You will know it is ready when the flavors have mingled and the pungency is pleasantly fused with acidic tones. The red color will have gotten deeper while the green of the nettle leaf turns a translucent brown khaki green color.

You can let this sit another week in the refrigerator with the lid on to allow the flavors to continue to develop.  This will store in the refrigerator for 8 – 12 months.

Fermented Vegetables :: A Retrospective :: New Year’s Resolutions and E-books

 Once upon a brine...

 Once upon a brine...

Once upon a brine a husband had the idea to write a vegetable fermentation book. The wife told him that she already had a project but he should go right ahead. In a short time he lured her into his project. Over the next two years they spent time together playing with their food and writing words. Oh, the romance. Meanwhile the book that grew and grew and grew had no home. They had submitted it to one publisher who talked to them and another who sent a form letter rejection. (the indignity) They were not deterred and the book neared completion. This husband and wife were consummate DIYers and they thought—why don’t we become a small indie press while we are at it? (bad idea)

In January 2013 the husband’s New Year’s resolution (he does that) was to create an e-book to release in February. This was after the wife had spent a few months talking to freelance editors, designers, and printers. That was when they realized an indie press might be a harder way to make a living than a small family farm, and they already had one of those. They finished the e-book but never released it. A friend, who believed in the project, encouraged them to submit it a few more times first.

Fast forward to January 2015. Happy New Year! (Christopher might have a few New Year resolutions, among which might be a “hot” new book project. We can’t say more.) 2014 was amazing! Storey Publishing released the book Fermented Vegetables in October which hit a Pacific Northwest best seller list in December. While we appreciate all that we taught ourselves, we are thankful for all that we have learned from the team that made this happen.

If your New Year’s resolution is to try fermenting vegetables because you want to and just haven’t taken a plunge into the brine, this is your chance and it will only cost you $2.99. Storey Publishing and Workman's Blue Plate Special are offering the e-book version of Fermented Vegetables for the entire month of January. Or, you can get it from any of your favorite e-book retailers.

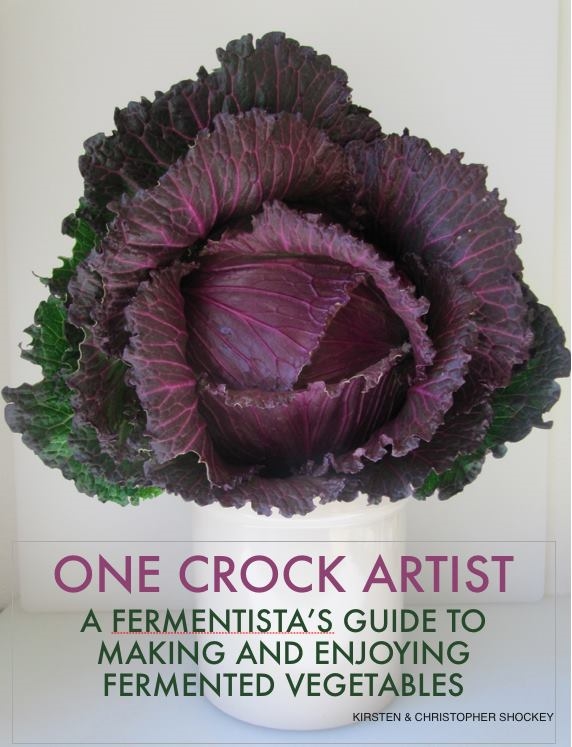
Snapshot of a draft cover of Fermented Vegetables before it was the beautiful book we know and love. The husband and wife do find it apropos that this special price is happening on the anniversary of their short e-book publishing career

Snapshot of a draft cover of Fermented Vegetables before it was the beautiful book we know and love. The husband and wife do find it apropos that this special price is happening on the anniversary of their short e-book publishing career


What came first, the ferment or the pot?

Traditional style fermentation crock made by Jeremy Ogusky. The lid on this design functions as a follower and must be weighted with a water filled jar and topped with a cloth. If you shop talk to Jeremy about the lid style that best fits your needs. 

A few lucky folks are given a fermentation crock as a gift and they think, hmmm, maybe I should try this thing called vegetable fermentation. They often end up at our classes (or learning with our book at their side). However for most of us, when the fermentation bug hits, the first thing we do is find a vessel—a jar or a crock. This often means a visit to the local kitchen store or online shopping. For Jeremy Ogusky, a Boston potter, this wasn’t an issue. He simply made himself a crock. (Who doesn’t wish they could do that.) He then made a few more for friends and family. After awhile a tiny housewares company, Williams-Sonoma, contacted him and offered to contract with him for hand-thrown clay crocks. You can watch him here.  He said yes and realized this is fermentation’s moment to shine. Instead of just sitting in the studio turning out hundreds of crocks, Jeremy leapt into the brine—championing fermentation as well. 

When I spoke to Jeremy what struck me most was his intense interest and skill in collaboration and connections. Fermentation pulls people together. Jeremy found the paths of folks with very different interests intersecting with fermentation.  When he explained this I imagined roads—the thought paths of science, health, food lovers, food makers, artists, farmers, preservationists, urban homesteaders, DIY—converging from all directions at a giant handmade clay crock of fermented vegetables. (A bit like all the roads that led to Rome.)

For the past five years Jeremy has cultivated his role as a thought leader in the fermentation renaissance by collaborating with many folks around Boston to bring this delicious food to the forefront. He is responsible for the group known as Boston Ferments which started out as a loose band of fermentation enthusiasts and has grown to a group that hosts the Boston Fermentation Festival, fermentation workshops, fermentation themed dinners in restaurants, and Kraut Mobs. (Yes, “mobsters” show up at farmer’s markets or food festivals with 50 pounds of cabbage, cutting boards, knives, bowls, salt and jars and invite people to make sauerkraut.) 

For Jeremy, who's first career path was public health, the clay work blends well with his interest in nourishing food. He is interested in the intersections of his own work with clay and fermentation. Clay working is one of our oldest crafts—born solely for function, vessels in which to cook, serve and store (or preserve) foodstuffs. You can see where this is going. If fermentation is one of the oldest methods of preservation, one has to ask what came first? Did we ferment once we had pots or did we create vessels to help our fermentations?

Handmade stoneware began as utility but now it is often sold as art. As many of my readers know I appreciate functional art. I find that these fun and beautiful tools with a story inspire the food I create. 
 
On our counter, Jeremy’s faded denim-colored crock boldly proclaims, “ferment.” This is more than just a label of the contents within—this word also reminds us to slow down and take time. Find the comfort in allowing your ideas and projects, (or vegetables) to sit quietly before breaking out in a bubbling frenzy of creativity (or taste).


There once was a Foreword that didn't fit

Fermented Vegetables is a big book of fermenting so big in fact that there was no room for a foreword. Cheesemaker and author Gianaclis Caldwell had graciously written one and it seemed on fair that we shared it here.

With out further ado we present the foreword by Gianaclis Caldwell 
Cheesemaker, Pholia Farm Creamery, Rogue River, Oregon 
Author: Mastering Artisan Cheesemaking, The Farmstead Creamery Advisor, The Small-Scale Dairy: The Complete Guide to Milk Production for the Home and Market, The Small-Scale Cheese Business: The Complete Guide to Running a Successful Farmstead Creamery

One of my childhood memories is of two enormous ceramic crocks sitting on the shelves of our big walk-in pantry. The first was filled with fermenting cabbage, the other with something a bit more mysterious and off limits “home-brew”, better known as beer. The pantry, which we called “the fruit room” as it held boxes of apples and pears from our orchard and neatly organized rows of mason jars filled with canned peaches, tomatoes, and the rest of the bounty from our huge organic garden, was a long, narrow room whose thick walls were insulated with sawdust meaning it would stay cool throughout the long, hot summer–the perfect place for fermenting foods. In those days I was not a fan of tangy, salty, or yeasty foods, so the big crocks, which now that I am grown do not seem quite so gigantic, held no appeal to me. But I can remember my mother and sister both enjoying the kraut straight from the crock and my sister sneaking dipperfuls of beer out of the amber depths of the homebrew crock—before my parents had the chance to get it into more easily inventoried bottles. 


I didn’t really ponder or begin to appreciate the process of fermentation until fairly recently. Even my career as a cheesemaker, basically a professional milk fermentista, had not lifted the veil on the wide world of fermented foods. About five years ago, however, a previously little known product called kombucha started appearing on our local grocery store shelves. Fermented tea, kombucha seemed a very grown-up drink–not too sweet, refreshing, and to top it all off, actually good for you. About the same time, I picked up a copy of Sandor Katz’s popular book Wild Fermentation in which he not only told how to make this delicious (and rather high priced) brew, but he included an illustration of a kombucha “mother”. Also known as a “mushroom” or SCOBY, this bizarre looking, jelly-like, slightly disgusting thing is responsible for turning an otherwise sweet and rather boring beverage into the intriguing, complex drink. I had to have one. 


Our part of Oregon is teeming with homestead and small farmers. The bounty of their acreage fills not only their own bellies, but also the farmers’ market and roadside stands. In one particular valley I had a couple of farming friends, one producing pasture raised pork and poultry and the other was building an on farm fermentation kitchen. If anyone would have a kombucha mother to spare, I figured it had to be the Shockeys. A visit to their farm not only yielded the sought after, gelatinous SCOBY, but also a revolutionary lunch at the family’s distinctive hardwood table. A pot of delicious soup and a bowl of fresh salad greens were accompanied by several jars of brightly colored and interesting smelling fermented vegetables. What is this, I thought. I watched as each tall, curly- haired member of the family topped their soup and salad with forkfuls of krauts and long green beans from the jars. I followed their lead and tentatively tasted. These fermented concoctions were not too salty or sour, like the kraut of my childhood, and they were filled with flavor! In response to my compliments, Kirsten espoused the health benefits and joy of fermenting vegetables. 


I have had the great pleasure of seeing Kirsten and Christopher’s obvious knowledge and passion for fermentation transformed into this magnificent book on the subject. From sitting in a local café together while I worked on my own manuscripts, to finally having the privilege to write this foreword, it has been a joy to be a part of their process—especially since it has resulted in such scrumptious results! Indeed, I had difficulty writing a foreword that didn’t come across as a paid for advertisement… 


There are several fermentation books, some, such as Sandor Katz’s original as well as his most recent, The Art of Fermentation, will be irreplaceable inspiration and reference books. But Fermented Vegetables will not only make you want to become a fermentista, it will virtually guarantee success. Thanks to the Shockey’s clear instructions, inspiring photography, pertinent science, and options for successfully performing each task–you will no doubt find yourself an accomplished fermentista before you can spell Lactobacillus. 


Writing both as a couple and sharing their individual perspectives in engaging sidebars, Kirsten and Christopher use humor and tales of their own and other fermentista’s mishaps and revelations to encourage and inspire the reader’s development and intuition. Beginning with a simple, foundational recipe, the book leaves no excuses for procrastination. As you proceed through the book, the recipes range from basic to intricate, practical to sophisticated, and staples to indulgences. I have no doubt that my favorite recipe chapter is likely to be the fun and provocative (I mean really, healthy cocktails?) “Happy Hour” section. Their presentation of recipes by category of vegetable will solve many of the dilemmas facing those eating seasonally—either from the abundance of their own garden or from that of the local farmers market. 


The kombucha mother that Kirsten handed to me that day several years ago continues to thrive–though now through daughters hundreds of generations removed from the original–and produce delicious, and nutritious, kombucha in a crock on our kitchen counter. Krauts and kimchis from local producers who barter for our cheeses occupy their own space in our refrigerator and their spicy and colorful contents are a part of many meals. My own vegetable fermentation has not yet extended beyond sour pickles, and I really felt little inspiration to do more, that is until now. While I will likely never use the big, five-gallon crocks that my mother did (she still has one) I do have two smaller versions that arrived under the Christmas tree last winter sitting empty. Hmm, maybe...


The cool and wild side of fermenting :: Mint

There is a natural spring on our property. It is the center and heart of the property both metaphorical and physically. Christopher shares the day we were introduced to the magic of this spring through the wild peppermint. 

The day we found our farm, I had already given up. We had traveled south on Interstate 5 with our three small children and Kirsten pregnant with our fourth to be greeted by temperatures over 100 degrees and a landscape burnt crisp from the heat and lack of rainfall. Every house or property we had seen that day was either moldy, depressingly run-down, overrun with poison oak or a combination of all three. I wanted to retreat to the Willamette Valley, but Kirsten wanted to look at one more. After driving up Thompson Creek for nearly seven miles we arrived at what would become Mellonia Farm and our home. 

While I hiked the hills with the owner, Ron, to learn the borders of this hillside farm, Kirsten and the kids found refuge at the stream in the shade of a beautifully old and gnarled willow tree. There, the boys stripped to their skivvies and splashed in a stream lined with wild peppermint. Driving home that evening the peppermint from the sleeping children’s legs filled the car, and we knew we had found our new home.

Fast forward fifteen years as summer approaches and Southern Oregon is in a state of drought. The soil has been too dry to dig with a pick ax for at least a month, but the mint along the spring is vibrant, refreshing, and smells of water and relief.  It is time to harvest—some will be dried for tea and some I will preserve through fermentation. Fermented mint? Yup and it is really tasty.

Mint, like its family-member basil, has played a significant role in traditional herbal pharmacopeia throughout history. Its wonderful scent and flavor have also made it a leading player in the kitchen, adding a cool refreshing taste to dishes, as well as ferments. Of the many varieties of mint, spearmint, curly mint, and peppermint (the strongest flavor of the three) are the most common culinary types, but there are also fruity varieties, such as apple, pineapple, or orange mint. The flavor of the various mints holds up well in fermentation. If you are creating your own recipe, use similar quantities to those you would use in a fresh salad or veggie dish. Choose the type of mint that you have available or like best, and add it to the ferment when you combine the rest of your vegetables, just before salting. Chopping the leaves will release a little more flavor in the ferment. 

Fermented condiments tray with Celery-Mint Salad


Celery-Mint Salad

Cool, bright, and lively, this ferment will be a wonderful addition to a summer spread.

1 1⁄2 pounds celery, thinly sliced crosswise (including leaves)

1 bunch scallions, greens included, finely chopped

6 sprigs mint, thinly sliced

1 teaspoon unrefined sea salt


Prepare the vegetables and place in a bowl. Sprinkle in the salt, a little at a time, tasting as you go until it’s slightly salty, but not overwhelming. Massage the mixture and let sit, covered, for 30 minutes.

Pack the mixture, a few handfuls at a time into a 1-quart jar, pressing as you go to remove air pockets and release brine; because of the texture, it will take some effort to get it tightly packed. This pressure will release more brine. When the jar is packed, leave 2 to 3 inches of headspace. With store bought celery there will likely be a noticeable layer of brine, while homegrown may just barely cover the vegetables. Follow with a grape leaf or piece of plastic wrap to keep the veggies submerged under the brine. Because of the low brine content, make sure this is weighted well with either a sealed water-filled jar or a water-filled ziplock bag to act as a combination follower and weight. Set aside to ferment, somewhere nearby and out of direct sunlight, in a cool spot for 5 to 10 days.

Check daily that the celery is submerged, pressing down as needed to bring the brine
back to the surface. When it’s ready, this ferment will be crunchy, will taste of fresh and minty, and will have a mild, light sour flavor, very different from the sour boldness of most krauts.

If it’s sour enough for your palate, tamp down the ferment under the brine, screw on the lid, and store in the refrigerator. Because of its high natural nitrate content, celery keeps well if it remains submerged, and will last over 1 year—but you will want to eat it well before then.


First Signs of Spring :: Fermenting Dandelion Buds

dandelion bud on a frosty morning

dandelion bud on a frosty morning

Kirsten writes :: Here in Southern Oregon the first dandelions have begun to bloom. Christopher and I had very different early relationships with spring dandelions. His father saw their appearance as time to tame the lawn while my mother saw them as a bounty to harvest.

Our first house as a young couple was a little saltbox in Boise with a backyard that the previous owners had planned to pave for a big shop. Thankfully they didn’t get that far.

The first spring there we picked and shoveled our way to the soil. The yard responded to the change in stewardship by celebrating with a riot of dandelions, which I proclaimed to be our first crop. When I was young, we lived in married student housing on the Cornell campus. There were vast lawns out the back door polka dotted with yellow dandelions. In the early spring my mother would pick the flower buds and sauté them in plenty of butter and garlic. When the flowers bloomed she made fritters. I don’t remember the flavor. I do remember the magic of eating off the lawn. Naturally I wanted to share this joy with our son.

Christopher writes :: I was skeptical but when I heard this project involved batter and frying I was game. We had just settled into a mound of fried dandelion blossoms out on the back patio when we heard the old wooden gate complaining and in came my father. By then I had downed a few of the golden beauties and I was eager to share my revelation with the man that had spent my childhood spraying, forking and mowing these delicious plants.

“Hey Pop, try these–they’re great!” I said, standing up and holding out my plate to him.

“What are they, morels?” he asked hopefully, reaching for a crispy blossom.

“No they’re dandelions!” I proudly announced.

My father’s hand stopped mid-air as he scanned my plate. I watched as he slowly looked past me. Turning, I saw our son in his cloth diaper sprawled out on the cool concrete of the patio, digging into his portion.

“Are you are feeding the baby weeds?” he asked us, clearly not wanting to believe his eyes.

By the time we thought of foraging dandelions to ferment, our toddler had three younger siblings and had entered college. There were many trials that included everything but the fluff—bud, leaf, and root. While we acknowledge the incredible health benefits of fermenting the greens we just don’t love (or even like) the bitter flavor, which isn’t mitigated at all by fermentation. (The best way to use the leaves is as small part of a batch of cabbage sauerkraut or spicy kimchi.) It is once again the blossom buds that have us eating from the yard.

 Dandelion buds in brine ready to start fermenting


Dandelion buds in brine ready to start fermenting

Fermented Dandelion Flower Buds

Make in a pint jar

When selecting flower buds to pickle, be sure to pick buds that are still tightly closed, not flowers that have simply closed for the night, which will have bits of petals sticking out. Use these small pickles as you would capers.

2 cups dandelion buds

1–2 heads garlic, broken apart and peeled

1 onion, sliced in wedges

1 (1–inch) piece fresh ginger, chopped

2 tablespoons red goji berries

1 cup Basic Brine (1/2 tablespoon unrefined sea salt to 1 cup unchlorinated water)

Combine the dandelion buds, garlic, onion wedges, ginger, and goji berries in a bowl. Transfer to a quart jar and pour in the brine to cover the mixture completely. The dandelion buds will want to float; place some of the larger onion wedges on top to keep everything under the brine. Reserve any leftover brine in the fridge to top off while fermenting. (It will keep for 1 week; discard thereafter and make a new batch, if needed.)

Follow with your favorite follower and weight, or use a water-filled ziplock bag. This steep is important to prevent the small ingredients from floating out of the brine. Remember: Submerge in brine, and all will be fine.

Set aside on a plate to ferment, somewhere nearby and out of direct sunlight, in a cool spot for 5 to 7 days. During the fermentation period, monitor brine level and press buds back into brine or top off with the reserved brine solution, as needed. You may see foam on top; it is harmless. As the vegetables ferment, they begin to lose their vibrant color and the brine will get cloudy; this is when you can start to test your pickles. They’re ready when: The buds are dull green, the goji berries are plump but still bright orange red and the brine is cloudy. The flavor of the buds and the brine are slightly sour, with ginger and garlic notes, 

Store in the fridge in the same jar, lid tight. These will keep for about a year. Enjoy them sprinkled on salads, added to a sandwich spread such as chicken salad, or simple pluck out of the jar for a little pickle-y treat.

First Time Authors

Pickles and the setting sun

“You’re right on track. It takes an average of six years to write your first book,” a friend told me recently. 

“Where do you come up with this stuff? Never mind how I feel about statistics, the way I see it your statistic is in our favor and puts us ahead of the curve,” I said. 

Three years ago this month we broke ground on the idea of a fermented vegetables cookbook by writing our first book proposal.

The thing is, everything about this project has been a first. The first proposal was followed by the first rejection. Because that rejection came after a few enthusiastic calls with the editor it was a bigger disappointment than the form letter we had prepared ourselves for.  However it spurred on attitude: well-we’ll-show-them-and-write-the-New York Times-Best-Seller-of-sauerkraut—and we were prolific. This writing burst was soon followed by the first 10-month hiatus because we were too busy making the ferments and hocking them at local market (and holding down the day job). That was the first year. The second began with another few months of bad attitude (by one of us and we won’t name names) and then a genuine commitment to the project. 

This took us down the path of self-publishing, which brought on meetings (more firsts) with a distributor, a designer, some editors, and four print houses, but we stopped short of the meeting with a loan officer (the price tag to do it right was a daunting obstacle) and decided to create our first e-book. This time last year as we rounded project year two we thought our book was pretty much finished. Colorful glossy pages slid past on the screen with each swipe of a finger—we had a pretty little iBook.

The more people that we showed the book to, the more encouragement we got to submit this labor of love to a few more publishers. We began the third year with our first meeting with an agent. We experienced our first accepted proposal, our first contract, and our first advance checks.(This is our preferred bank visit). Then it was on to our first deadline, followed by more deadlines, and as the third project year neared, our first professional photo shoot on location here at the farm.

We had no idea what to expect. We did have a call sheet/shoot list (our first)—eight pages describing the photos. We made about 60 different ferments. Some of these were made in intervals to illustrate the visual changes that take place as the vegetables are curing. Of course there was also the cleaning—tidying the house, mopping the floors, and washing the windows in the commercial kitchen.


Our editor, the photographer, and her assistant, arrived in the morning. They got out of the car to the sun peaking over the ridge and a river of fog flowing along the creek below our house. We all acknowledged the beauty of the scene. We introduced ourselves since we were all meeting for the first time. But there was no time to leisurely take in any of the pleasures of the moment as the two days to get through the shoot list was a super ambitious schedule. (Not that we knew that—we do now. The shoot was finished after dark on the second night.)

“Come on in. I’ll show you the space.” I told the photographer. “This is the production kitchen.” I said as we walked into our “kraut” kitchen where we assumed the work would take place.  “I’ll show you the rest of the house and you can see the spaces we have in case you want to do some of the work in a different scene.” I added.

Transformed office to studio

She surveyed the spaces and asked if we could use the office—a bright south facing space with east and west light. “Of course” we said. While the photographer and her assistant brought in tall lighting stands, black bags full of equipment and props we moved the Pilates reformer and some other furniture—swirling dust bunnies disturbed—the only room we hadn’t put much time into cleaning. The pace never waned and we felt so studio-urban in our provincial setting. The gold warm-hued wood of the room’s walls, floor, and furniture was transformed with lighting; wide black and white screens to filter and redirect light, multiple mac books, and the cannon camera perched on its tripod turning the scenes into images.

The rest is almost a blur of activity and action punctuated by stories. Our visitors shared stories of location photo shoots from around the world, which captivated our imagination. We learned that: There is truth in food photography now; no more Elmer’s Glue as the stunt double for milk or mashed potatoes standing in for ice cream. That said ice cream when it melts just right can be thought to look “too sexy.” We found out that an old weathered barn door that had escaped the most recent burn pile would rent for $500 dollars a week from a prop provider. Some sets can include more than twenty people—production assistants, food stylists, lighting people and prop people. The five of us did it all. We watched well-placed lights and screens transform dusky evening light into bright morning sunshine on the page.

The photos appearing on the screen gave tangible life and proof to this project that has been lodged in the creative imaginations of all who have worked on it. It finally feels as if it really is happening in the beautiful artistic way we’d hoped. Meanwhile we have another deadline…

Kimchi Season

In Korea late October or early November is the fall pickling season.  Kimchi is an important aspect of Korean cuisine—it is served with just about every meal. There are fermented flavors for different occasions and a taste for every palate—sophisticated, fruity, crunchy, pungent, sour, mild, refreshing. Varieties may include everything but cabbage—how about buckwheat sprout kimchi or squid kimchi?
In light of the season we thought we’d share some things you may not know about venerable kimchi.

Top Ten Random Kimchi “facts” (and facts is loosely defined)

10. Put Your Money Where Your Mouth Is
During gimjang, or kimjang, (kimchi season) many employers give their employees bonuses to facilitate a good time shopping for piles of kimchi ingredients.

9. Imagine Mountains of Napa Cabbage (and Peppers and Garlic—Oh My!)
All this shopping for cabbage, garlic, ginger, peppers, and radishes takes place at farmer’s markets that spring up all over the country this time of year.

8. Celebrate
In Gwangju, South Korea there is an annual Kimchi Festival—which you missed this year. It was at the beginning of October. Maybe your travel plans will land you at the 21st annual next year. I have seen parade pictures that include mascots dressed as Napa cabbage.

7. Field Trip
There is of course the Kimchi Field Museum in Seoul whose mission is to educate the world about kimchi. One of the sections includes dioramas for each step of the kimchi making process. Or, if you are the literary type the library boasts over 2000 books on the subject.

6. Disease Fighting
During the 2005 outbreak of bird-flu scientists at Seoul National University lead a study that fed infected chickens kimchi to test its effects on their health. A week later, 11 birds had begun recovering. "We found that the chickens recovered from bird flu, Newcastle disease and bronchitis. The birds' death rate fell, they were livelier and their stools became normal," said Professor Kang Sa-ouk.

5. Care Packages Korean Style
Mothers of Korean soldiers being deployed to Vietnam in the 1960s weren’t sent off with cookies—but with onggi pots filled with kimchi.  In 1967 a diplomat visiting Washingon was said to have missed kimchi more than his wife. 

4. Kimchi is Out of this World
When Korea sent its first astronaut to the space station they felt he must go with kimchi. It turns out kimchi posed a bit of an issue to turn into spacefood. There was concern about bringing the bacteria into space—partly due to contamination and partly do to fear of explosions with the pressure changes. One team developed inert kimchi cans, another in plastic packaging.

3. How Much Kimchi Do You Eat?
Per capita, South Koreans eat 77 pounds of kimchi per year.

2. Kimchi-fed Eggs
If you have backyard chickens and want to try something it is said that you can feed them kimchi—there are specialty egg producers feeding kimchi, or at least the resultant lacto-bacillus to their hens. I have read online claims of healthier hens with healthier eggs. Some even claim the eggs contain lactobacillus. I must admit this seams farfetched that the lactobacillus lands in the eggs but I can’t account for the science either way. I can tell you when I go through the effort and expense of making kimchi the last thing I would do is feed it to chickens. That said…

The pig who didn't like spicy kimchi

1. Pigs Don’t Like Spicy Kimchi
When we first made kimchi commercially we had a gallon or so of peppery-brine left at the bottom of the crock after packing countless jars. (Now I know the stuff is an elixir of the Gods—but at the time it seemed like excess.) We decided to take it to our pig who enjoyed all manner of scraps and gobbled up our cheese making whey. He dug his snout into his trough and drank the brine, when he came up his mouth was open and he ran to his water bucket. We dumped what was left in the trough and brought him apples as an apology.

Pickle Babies :: Fermenting the season's end

Baby Pickles - From garden to brine, pre-fermentation

In the Siskiyou Mountains of Southern Oregon, the weather and I are dancing—two-stepping in and around the autumnal edge of the garden—the killing frost. A cloudy day means I can push cleaning out the garden one more night and one more day of ripening fruit. A clear sky in evening after a glorious fall day often means that frost will skitter across the landscape. Some mornings before sunrise I stand with the brittle chilled hose spraying ice-cold water on plants to abate the coming damage. Because of the terrain and waterways it has frosted a few times in the last week but not landed in the garden. Beyond a few cold singed high flung top leaves of the squash plants, the hard frost has not landed as a death blanket across the tender annuals. I still had time.

It is of course double edged like most things in life—oh please frost take out the endless stream of work, picking and preserving—but it is also the end of homegrown warm season bounty. Often, even the years when I don’t think I can possibly pluck another morsel, lift another crock or empty a steaming hot canner, the threat of frost spurs me on. I can’t see food go to waste. I drag flat boxes, buckets and baskets to fill as every last green tomato, pepper and basil leaf gets harvested.

This year the cooler, damper temperatures brought with them a flush of garden activity. Squash and cucumber plants hardly productive in August sprouted new flowers and fruit in one last effort to fulfill their task of birthing seed. These pinky thick zucchini, the quarter-sized patty pans, lemon cucumbers, the dimensions of maybe a walnut, will never reach maturity. But they are abundant, can be eaten at any stage and make wonderful bite sized pickles. 

Fermentation happens - three days in brine, notice CO2 bubbles in dill seed head

Fermentation happens - three days in brine, notice CO2 bubbles in dill seed head


End of the garden medley (where bite-sized veggies shine)

Makes one gallon

a few pounds of mixed (any combination) immature squash and cucumbers, enough to fill a gallon jar to the shoulder,
10 or more whole garlic cloves, peeled
2 tablespoons pickling spice or:
1½ teaspoons mustard seeds
1½ teaspoons whole black peppercorns
1 teaspoon coriander seed
1 teaspoon dill seed, or better a couple of fresh dill seed heads
2 bay leaves
3—4 whole hot dried red pepper such as cayenne


Prepare Brine:

3/4 cup unrefined salt

1 gallon water

optional: grape, oak, or horseradish leaves to top ferment, the tannins will help keep things crunchy


If the squash still have their blossoms, you can pickle them as well. Take care that they are still whole and not wilted. Rinse off any dirt.

You don’t want any part of the blossom if using cucumbers. Scrub them in water; take care to trim the stem and make sure the blossom end is clean as it contains an enzyme that will soften your pickle. Crush the garlic cloves slightly with the back of knife, just enough to break them.

Pack veggies into a few wide mouth jars, or a 1-gallon jar. (If using a crock, you will pack into jars later.) Mixing in garlic and all other ingredients as you go, distributing equally.
Pour the salt brine over the cucumbers. It must cover all of the vegetables.

If you do have a grape leaf or other tannin leaf, this would be the time to add it.


Place a smaller jar filled and sealed with water on top for weight. If your little future pickles are packed and wedged tightly you will not need to place a weight on top. Just cover the jar, but do not tighten lid—it needs to breathe out the CO2. If you are fermenting in a jar you can watch the process. At this point the vegetables will be an incredibly vibrant. It will look as if all the colors are magnified. As they start to ferment you will see the colors turn drab. This change is a result of the acids interacting with the chlorophyll. The brine will get cloudy–this is a normal part of the lactic acid production. If you are fermenting in a crock, no worries all this will be happening as well.

After four days of fermentation time on your counter you will have half-sours in a about six days the flavors will all be stronger and more sour.

Enjoy!


Practicing Kraut Non-violence: Pressing Not Pounding

Unknown artist captures the dangers of pounding—this was tacked to a bulletin board of a small scale sauerkraut producer. 


Bare feet stomping on shreds of cabbage in barrels hits a decidedly European collective nostalgia. (Have you ever heard of a kimchi stomp? Nationwide kimchi making season—yes, kimchi pounding—no.)

Across the country, festival goers shuck their shoes and jump into barrels to feel cabbage and brine squeeze between their toes. It offers a chance to get grounded, literally, in their food. (I hope that at the end of the day this particular cabbage gets fed to a compost pile.)

My guess is that the stomp mythology comes from a few places. From experience, I know that when great quantities of garden freshness are being preserved during the harvest season, it is an “all hands on deck” kind of a time. Sauerkraut needs pressed evenly through the vessel, whether it is a crock or barrel. What a great job for the kids—wash your feet and press this down, fits the need of any humming homestead. For a few minutes the kids are contained, entertained and helpful. It doesn’t get any better than that.

At the opposite end of homestead preservation this is another scene this time from the early industrialization of sauerkraut production. Barrels the size of small houses were filled with cabbage. Since the success of fermentation is based on the cabbage being completely submerged, men in rubber boots with pitchforks was the best way to ensure the cabbage evenly distributed and immersed in the brine.

But what does this all mean to the home or even farmstead fermentista? The goal is to allow the salt to work into the cells of the cabbage to release the brine. The question is: Should you pound your kraut?

I am not a pounder. I used to pound when my batches were a few cabbages small, but when we started processing hundreds of pounds of cabbage it became clear that this physically demanding workout was not sustainable. We learned it didn’t have to and we let the salt do the work. It saved our shoulders and our kraut stayed crunchy.

If you enjoy pounding by all means pound away. Just be careful to not hammer, beat, clobber, pummel, grind, crush, pulverize, or mash your cabbage. Too much pounding will render your resultant kraut mushy. And watch the edges of your crock. I have seen first hand and heard many tales of woe about what enthusiastic pounding can do to the rim of a stoneware crock when accidentally caught by the mallet.

All you have to do is thoroughly mix in the salt and massage the cabbage or other vegetables for a few minutes—as if you are kneading bread dough. Then let it rest covered for a half hour, or more for larger batches. Check it. If it is weeping enough, start pressing it into your jar. If not, agitate it more and let it sit a little longer.

Properly pressed kraut

When your  cabbage (or other vegetables) are juicy, they are ready to tuck into a jar or crock. Place a little in the bottom of your vessel and apply pressure until you see or feel the juice. Add more salted vegetable and repeat; this will keep your veggies crispy and safely fermented.

Kraut tampers—old and new

This is the part that is probably the most important step—PRESSING. (Don’t forget keeping your vegetables under the brine conquers evil every time.) Pressing is defined as applying pressure or continuous force; it is a slow steady motion. You want to bring the brine to the surface of the vegetables with this pressure. After pressing with my fists or fingers for awhile, I started to look for a more comfortable way to make kraut. I was talking to our friend Jerry, a grandpa with a wood shop, and a week later he had turned wooden tampers of multiple sizes; a few small ones which fit nicely into the tight spaces of a crock or jar, one with holes in the bottom to allow the brine to flow through, and lastly, the one for our 10–gallon crocks. It was a block of wood affixed to what looked curiously like a raft paddle handle. When I asked, I learned it was the next incarnation of a paddle that had worn out its serviceable life on the Colorado River.

Rhubarb Fool(s)

Rhubarb fermented with ginger and cardamom

A few days ago I was having tea with my dear friend Vicki, and she was telling me about a meal she cooked recently for her family. That is what we foodies do—talk about food. Sometimes it is recent meals, sometimes the amazing vegetables growing in our garden and how we will prepare them. Yes, I admit that it's strange, sitting around talking about good food while sipping tea and secretly competing to see who can make the other more hungry.

“...and I made a rhubarb fool for desert.”

“Whoa, hold on, what pray tell is a rhubarb fool?” I interrupted.

“You have never heard of a rhubarb fool? It is a simple old style desert. I think it is from England. You take rhubarb that has only been slightly cooked, just simmered soft, but not so soft that it falls apart. When that has cooled you fold it into whipped cream.”

I confess that whipped cream might just be one of my favorite pleasures, next to butter. (hmmm a theme...is this the place to admit that buying our first dairy cow was all about the cream. We shamelessly named her ‘Buttercup’.)

Christopher happened to be out of town this week, not that he wouldn’t support what happened that night at dinner, but it makes a better story. I came home with visions of fool and told the kids all about it and made the executive decision we would eat a few leftovers before having the rhubarb fool for dinner.

As I was dashing down the hill, paring knife in hand, to our massive rhubarb plant, Dmitri said. “Don’t you dare ferment it.”

“Oh I won’t I assured him.” I knew I wouldn’t tonight, but I would bring some extra stalks with me and see what would happen. I had fermented rhubarb before but this time I was looking for a different flavor.

The ferment-free fool was amazing and our fool bellies were so full it was embarrassing, especially when Christopher called.

Here is a recipe for the rhubarb that I fermented.

Fermented Rhubarb infused with Ginger and Cardamom

1 pound (about 3 1/2 cups) rhubarb stalks, sliced
1 scant teaspoon pink salt, Himalayan or Redmond Real Salt from Utah, these salts have a higher mineral content and are sweeter
1 tablespoon grated fresh ginger
1/4 – 1/2 teaspoon ground cardamom

Placed sliced rhubarb, salt, ginger, and cardamom in a bowl. Massage all the ingredients together. When the salt has coated all the rhubarb and it is starting to weep, cover with a towel. Allow to sit for a half hour then press into a quart jar.

When the brine is above the rhubarb weight it down and allow to ferment on your counter for four to five days.

This on on its own makes a tasty condiment. However I was determined to make a 'fooled-you' rhubarb fool.

"Fooled-you" Lacto-fermented Rhubarb Fool

Epilogue

Last night the rhubarb was deliciously fermented, strawberries and cream were purchased. I began to put together my vision of a fermented rhubarb fool. My children begged me not to mess with the known dessert–in the spirit if it ain't broke don't fix it.  

"At least try it in a small amount first." 

"That's not how I roll." It always throws them off when I use their slang. 

I placed one cup of the above fermented rhubarb in the food processor with two cups of fresh strawberries and 3 tablespoons of sugar. I processed this and grated in the zest of one lemon. I then whipped a pint of heavy cream.

Instead of folding in this strawberry-rhubarb sauce I layered it like a parfait.

It looked great. The same aforementioned children, remembering their full fool bellies, asked if we could eat dessert first. We did while the lasagna waited.

Two interesting things happened.

The kids loved it and apologized for doubting me. The other thing is our bellies were happier. The fermented rhubarb was lighter on our digestion. We all enjoyed our lasagna and there was no groaning with tight bellies when we left the table.


Spring Cleaning

Sauerkraut Frittata ​garnished with chives and dandelion petals

     Every fermentista I know has a batch of kraut that languishes in the back of the refrigerator—the place where the orange marmalade jar (a gift from Aunt Zelda who visited Great Britain a few years ago), prickly pear pickles (she went to Arizona last year), and the unloved krauts reside. Sometimes the rotation in the back of the fridge is longer than anyone of us would care to admit and we don’t have to.

     So this kraut, stepchild that it is, is technically good—as in, it isn’t rotten.  It tastes fine, creamy even—as in too soft.

     We could go into the why is my kraut soft? But this post isn’t about the why. It is about solving the dilemma of a kraut that you don’t want to throw out and don’t want to eat. This is normal. Many of us get very attached to our batches of live food and we feel terrible, like we have let them down, by sending them into the compost pile.

     There is help. It is Springtime, time to purge the old krauts to make way for all the delicious fermentation that you will be doing with the spring vegetables that are bursting forth from the waking ground. While I have no tricks for the marmalade or cactus pickles, I can share some ideas for the soft kraut.

     Use soft textured krauts in dishes where a soft texture is appropriate and pleasing to the palate.  A scoop of the kraut cooked in a stew is one example.  Because eggs are also so abundant this time of year one idea is a frittata. (Should I admit there are 16 dozen duck and chicken eggs in our refrigerator as I write this?)

     A frittata is essentially a flat omelet that has the stuffing baked into it. It has the flamboyance of a quiche without the work or the gluten of the crust.

     The beauty of this recipe is that it can be varied easily just by changing the type of kraut. And it is important to say—this is delicious with perfectly crisp kraut as well. Please feel free to play with this recipe; change up the kraut flavors or the herbs.  For a richer dish, add smoked salmon or Italian sausage.

Sauerkraut Frittata

1 ½ cups raw sauerkraut, drained

2 tablespoons olive oil

1 medium onion, thinly sliced

6 eggs

pinch of salt and pepper

a scant ¼ teaspoon freshly grated nutmeg

3 cloves of garlic, minced

2 tablespoons butter

optional: 2 tablespoons parmesan cheese

     Preheat oven to 350ºF.

     Sauté the onion in 1 tablespoon of the olive oil until caramelized, set aside.


     Crack the eggs into a large mixing bowl.  Add salt and pepper, nutmeg, the second tablespoon of oil and the garlic. Beat lightly.


     Gently squeeze the kraut to remove most, but not all, of the liquid. Stir the kraut and the cooled caramelized onions into the egg mixture. This is also the point to add the optional salmon or sausage.


     Preheat a well-oiled 10-inch heavy skillet on medium-low heat.  Melt the butter in the skillet and pour in the egg-kraut mixture.  This will set the bottom nicely. Immediately transfer to the preheated oven.


     Bake 20 - 25 minutes or until set.


     Remove from oven and sprinkle optional parmesan on top.


Fermenting Sweet Potatoes

Pressing sweet potatoes to create brine for lacto fermentation.

     It was a simple question. My son asked, “Are these sweet potatoes or yams?”

      I confidently answered, “they are sweet potatoes.” My mind however was exhibiting some doubt; I visualized standing in the produce section in front of the sweet potato display—Jewell yams. I had brought home Jewell yams but I also knew I had identified Jewell yams, Garnet yams, Japanese sweet potatoes, and Beauregard, all as sweet potatoes. Was I fermenting yams or sweet potatoes? Uh-Oh, I thought, what is the difference between sweet potatoes and yams? My first pass of “asking google” left me more confused than enlightened.  The important thing I came away with was that sweet potatoes and yams are not related botanically, the nutritional content is very different and that sweet potatoes are soft and sweet while yams are starchy.  I read posts that referred to the yam as white and the high beta-carotene content of the yellow and orange-fleshed sweet potato. This did not map to my experience in the grocery store. The tubers that were labeled as sweet potatoes had white flesh and the tubers labeled as yams had rich orange flesh.

     It was getting late; I am a morning person and I was realizing this was a bigger project. The next morning I went and talked to the produce manager. He told me about the orange-fleshed yams and the white or creamy-colored sweet potatoes.  I realized the confusion was bigger than my own. It was in the markets and marketing. 

     All my supposed “sweet potato” ferments had been with the orange-fleshed “yams” for no other reason than they are my personal favorite and the color is beautiful. I bought 10 pounds of a creamy pale variety of sweet potato thinking I had not even begun to try to ferment sweet potatoes.  I shared my confusion with Christopher; “I bought sweet potatoes for an emergency ferment."

     He said, “I wonder if the phrase ‘I bought sweet potatoes for an emergency ferment’ has ever been uttered in human history.”  I wasn’t sure he got the gravity of the situation.

     I went back to researching the difference, it turns out most tubers in the grocery stores in this country are indeed sweet potatoes even when labeled yams. I had been fermenting sweet potatoes along.  True yams are grown in Africa and in the Caribbean and very few ever end up in our US grocery stores—especially not in rural southern Oregon. If you happen to find a true yam you will not be confused. They are larger, they have rounded ends, their skin is tough—almost bark-like, and the flesh is sticky.

     So why all the confusion?

     I did learn there has been confusion for many years. Here is the beginning of the second chapter of a book written on sweet potatoes in 1896: “Since the little word “Yam” is the cause of great confusion in the nomenclature of sweet potatoes, especially in the Southern States, it may be well to give some space here to the discussion of the vegetable of which the word is more properly the name.  The word Yam…is of African origin and means “to eat” in several dialects…”

     It is believed that when orange-fleshed, softer-textured sweet potatoes were introduced in the southern United States, growers wanted to differentiate them from the more traditional, white-fleshed types.  The African word nyami was used by the slaves to describe the southern sweet potato as it reminded them of the starchy, edible root from lily family of plants that they knew from their homeland. It was adopted as yam for these softer sweet potatoes, which incidentally are in the morning glory family and most likely native to the Americas.

     Now that we know the difference let’s talk about fermenting them.

“Lactic-acid fermentation also has some other distinct advantages, e.g., the food becomes resistant to microbial spoilage and to development of toxins (Kalantzopoulos 1997). Sweet potato, in tropical regions, is consumed in the households of small farmers and poor people. Night blindness is a major physiological disorder among these people due to vitamin A deficiency, which can be alleviated by regular consumption of orange-flesh (b-carotene-rich) sweet potato either fresh, boiled and as lacto-pickles.”–S.H. PANDA, M. PARMANICK and R.C. RAY


     Sweet potatoes are considered the world’s seventh most important food crop. A study was done in India in 2006 to see if lactic acid sweet potato pickle would be viable for small-scale industries. They deemed lactic-acid fermentation as “an important technology” in developing nations. They were interested not only in the nutritional benefits but also the “hygienic” potential because it is a safe way to process food. The study concluded that sweet potatoes could be pickled and that the flavor was pleasing.


     We are going to say the flavor is more than pleasing. It is amazing.


     Use sweet potatoes as you would carrots. They respond and look quite similar in a ferment.

Sweet Potato Ferment

Makes 2 quarts

5 pounds sweet potatoes, peeled and thinly sliced

1 medium onion, diced

1 green bell pepper, diced

5 cloves garlic, finely minced

3–4 dried tomatoes, thinly sliced

1 tablespoon fresh ginger root, grated

1 tablespoons whole coriander seeds

2 teaspoons cayenne powder

1–2 tablespoons salt

In this ferment there is no shredding. Instead we are slicing the sweet potatoes quite fine. This is best done with the slicer side of a grater or the slicing blade in your food processor.

Add the rest of the ingredients, then it is the same—salt and submerge.

Allow to ferment for about 2 weeks.

Learn more about fermenting any vegetable on our self-paced online fermentation masterclasses at Fermentation School.

For some it's flu shots, for others kraut shots...

Briny Lemonade

Briny Lemonade

The brine from pickling shredded vegetables is pure vegetable juice. Remember, this liquid is achieved by shredding your vegetables, often cabbage, and through the further breaking down of the cells with salt and pressing. When these concentrated vegetable juices undergo fermentation they become a rich cloudy elixir containing not only the properties of the vegetable but an increase in vitamins C and B along with the additional beneficial bacteria (probiotics), enzymes, and minerals produced by the process. Kraut juice is also high in electrolytes. Folk remedies in many cultures have found healing in fermented vegetables and the resulting brines.

Brine was a precious commodity when we made small batches of kraut with only a tablespoon or so left over at the bottom of an empty jar, but when our kraut making became commercial, with 10-gallon batches of kraut or kimchi, we were faced with a huge surplus and very little space to store it. It seemed wrong to send it down the drain, so we purchased a couple dozen glass, USA-made shot glasses and took a few bottles of brine to market to see what would happen. Turns out people loved it and it became a mainstay. We happily made a dent in our surplus, 1.5 ounces at a time.

Christopher usually took on the job of bartender and identified four types of shot drinkers.

The Natives

Usually Eastern Europeans who grew up depending upon sauerkraut brine after a late night at the discos.  Given our market was on Saturday, we provided relief to more than a few.

The Drinkers

Often it would be the woman of a couple that ventured to taste the kraut, with the man hanging back just at the edge of the canopy, out of the sun but not close enough to commit to tasting anything.  Our small chalk written sign that read “Brine Shots $1” proved a siren’s song to these men, eventually pulling them in with a crumpled dollar bill in hand.

The Believers

Some folks do their homework and understand gut biota.  For them a shot of brine is an inoculation, a quick infusion of the healthy microbes. They were the  regulars, coming every Saturday and leaving a little lighter.

The Naughty Ones

There are people that want to knock back a shot glass in the middle of the street in the middle of a market. They would often giggle or make a dramatic play of it, convinced they were somehow being mischievous.

This blog is about flavor and the enjoyment of fermented foods, so if your first reaction is still–ick, yuck, no way, really? –or if you simply don’t like brine straight up, try making plain sauerkraut brine into “lemonade”.

Brine-ade

1 cup sauerkraut brine
3/4 – 1 cup unrefined sugar or honey
one whole lemon thinly sliced
1 cup warm water
3 – 4 cups cold water
optional variation: grate in a little bit of fresh ginger to taste

Make a simple syrup with 3/4 cup unrefined sugar or honey and 1 cup warm water. Mix until your sweetener is completely dissolved.

Place your syrup into a pitcher and add the sauerkraut brine, cold water and lemon slices. Give the lemon slices a twist to release some of the lemon juice as you are putting them into the pitcher. Add optional ginger at this point.

Let this sit for about a half hour to allow the flavors to mingle.

Serve over ice for a refreshing summer beverage, or serve room temperature for a cozy healing beverage.

Lastly if you are interested in some of the science behind cabbages and their anti-microbial and anti-fungal properties you might want to check these links out.

The Journal of Food Protection in September 2006 published a study that found that the juice from brassica oleracea leaves (members of the cabbage family) was effective in inhibiting the growth of Salmonella Enteritidis, verotoxigenic Escherichia coli O157:H7, E. coli HB producing thermolabile toxin, nontoxigenic E. coli, and Listeria monocytogenes.

Food Chemistry Toxicology published a study in October 2010, wherein researchers found that a “bio-converted product of cabbage” (fermented kraut brine) displayed potential anti-candida effects. It concluded that fermented cabbage juice (kraut brine) has potential therapeutic value of medicinal significance to control Candida species including clinical isolates.

Ignored Ferment--Surprises!

Fermented Eggplant Baba Ganoush

Fermented Eggplant Baba Ganoush

For the last year a two-quart jar has sat silently in our refrigerator–waiting. It has remained in its place while hands reached past it for many other jars of fermented vegetables; onions, peppers, kimchi, sauerkraut of all flavors. I am pretty sure nobody else in my family noticed it, even though two-quarts takes up a lot of real estate in our crammed refrigerator.  They all tend to look past unknown things in jars, as they are wary of their mother’s experiments. I would look at this ferment, a slightly grey color, and think "maybe tomorrow" as I reached for anything but the eggplant.

I have to admit, I had never even tasted the lacto-fermented eggplant. Last summer I peeled and sliced a small box of Japanese style eggplants, added basil leaf and salt. I let it ferment for a week and when it was done I tucked it in and proceeded to play this game of “maybe tomorrow” with myself.  A confession -  I have a fragile relationship with eggplant. When it is cooked just right, I love it. When it is not, well, I feel like I am five again moving it around my plate trying to figure out how to find a place for it that is not my mouth. I especially  don’t like it  when it is not fully cooked, so my insecurity was well-founded in that the fermented eggplant was indeed raw.

Yesterday I spent the day with a friend roasting eggplants. I was feeling friendly with eggplant so the day had come:  I had the appetite for eggplant. I reached into the refrigerator and pulled out the patient jar of fermented eggplant. I tasted it, and was surprised. I liked it. The fermented taste had taken on a lemony flavor. I immediately shared it with my friend and her young son. They both shared my enthusiasm.

Inspired, I made a baba ganoush, the Middle Eastern eggplant spread. No roasting, just tahini, a bit of garlic and parsley, and a food processor. Done. Yumm.

Fermented Onions

Here we are fermenting onions…This is a post of one of my early classes. I have taught hundreds all over the world since this post. I now teach online at Fermentation School. To learn how to become a lacto fermentation superstar take one of my self-paced online fermentation classes.

I felt overwhelmed planning for last week’s Fermented Condiments class, mostly because there were so many directions I could take. Dressings, relishes, chutneys, salsas, and my new favorite concentrated seasonings, any of these could take up the whole time. I didn’t know how many of the students where completely new to fermentation, so I wanted the hands-on project to be one with a guaranteed success rate.  I chose one of my favorites.  Fermented Onion Relish which is as simple as it is delicious.

When my eldest son, who worked in our commercial fermentation kitchen producing onion relish in 200 pound batches, heard my plan he immediately said, “Are you kidding? You are going to have a room full of people chop onions?” I remembered the swimming goggles that fogged our vision and did not keep the crying sting from our eyes. 

“Oh that is bad.” I said. Despite thinking it over, I stuck with my plan. I decided there would be a few other vegetables to slice so that nobody would have to slice onions. We would make Fermented Fennel Chutney as well.  And, I justified to myself, we were talking about 10 onions over a class of 8 students.

Fast forward to Thursday evening. We have talked about fermentation, we have tasted a colorful array of fermented condiments; from salsas to spice pastes. The participants are happy, one woman tells me, “It is my goal to have in my refrigerator all of these varieties of condiments.”

It is now time for the hands-on portion of the class. We start with the onions. After a few minutes I am standing in front of my students who are dutifully slicing these onions.  The room started to fill with that familiar smell, I look around the room and we are only half way through.  I start to fret, maybe my son was right.

We endured, there was a huge hood fan in the kitchen and we took the onion ends to sit outside of the room. As the salt was added and the onions began to weep themselves the intensity cleared and we made it through.  Soon we where packing jars, talking about the fermentation time, and everyone went home smiling.  Whew.

NO tears were shed!!

Simple lacto Fermented Onion Relish


4 - 5 large onions (any variety)
1 teaspoon mustard seed
1 teaspoon cumin powder
1 1/2 tablespoons salt
1 tablespoon previously fermented sauerkraut brine

1.    Thinly slice the onions crosswise to make rings. Transfer to a large bowl and sprinkle in 1 tablespoon of the salt, working it in with your hands. Taste and sprinkle in more salt as needed to achieve a salty flavor that is not overwhelming. Add the mustard seed, cumin, and sauerkraut brine.

2.  Press your onions into a jar or crock. More brine will release at this stage, and you should see brine above the onions. Top the ferment with a quart-sized ziplock bag. Press the plastic down onto the top of the ferment and then fill it with water and seal; this will act as both follower and weight.

3. Set aside to ferment, somewhere nearby, out of direct sunlight, and cool, for 7 to 14 days. Check daily to make sure the onions are submerged, pressing down as needed to bring the brine to the surface.

4. You can start to test the ferment on day 7. It’s ready when the onions are translucent, have lost their sharp bite, and are pickle-y tasting without the strong acidity of vinegar.

5. Store in jars, leaving as little headroom as possible, and tamping the onions down under the brine. Tighten the lids, then store in the fridge. This ferment will keep, refrigerated, for around 18 months.

Note: Onions lack inherent Lactic acid bacteria (LAB), when combined in the sauerkraut crock, kimchi pot, or pickle jar this is not a problem, just a little bit of the other vegetables have plenty of LABs to jump start the process.  In onion only relishes and chutneys adding a little bit of sauerkraut brine is enough to inoculate the ferment and it will acidify as well as anything else.

Local Restaurant Making In House Sauerkraut

​Smithfield's Pastrami Sandwich

My husband and I arrived and where greeted at the door of Smithfield’s in Ashland, OR with, "Hey you are the one that taught Neil to make sauerkraut!" The waitress then seated us at a table by the window looking out upon downtown Ashland.  It was after 2 pm on a Thursday right before they close to prep for dinner so it was pretty quiet, there was another couple and two guys practicing magic tricks over beers at the bar.

She told us the sauerkraut was making its debut today in the Rueben sandwich and then correctly assumed that was why we were here.  Ordering was easy, two Reubens and a Wondering Angus Cider to share.  When our plates arrived my eyes were drawn to the brown of the toasted rye bread, which matched the handmade perfectly crisp potato chips. The slices of in-house vinegar pickles stood out attractively like a bright green shrub on a desert landscape.  Then our server gave my plate a little spin as she set it upon our table and I caught a glimpse of the beauty within.

This story began about a month ago when I spent the afternoon in the kitchen chopping locally grown cabbages with Chef Neil Clooney.  He makes a noble honest house cured pastrami and he needed a sauerkraut to match.

There it was, between the bread layers of pastrami, blending with the melted Swiss cheese, separated by this first batch of sauerkraut.  Crisp ferment surrounded by fried, melted and succulent beauty, not bad for a coming out party.  But before I tried it, Neil brought out a ramekin of the sauerkraut, putting it before me to taste. I gave him the thumbs up. It was crisp, clean, not to salty, and pleasantly acidic. I couldn’t wait to savor the sandwich. But before I tried it, Neil brought out a ramekin of the sauerkraut, putting it before me to taste. I gave him the thumbs up. It was crisp, clean, not to salty, and pleasantly acidic. I couldn’t wait to savor the sandwich.  

The pastrami was incredible and the sauerkraut in its cliché roll on a Rueben did what it was supposed to do; provided a crunchy, fresh and slightly sour counterpoint to the rest of the sandwich. Perfect.  Our server returned part way through, smiling. 

"It's good isn't it?" she asked. We both nodded our heads, mouths full and deeply enjoying our meal.

Sauerkraut and a Bathrobe

​Ice Crystals in the Field

It is the day after the winter solstice and we are spinning back toward the light.  Here at Mellonia we a have a forested ridge to the south of our house.  This time of year we loose the sun on the house at about 2:30, from that moment on no matter how sunny and warm the day is, the chill has set in and instantly moves any of my activities to a sunnier location or inside.  This has been especially true this last month when things have been crystal, clear and cold.  I always like to think about how the days are getting longer again, but for some reason with winter just beginning it always feels like it takes more time to get out of the short days than it did to get here.


All the holidays of this season I believe stem from the solstice and I love all the candles and light that fills our homes no matter what our particular traditions are.  Despite this Christmas, dominates our culture, and so the story I have to share is a Christmas story.  

I just received an e-mail from someone who had visited us a the market this summer.  Her two daughters loved the krauts we made with lemons, the lemon kraut girls she called them.  She was contacting me because her girls had both requested a big jar of sauerkraut, her seven year old asked for a bathrobe and sauerkraut.  This warmed my fermenters heart, as it is the closest I will ever get to a Dear Santa letter.  We made big jars and personalized labels.  

Last night I heard a celtic blessing that is spoken as the Christmas candles are lit.  It is simple, and simply the most we can hope for.

“May we all be alive this time next year.”
Go mbeire muid beo ar an am seo aris!

The Pickle Shop

​Jar of Dills

This week the Mellonia kitchen smells decidedly of dill--dill pickles to be exact.  We are a small operation, our crocks are small and not many of the our local So. Oregon farmers grew cucumbers this year. I have had trouble sourcing an abundance, as the farmers that did grow them have had no problem selling them. The resurgence in home canning and pickling is alive and well here. All this to say, while we have 10 gallon crocks of pickles going, there is not enough to have pickles through the yearWe make a New York Deli style pickle developed in the early part of the last century.  My Grandmother, whose parents were immigrants from Russia, loved these.  Often the first business these immigrants would be able to get into was that of a carter. My ancestors where no exception. Push carts were cheap to rent and the market for pickles was good.  Many of these carters eventually bought their own carts, then stores.  In New York these were concentrated on Manhattan’s Lower East Side. This area became known as the “pickle district.” Though all but one of the once 80 shops are long gone, there is now an annual pickle festival.

These were by no means the first cucumber pickles.  Cucumbers where the first vegetable known to be pickled and that happened around 4000 years ago in India.  Even in New York earlier immigrants saw the pickle market. The 17th Century Dutch pickled Brooklyn cucumbers which they sold in Manhattan.

There is a part of me that would love to step back into 1920’s New York to visit these pickle shops--for a day.  To a certain extent I can imagine sights, sounds, textures and smells, but these images come to me in a murky sort of way.  A few weeks ago at market a woman told Christopher about visiting one of these shops once a week as a child.  She said that she was scared to death of the proprietor, who did not see customer service as the “customer is always right”.   It seems the pickler would not let anyone enter the shop unless they proclaimed the type of pickle they would be purchasing.  Once inside the barrels were intriguing--I imagine a dark tight space, worn slatted wood floors, the whole place smelling oaky and briny.  At the same time I can imagine an upscale pickle shop, bright and colorful, yet still aromatic, oak, brine, garlic, ginger, all the smells that waft around our “fermentorium.”  Exciting unusual sauerkrauts and pickles would be seasonal and part of the vegetable terra of our place.

An Applegate pickle shop, right along the wine tour...though pickles and ferments are trending, that maybe pushing the envelope right off the table.  So, I think about how that shop would have to be in a hip neighborhood in Portland, or Seattle, or some city. Then I think how I don’t want to live in the city. The Farmer’s Market is our pickle shop, where the little kids love to get kimchi in cups from Christopher.