Make Garum Like a Roman :: Garum Recipe

A well preserved garum shop in Pompeii has given researchers not only more clues to the production of garum but another bit of evidence to back up an August eruption date of Mount Vesuvius. Alfredo Carannante analyze.jpg

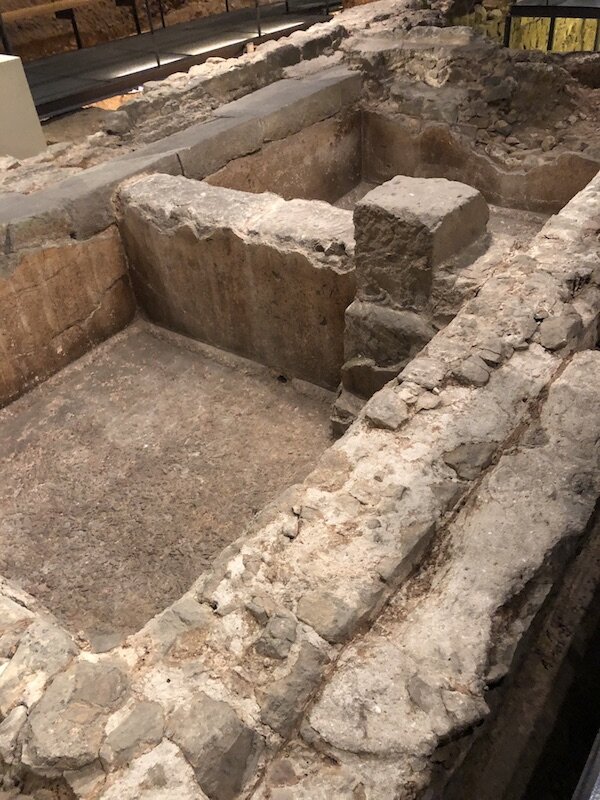
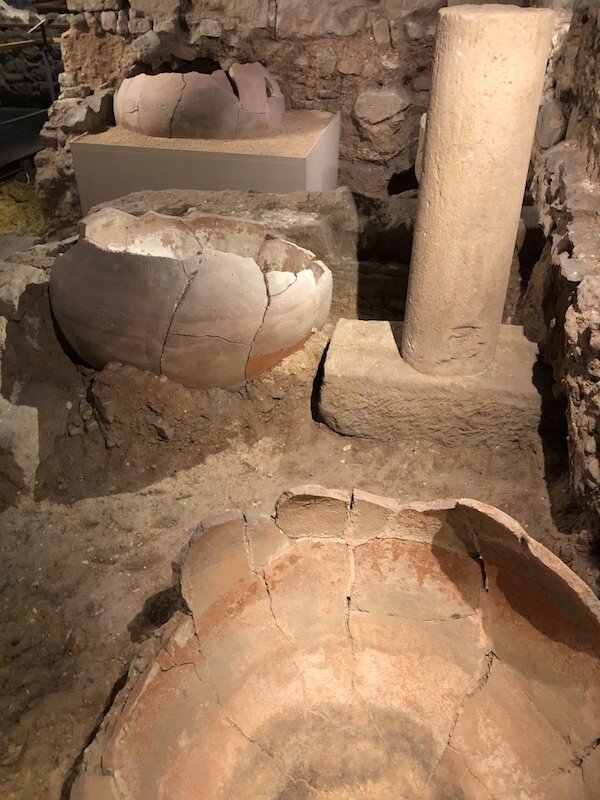
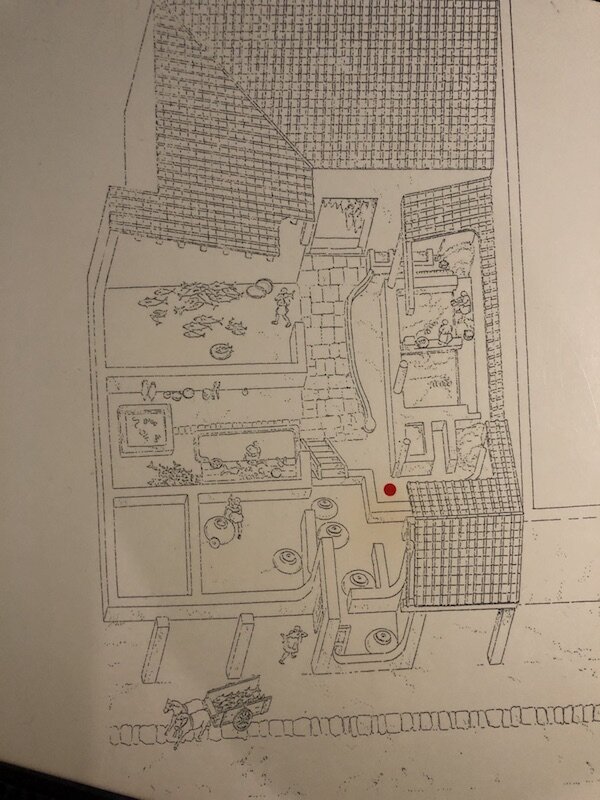
Here is a Garum recipe that is an extension of our previous post about Roman garum making in Barcino (modern Barcelona) ancient times. At its most basic garum (also sometimes called liquamen) is seafood, salt, and time. Roman makers though, we imagine, were looking for competitive edge and some shoppers for unique flavors. Of course, the choice of sea foods was paramount in flavor and likely ultimate price. We’ve read in numerous places mackerel made a good common garum, including Pliny. The best according to a 10th century book of agriculture the Geoponica was made with tuna innards, blood and gills (full utilization in action). However, the maker might include wine and herbs. One ancient recipe translation we read called for highly aromatic dried herbs that line the base of the fermentation vessel, then as fish and salt are layered so are more herbs.  The Barcino “factory” was right next door to a winery so I can see a partnership with less than ideal wines going into the garum.

The following recipe is a traditional fish based garum if you are interested in a modern spin on this umami sauce you can learn to make a bone marrow garum here.

In our research recipes layered salt on the fish. The same Geoponica recipe is roughly 12.5% ratio (8 parts fish to 1 part salt) but we found the flavor crisper and cleaner at a 18% salt by weight of fish ratio. Ancient recipes used significantly more salt than most people do today. Remember, salt was the preserving mechanism and the fermentation control, and it wasn’t something people couldn’t get away from because it was hidden in processed foods. Garums and other preserved nutritionally dense foods where the processed foods and the way the fresh foods were salted.

Heat is also a consideration. The ancient recipes all call for some sunshine and our modern sensibilities know that enzyme action is faster and most efficient around 138°F/59°C. These are the temperatures we use to speed up koji-based ferments. Temperatures in different regions might also contribute to the varying times prescribed—from 20 days to 6 months.


2 pounds (900 grams) raw mackerel, or other raw fatty fish (sardines are another good choice)

5.7 ounces (162 grams) salt

Optional dried herbs


1.     Chop the whole fish up, blood and guts and all.

2.     Mix thoroughly with the salt and optional herbs. Everything should be coated.

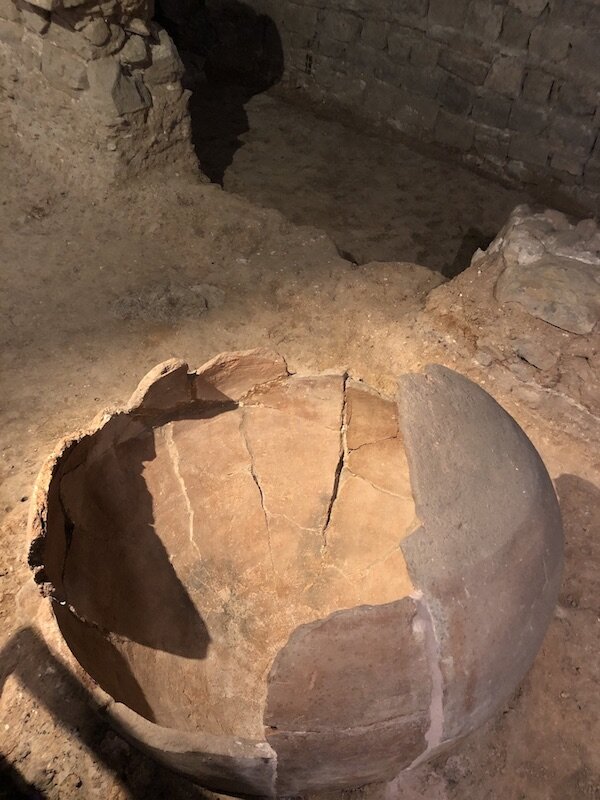
3.     Place mixture in a fermentation vessel. If you have an amphora go for it, otherwise use a half-gallon or gallon glass jar. Lid finger tight.

4.     Keep in sun, or warm, if possible. Warmth will move things along.

5.     Stir daily for the first two weeks. The more you stir the better. If you want to increase the surface area which will help with the enzymatic break down, you can mix it with a hand blender if you want to.

6.     Allow to ferment for about 4 months at room temperatures, stirring occasionally. It will go faster if you keep it warmer than that. The mixture will completely dissolve over time, if you don’t blend it you will still see the bones.

7.     It will separate and the liquid will be a variation of a clear amber color.

8.     Strain off the liquid. Use a coarse strainer first and then a fine strainer and finally a sanitized dense cheese cloth.

9.     Bottle the liquid. It will last indefinitely. 

What is Garum? Discovering Ancient Roman Fermentation beneath the streets of Barcelona

If you don’t recognize the name Garum you might have tasted, or at least smelled, fish sauce from southeast Asia. Other names for garum fish sauces are liquamen, allec, or muria, but we suspect it is less likely you have come across those names. Two thousand years ago garum was very popular in the Roman Empire, having probably been introduced to the Roman palate after they conquered Carthage, across the Balearic Sea in what is now Tunisia. The fermented fish sauce garum was a staple for all levels of roman citizenry. Besides its concentrated umami punch it’s also an amazing way to preserve an ocean’s perishable abundance for a long period of time. The secret to its longevity is in the process, which you might find fascinating, impossible or just a little gross. More on that in a moment.

In 2019 we were invited to Spain to teach different fermentation techniques, including making miso, hard cider and fermented condiments. So, on our last day in Barcelona we decided to get away from fermentation for a few hours and walk across the city to the Gothic Quarter to find the Picasso Museum. Walking through the tight cobblestoned streets of this old part of Barcelona you can easily imagine a scene from the middle ages, or for Christopher something from Monty Python’s Holy Grail. It feels old, worn yet solid as the giant blocks of stone that make up many of the walls. Upon finding the museum we realized a lot of people had already had the same idea and it would be many hours before the next tickets were available. So we did what we usually do in new places and wandered around. That’s when we found something amazing completely by accident.

 Just a few minutes’ walk down a couple of narrow streets we randomly walked into the yawning vastness of the Placa del Rei, a square surrounded by the Palau Reial Major or Grand Royal Palace. It was sunny and the square and massive spreading steps to one end were covered with couples and families taking in the sun’s rays or enjoying a small bite to eat. Kirsten noticed the simple sign and being the more adventurous one convinced Christopher his stomach could wait until they checked out this Museum of the History of Barcelona. We checked in our backpacks into lockers, grabbed English versions of the handheld audio tour wands and were escorted into an open elevator. Two floors down we stepped out into an underground Barcelona of 2000 years ago, the roman fortification of Barcino. Painstakingly excavated for more than 30 years below the palace above and featuring among other things the remains of a very old fermentation business it takes a few minutes for you to take in what your eyes are seeing. Elevated walkways above the ruins allow for you to basically hover a few feet above over 43,000 square feet of ruins, including a winery and a factory that produced a fermented fish sauce called Garum. (See the artist rendering in the slide show.)

Alright, remember the process, which you might find fascinating, impossible or a little gross? We are in the find-it-fascinating camp, but you be the judge. If you find yourself in the fascinating camp check out this recipe. To understand what is happening in garum fermentation you need a quick anatomy primer. Organisms have in their guts microbes that break down the foods ingested to supply themselves and their host with energy. This happens in halibut as well as in a human. These microbes stay within our guts, keeping their activity focused on what we eat and not on ourselves and the same goes for the fish these early Spanish fisherman were catching. However, if you chop the fish up and throw everything in a big vat with layers of salt, these microbes break down the proteins and fats of the fish, sea urchins and whatever ends up down in there to liquidy amino acids, fatty acids and the bones. It’s the animals’ own digestive juices turned upon themselves. Perhaps a cautionary tale to remember to feed your gut microbes within you well, otherwise, well…

The initial salted stage set up the fermentation was in large vats cut out of the limestone and sheltered from the rain and sun by awnings of sorts. (See the rectangular stone tubs in the slide show.) After some time through a series of connected troughs and drains the fermented fish mash was transferred to smaller containers that would have been outside on the patio to further condense in the sun. Beside these were the well-preserved remains of mortars that were used when the finished garum was transferred to massive clay pots, called dolia, on raised platforms for storage and sale. (In the slide show these are the two views of huge round pots.) Remember the bones? Those were fished out (sorry for the pun) and ground up in the mortars to make fertilizer or as an amendment to animal feed. An intricate series of stone gutters carried whatever was left off after washing between batches, likely flowing into the local waterways to become nutrients. A true zero waste fermentation operation and likely ran for hundreds of years judging by the layers of flooring tiles that reflect many renovations of the factory.

Now that you know more if you are thinking you are leaning toward the gross camp don’t beat yourself up about it. People have had strong opinions about garum for at least the last 2,000 years. Pliny the Elder, a fellow author described it as “that secretion of putrefying matter” while his contemporary Seneca piled on the garum hate train to ask “Do you not realize that garum sociorum, that expensive bloody mass of decaying fish, consumes the stomach with its salted putrefaction?”  Not exactly inviting is it? One of the biggest challenges for some isn’t so much how it’s made but the smell. Make it outside in a shed, on a balcony, or any place that your loved ones (and neighbors) won’t be offended. Also, if you are making a traditional garum with all the animal including the head and organs make sure its fresh. Believe it or not starting out with fish that doesn’t already smell fishy is helpful. This is not a place to decide to use the fish too far gone to eat otherwise. If you know that you want to make an amino sauce, or modern garum you can replace the fish gut microbes and enzymes altogether by bringing in a new team.  Sweet floral smelling Koji, aspergillus oryzae, which you can read about all about in our book Miso, Tempeh, Natto and other Tasty Ferments can offer its enzyme superpowers to break down proteins in similar ways. For these modern garums koji is used with a concentrated salt brine and protein.

If you want to explore the world of modern garum you can get started here with this class to make Bone Marrow Garum taught by Meredith Leigh. To read more about fish sauce head to this article.

Is Fermentation Scary?

No, but making videos about it can feel uncomfortable…

Do you want to learn to lacto ferment vegetables? Do you want to make pickles? Learn to make your own kimchi? Maybe you wonder: Is fermentation hard? Is lacto fermentation dangerous? It isn’t at all, in fact it is one of the safest preservation methods of all. If this is something you have been reluctant to try maybe now is the time to push past your comfort zone and learn to ferment at home.

Like most of us on this planet right now I am also getting the opportunity to leave my comfort zone to keep doing what I do. Teach fermentation! Christopher and I are both learning a lot of new skills in order to pivot. As someone who has made an income teaching humans together in both big and small settings my work is on hold until we can all get back together. Yet we both feel fermentation skills are more important today than ever. Fermentation is a lot of fun, but I think that it is also more than a hobby. It is a chance to interact with our food, preserve and enliven our foods with more nutrients which are more available to our systems. Fermentation is all about healthy food that our bodies evolved with and crave. Its about food security in unsure times and a strong microbiome (read strong immune system).

All that to say we are slowly working on bringing fermentation masterclasses to you from our home. I don’t think I am alone in thinking video work is hard. It is hard not to have a live audience and all the energy. Here is an outtake of our first course that proves we are either having too much fun, or I have indeed lost it.

This outtake is from our first online fermentation course ever—Flower Power. This class is about capturing and using wild yeast to ferment fruit juices into wild wines.

Homemade Fermented Oat Milk Recipe

This fermented oatmeal milk recipe uses the magic of koji to break down the rolled oats into a creamy milk that is good for you too. Non-dairy milks are great for folks who are lactose intolerant. If you are choosing non-dairy milks for environmental reasons oat milk has one of the lightest footprints.

Making your own saves money, leaves you in charge of the ingredients, and helps keep single use packaging out of the system.

Homemade oat milk recipes rely on raw oats, which aren’t the best for our digestion. The advantage of using koji rice is that the enzymes in the koji rice breaks down the larger molecules of the oats. This leaves them more digestible with more of the nutrients available for our bodies to absorb, and tastier. The other advantage is that you won’t get slimy or goopey milk which can be a problem people experience with over soaking, over blending, or using warm water.

Let’s backtrack a moment for those of you asking, “What is koji?” let me define it. Koji is the Japanese name for Aspergillus Oryzae. Koji is a fungus, more specifically a filamentous fungus that grows on the surface of its host – often rice – releasing powerful enzymes to break down complex molecules. In food this means it will break down large starches into simple sugars, proteins into amino acids, and fats into fatty acids. These smaller parts are all more flavorful.

Using koji is harnessing enzyme magic!

Koji has been used for thousands of years, think of it as a domesticated mold. It gives us things like miso, sake, soy sauce and oh so much more. You can order rice koji online, or find at your favorite Asian market.

To read more about koji or learn how to make it yourself check out our book Miso, Tempeh, Natto and Other Tasty Ferments. We also have started teaching fermentation master classes online with our friends. Check out our ever growing list of fermentation classes.

Fermented Oat Milk Recipe

You will need a jar, a blender, a nutmilk or other fine mesh bag or cloth for straining, and a way to keep your jar warm for 6 – 8 hours, and the following ingredients.

1 cup (90 g) rolled oats

½ cup (100) rice koji (white or brown rice)

5 cups (1183 l) water, warmed to 135°F/ 57°C

 Optional: pinch salt, ½ teaspoon (2 g) vanilla

The process is simple, as you can see in the above video.

You will pour the oats, rice koji and warmed water into a 2-quart jar. You will keep this at 135°F/57°C for the next 6 hours. (This can be done in a dehydrator, immersion circulator, instant pot, towels and a warm oven, towels and hot water bottles in a cooler…whatever you have.)

After 6 hours you will put in the fridge for at least 24 hours and up to 5 days. It will get creamier with a few extra days. It can get a little lactic (sour) tasting if you let it get to cook during the 6-hour heat time. If it’s gotten cool, process sooner.  

When ready, blend it for about 30 to 45 seconds, or until oats are creamy. Strain through a nut milk bag and voilà (wa-lah) you have oat milk. This will keep in fridge about 5 days. It will separate and need shaking upon each use.

Use the strained-out solids in a sweet treat—part of the hydration of banana bread, or in oatmeal cookie dough.

How to Ferment Peppers: Make a Pepper Mash

How to ferment hot peppers? How to ferment bell peppers? Doesn’t matter.

Lacto fermented Hot Sauce (or mild sauce) starts with fermented pepper mash. This technique is so simple and can be used with any type of pepper. It is up to you. Make what you like.

Adjustable to any pepper—banana peppers, carrot peppers, Thai peppers, Aleppo peppers, green chile peppers, ghost peppers, Fresno peppers, cherry bombs, jalapeños, shisito peppers…you get the ideaI. If you have it you can ferment it.

Pepper mash can be fermented in very small batches (say in a half-pint jar) or in a large-scale hot sauce plant. In this video we show you how to make a small batch. How long to ferment peppers? That depends on what you are looking for. At home fermentation you have the choice of how long you would like to ferment it. We suggest at least three weeks. Lacto fermented peppers develop more flavor over time. The thing is a fresh hot sauce is a flavor you will never be able to buy from the store. You can learn all the tips and tricks to make your own fermented hot sauce recipes in our self-paced online class. Our hot sauce fermentation book Fiery Ferments will also get you started with recipes that have been inspired from flavors all over the world.

Here's a fun fact. A large producer makes pepper mash by crushing whole red chiles with a hammer mill and adding a 5 to 8 percent salt ratio (our mash ratio is much lower at about 2%). This mixture is then put into barrels. Traditional Louisiana-style sauce makers procure the charred white oak barrels previously used by Kentucky whiskey distillers. The barrels’ wooden lids are fastened with stainless steel hoops and blanketed with a thick layer of salt. Tiny holes in the lids allow CO2 to escape. The salt blanket hardens due to humidity and seals the barrel fully after the active fermentation process stops.


What is a fermentation airlock and should I use one?

In fermentation an airlock is a set up that allows the carbon dioxide gas created as the bacteria break down the sugars and starches to escape the fermentation vessel, without letting new air into the environment. They have been common standard equipment in alcohol fermentations but are fairly new to the lactic acid fermentation scene. This will talk about using an airlock with fermented vegetables.  There are many ways to achieve this airtight environment and it often involves a bit of water. The ceramic water-seal crocks were likely one of the first ways that humans figured out that a simple ring of water would trap the air.

Airlocks like the ones pictured above also use water as the seal. The carbon dioxide bubbles out through the water but the outside air can’t find a path back through the water and into the ferment. Simple ones like these have been used in alcohol ferments for years but as lactic acid fermentation has gained popularity many folks have adapted these to use on canning jars.

These systems take most of the babysitting out of the curing time during the fermentation. We admit to setting ferments in their air lock topped jar and forgetting them—with delicious results. That said, its only fair that you know all ferments have a mind of their own (just like kids). So while you think they are safely sleeping in bed, they just might be under the covers reading ghost stories with a flashlight. Then they get scared and there is a whole lot of excitement…same with the microbes.

If your ferment is particularly active and your jar is particularly full this moving brine may just bubble right out of your ferment. When the ferment appears to be “making” brine what is really happening is it is expanding due to the trapped carbon dioxide. This movement in the brine is sometimes called a “heave” or a “surge.” Therefor weights are another important piece of the worry-free ferment as they help keep the veggies in place during the most active phases of fermentation. We have found out ferments are infinitely more successful if we manage the air pockets. Even if the oxygen is not present and the vessel is completely sealed in these pockets the flavor can have a bitter quality if they aren’t pressed down. This brings us back to using small weights or simply opening your ferment as needed to press the veggies back down under the brine (with a clean utensil) before sealing it up again for more fermentation.

So, the second part of the title—should you use an air lock? The answer is it depends. It depends largely on you, your style, your setup, and your comfort level with fermentation. Fermentation is an ancient, very low-tech, and forgiving process, but it’s important to note that LABs (the friendly bacteria we talked about earlier) are happiest and most productive in anaerobic environments (again, ones without oxygen). Enter the airlock systems, which allow carbon dioxide to escape from your container, while keeping oxygen out—creating the anaerobic sweet spot needed to foment your ferment. This takes some of the babysitting out of the process, allowing you to forget about your jar a bit while the good bacteria process the fruits and veggies. While airlocks aren’t necessary, they can give newbies the confidence they need to get hands-on fermenting experience. They also made to fit nicely on any wide-mouth Mason jar, making them a cost-effective solution with a relatively small footprint.

It is important to note that not airlocks are foolproof. Though it’s unlikely, even with an airlock, scum (mold and yeast) can still make their way into the jar. We have built these troubleshooting pages just to help you out. If you want to master vegetable fermentation and feel confident in fermenting any vegetable with or without an airlock be sure to check out our fermentation masterclasses, especially Mastering Fermented Vegetables, where we look at all kinds of fermentation vessels and their pros and cons.

Fermented Onions

Here we are fermenting onions…This is a post of one of my early classes. I have taught hundreds all over the world since this post. I now teach online at Fermentation School. To learn how to become a lacto fermentation superstar take one of my self-paced online fermentation classes.

I felt overwhelmed planning for last week’s Fermented Condiments class, mostly because there were so many directions I could take. Dressings, relishes, chutneys, salsas, and my new favorite concentrated seasonings, any of these could take up the whole time. I didn’t know how many of the students where completely new to fermentation, so I wanted the hands-on project to be one with a guaranteed success rate.  I chose one of my favorites.  Fermented Onion Relish which is as simple as it is delicious.

When my eldest son, who worked in our commercial fermentation kitchen producing onion relish in 200 pound batches, heard my plan he immediately said, “Are you kidding? You are going to have a room full of people chop onions?” I remembered the swimming goggles that fogged our vision and did not keep the crying sting from our eyes. 

“Oh that is bad.” I said. Despite thinking it over, I stuck with my plan. I decided there would be a few other vegetables to slice so that nobody would have to slice onions. We would make Fermented Fennel Chutney as well.  And, I justified to myself, we were talking about 10 onions over a class of 8 students.

Fast forward to Thursday evening. We have talked about fermentation, we have tasted a colorful array of fermented condiments; from salsas to spice pastes. The participants are happy, one woman tells me, “It is my goal to have in my refrigerator all of these varieties of condiments.”

It is now time for the hands-on portion of the class. We start with the onions. After a few minutes I am standing in front of my students who are dutifully slicing these onions.  The room started to fill with that familiar smell, I look around the room and we are only half way through.  I start to fret, maybe my son was right.

We endured, there was a huge hood fan in the kitchen and we took the onion ends to sit outside of the room. As the salt was added and the onions began to weep themselves the intensity cleared and we made it through.  Soon we where packing jars, talking about the fermentation time, and everyone went home smiling.  Whew.

NO tears were shed!!

Simple lacto Fermented Onion Relish


4 - 5 large onions (any variety)
1 teaspoon mustard seed
1 teaspoon cumin powder
1 1/2 tablespoons salt
1 tablespoon previously fermented sauerkraut brine

1.    Thinly slice the onions crosswise to make rings. Transfer to a large bowl and sprinkle in 1 tablespoon of the salt, working it in with your hands. Taste and sprinkle in more salt as needed to achieve a salty flavor that is not overwhelming. Add the mustard seed, cumin, and sauerkraut brine.

2.  Press your onions into a jar or crock. More brine will release at this stage, and you should see brine above the onions. Top the ferment with a quart-sized ziplock bag. Press the plastic down onto the top of the ferment and then fill it with water and seal; this will act as both follower and weight.

3. Set aside to ferment, somewhere nearby, out of direct sunlight, and cool, for 7 to 14 days. Check daily to make sure the onions are submerged, pressing down as needed to bring the brine to the surface.

4. You can start to test the ferment on day 7. It’s ready when the onions are translucent, have lost their sharp bite, and are pickle-y tasting without the strong acidity of vinegar.

5. Store in jars, leaving as little headroom as possible, and tamping the onions down under the brine. Tighten the lids, then store in the fridge. This ferment will keep, refrigerated, for around 18 months.

Note: Onions lack inherent Lactic acid bacteria (LAB), when combined in the sauerkraut crock, kimchi pot, or pickle jar this is not a problem, just a little bit of the other vegetables have plenty of LABs to jump start the process.  In onion only relishes and chutneys adding a little bit of sauerkraut brine is enough to inoculate the ferment and it will acidify as well as anything else.