Aged Fermented Thai Red Curry Paste

How to know when old ferments are still good? That is a question many of ask when we find a jar we didn’t remember we had. Lost and found ferments are real. We all have ferments that slip quietly to the back of the fridge where they get forgotten. In the spirit of full utilization and not wasting food I want to help you figure out what is still good (and maybe even tastier!) and what should be thrown out.

How a ferment ages depends very much on what kind it is. The original ingredients will determine a lot about its longevity. Miso and other bean ferments generally keep aging and layering on flavor. These may have a layer of mold growing on them but underneath they are still safe. Vegetables are quite variable in that they can still be technically “good” but no longer vibrant. I find a sauerkraut that is over a year old is generally of this ilk. Whereas a chile pepper based ferment has compounds in it that give it years of delicious longevity. Check the last post about creating hot sauce from old fermented pepper pastes. I also find herbal ferments like basil or shiso have a much longer lifespan do to the constituents that make these herbs antimicrobial. To learn more about fermentation methods head to Fermentation School.

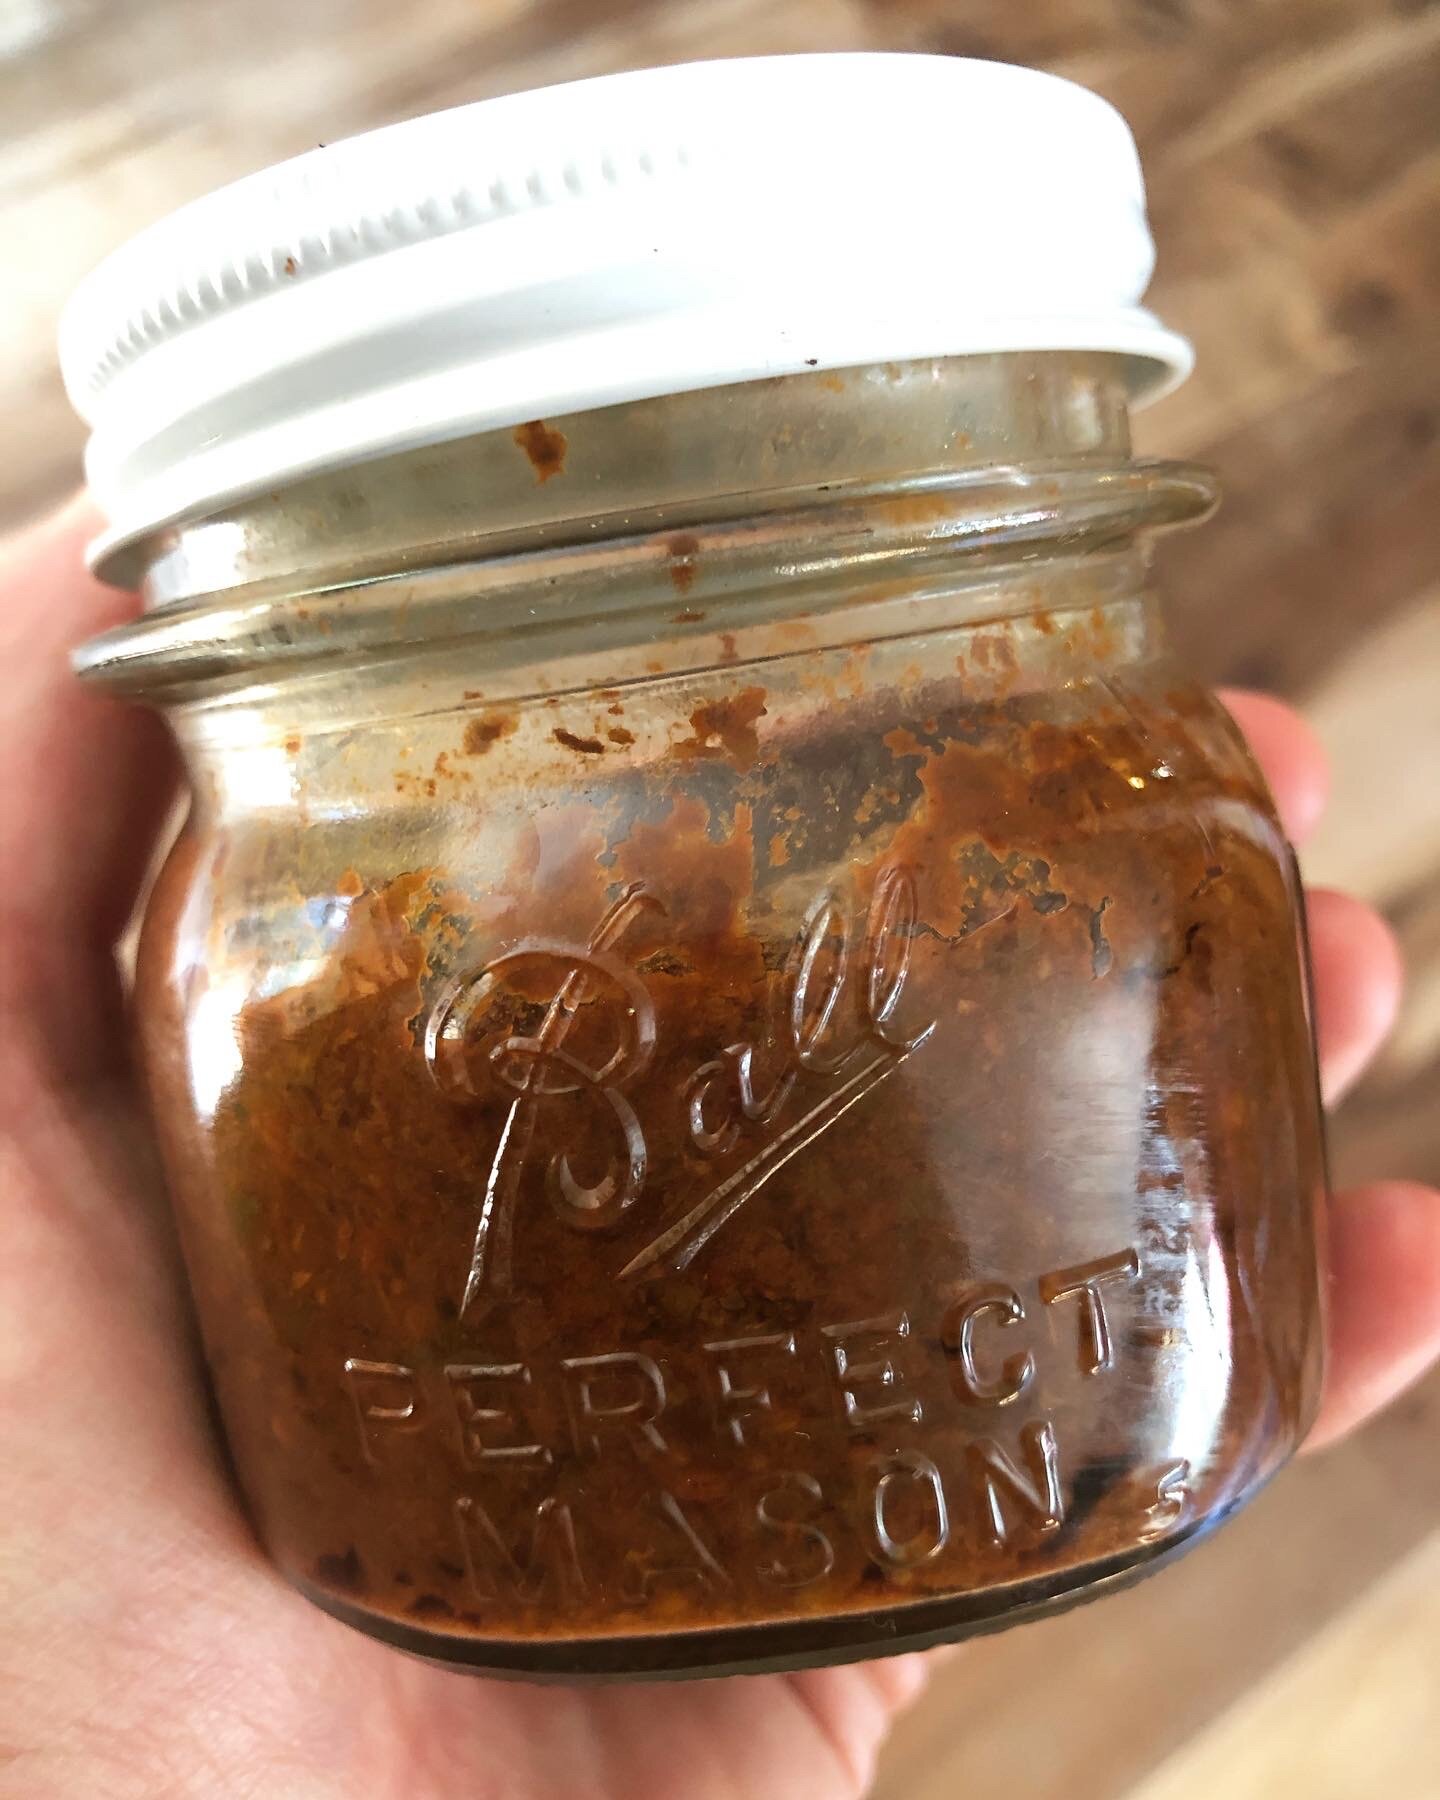
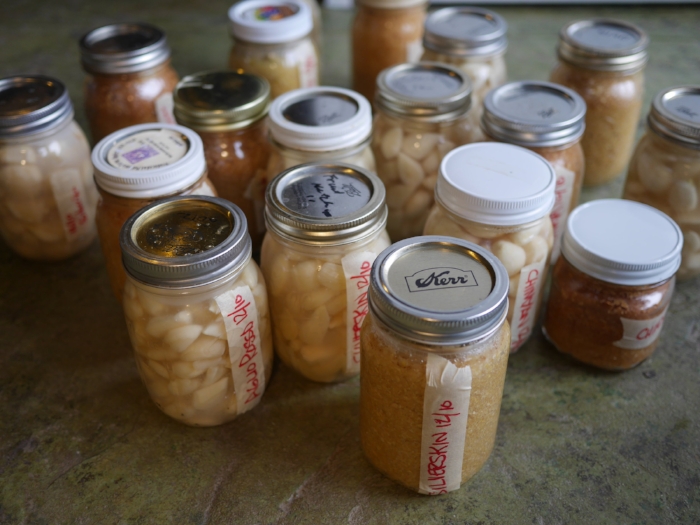
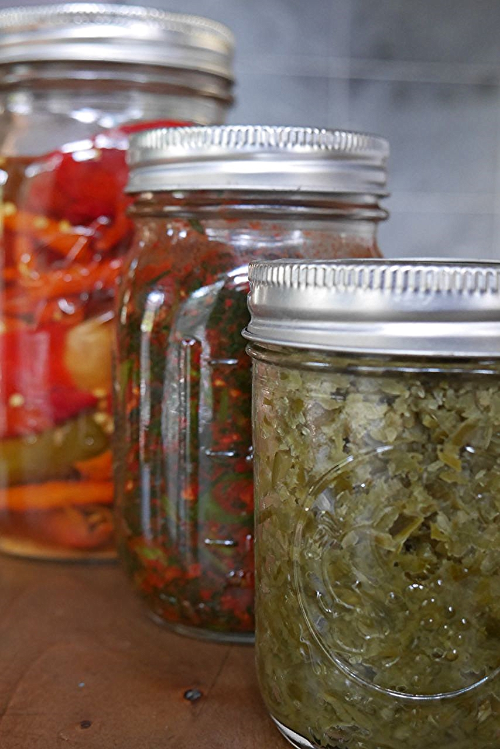
This fermented Thai Red Curry Paste is an example of a ferment that had both antimicrobial preservation ingredients and chiles. I found it recently in the recesses of the fridge. It was made in 2015. To be fair, not the daily fridge, one of the ferment fridges where things get “lost and found” often. This recipe is from Fiery Ferments and took inspiration from one of our favorite flavors and lacto-fermented it. Early in the ferment it doesn’t taste as good, it gets better with age.As the fermentation continued, the flavors blended and created a pleasing complex red curry flavor. So hence making it and putting it away for 6 months, um or 5 years. What do you do? Make curry. Below is the recipe for your enjoyment, go ahead hide it in the back of the fridge after it has fermented to discover later.

To evaluate your old ferment for “good” you will use your senses and trust your gut. Properly fermented the pH will have been below 4.0 this ensures that harmful bacteria will not live in the ferment. (You can test with a pH meter or test strips.) You will also know because it will be pleasingly acid — think pickles. If the ferment is still anaerobic (under the brine and no airpockets) then it is also a good sign. There may be yeast, even mold on top but that can be removed. As long as it is just on top and the rest is anaerobic it is fine. Then of course there is smell, does it still smell fine—not foul, putrid, musty or off? If so you can move to a small taste, this will give you a lot of information. It should taste fine. If it does not, then it is not.

RECIPE FOR FERMENTED THAI RED CURRY PASTE

Thai pastes are traditionally ground together with a mortar and pestle. We mention this because there is a texture difference: the fibers of lemongrass and roots don’t break down as much in a food processor, though the flavor will still be delicious.

3 tablespoons fresh lemongrass, chopped

1 medium shallot, or 4 tablespoons, chopped

9–10 diced Thai type small red chiles, deseeded, soaked, and drained

1/3 cup loosely packed cilantro, chopped, with root when possible

8 medium cloves garlic

2 tablespoons galangal, grated

1–2 kaffir limes (also called makrut limes,substitute regular limes if unavailable)

1/2 tablespoon kaffir lime zest (take care not to zest the bitter pith)

2 teaspoons kaffir lime juice

1 1/2 teaspoons salt

1. Process all the ingredients to a paste consistency in a food processor. Sprinkle in the salt. It will become juicy immediately.

2. Pack the paste into a jar that is just the right size for your ferment, leaving at least an inch of headspace, release any air pockets as you press it in. The thick brine will be hard to distinguish from the rest of the paste.

3. Press a piece of parchment paper (or other cartouche) against the surface, being careful not to trap any air beneath it. Screw the lid down tightly.

4. Put the ferment in a corner of the kitchen to cure, and watch for air pockets forming in the paste. If you see them, open the lid and press the paste back down. If the lid starts to bulge, simply open it for a moment to “burp” the ferment.

Hot Sauce from aged fermented peppers

These aged fermented hot sauces are an example of the versatility of fermentation-preserved foods. They are also an example of zero-waste, or whole utilization, at work. If we are being perfectly honest, they are the result of years of procrastination. These little bottles are packed with flavor and feel in many ways like a time-capsule of gardens past.

FUR-ments: Fermenting Vegetables for Your Pet's Gut Health

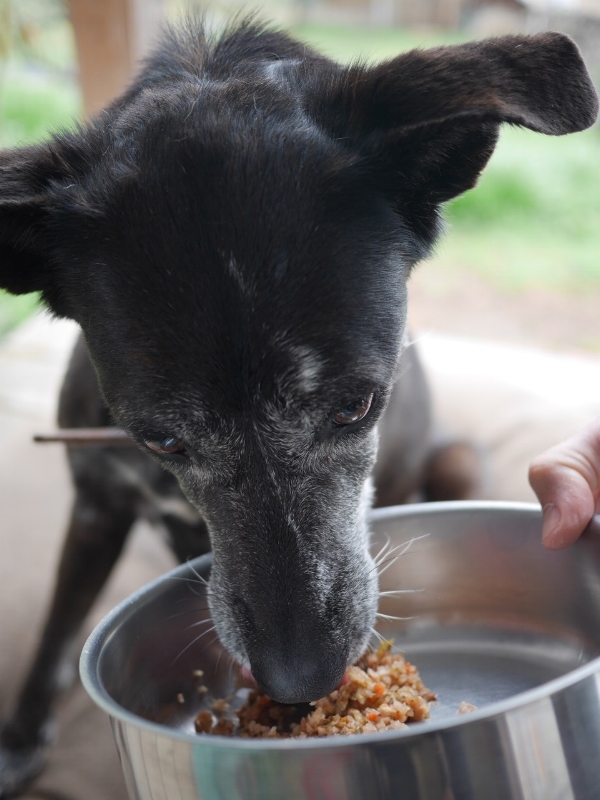
Fur-ments — Using vegetable scraps to increase the health and vitality of our pets.(Fur-ment model pictured: Maeve who was born 16 years ago on the homestead. She has out lived all of her 8 siblings.)

Fur-ments — Using vegetable scraps to increase the health and vitality of our pets.

(Fur-ment model pictured: Maeve who was born 16 years ago on the homestead. She has out lived all of her 8 siblings.)

This post was sent to us by Noel Thurner who has come up with a wonderful process for using vegetable scraps to improve the health of your pets—how cool is that? While we do share some of our own ferments with (our very picky) pup it never occurred to us to take the peels and other vegetable scraps to make some nutrient dense pet condiments. (Especially since all of dogs we have ever had have always dug into our compost piles and worm boxes—looking for these very scraps!)

We have always been interested in keeping our pets healthy without using harsh chemical wormers. One strategy is to make sure that they get veggies in their diet for the fiber that helps keep their digestive tract less susceptible to worms. Our go-to natural preventives have always been garlic, diatomaceous earth and pumpkin seeds. Pumpkin seeds have never been popular but when we grind them in with the fur-ment, that picky pup, doesn't notice. Diatomaceous earth is tricky because it is light powder and it is extremely important that they don't inhale it—again you guessed it—easily solved by mixing the dose in a the wet fur-ment. We do ferment the garlic straight into our ferment as our animals have had great results with garlic doses, but because Noel doesn't recommend alliums we suggest you work with your vet to decide if garlic is right for you.

To learn more about basic fermentation (and advanced) for pets or humans please check out our online classes at Fermentationschool.com

Finally, isn't the word fur-ment perfect. Noel shared that it was Sandor Katz who came up with the spelling. Noel was taking a class from him in the early 2000’s at the Organic Growers School in Asheville and told Sandor about feeding pets ferments at which point he coined the word FUR-ment.

Without further ado, here is Noel's process.


If you are reading this it is because you want to ensure that your dogs and cats receive optimal nutrition: fermented foods are one of the very best ways to support good gut health, thus vitality.

It is no secret after the past decade of extensive gut biome research that the gut is the key to a strong immune system and a happy mind. So how to get those beneficial bacteria into your pet? Easy: fermented vegetables—in an application we’ll call fur-ments.

I have created a new way to craft fur-ments using the scraps of food one would either discard or compost. This is the ultimate in up-cycling food from your quality, preferably organic, vegetables. This not only keeps these ‘wastes’ out of the landfill, but provides a nutrient-dense and fiber-rich ‘vitamin pack' for one’s pets.

Dogs and cats have been coexisting with humans for thousands of years and have always been there to consume our ‘leftovers’. Fur-ments are a great way to enhance your pet’s diet with vegetable nutrients, necessary fiber and probiotics.

The focus here will be vegetables from the cruciferous family, root peels and low glycemic vegetables. I choose not to include those from the nightshade family: white potatoes, tomatoes, peppers and eggplant - as these tend to be inflammatory with less nutrient dense peels and skins. No alliums or sugary fruits, either.

How to make fur-ments? I use a food grade 12” x 20” tray and fill with carrot peels, stalks from broccoli & cauliflower, bruised bok choy leaves, red and green cabbage outer leaves, kale and collard ‘spines’, along with a mushy apple and beet cubes from a beet kvass ferment. You get the idea. I collect these raw cast-offs in a gallon Ziploc freezer bag, tossed in the freezer, stuffing the bag to capacity in order to create a few quarts of fur-ment. (Kirsten: We keep the prime veggie scraps in a lidded glass container in the fridge and make the ferment about one a week because we have a lot of scraps.)

Once warmed to room temp, I salt with Redmond’s Real Salt as if I were serving to one who likes a lot of salt on their salad and mixed to ensure even salt distribution. General rule of thumb for a ferment is 1 teaspoon of salt per 1 pound of veggies. It is IMPERATIVE you use a natural salt, one that is not filled with additives, especially anti-caking agents. Otherwise your fur-ment will not ferment. Other options are Celtic or Himalayan Sea Salt.

A rainbow medley of low glycemic veggies, chopped & ready for grinding in a food processor.

A rainbow medley of low glycemic veggies, chopped & ready for grinding in a food processor.

Next step is processing. A trip to the food processor creates a chunky mass. You will see a brine and that elixir is good!

Veggie scraps chopped in the food processor and salted, now ready to mix and pack.

Veggie scraps chopped in the food processor and salted, now ready to mix and pack.

I tightly pack a wide mouth quart jar and have place a cabbage leaf on the top of the ferment to ensure the mass stays below the brine. You are creating an anaerobic [no oxygen] environment.  I use Pickle Pipes to allow the carbon dioxide to escape. One can also use a canning band and lid but then you must ‘burp’ the jars daily.

Let sit at room temp out of direct sunlight for 3 days. Best use a plate under the jars to catch the juices in case you get a really active ferment. Once a day it is a good idea to push the pulp back down to keep it well packed: this food is alive! One can then place the jars in refrigerator, replacing the pickle pipes, if used, with lids. The fermentation will continue but just slower at the cooler temps.

This nutritious blend is now vibrating with vitality for your pets. Daily dose: 1 teaspoon per every 20 pounds of dog. Cats need just a pinch.

If you are new to fermentation, check out the free fermentation ecourse on this site, or see the Shockey's must have book. Also please visit this Canadian site link for easy-to-follow guidance for ensuring your pet’s ferments are perfectly crafted. Expert reviews of fermentation products as well. Holly Howe’s site is clear, simple and addictive!

The Canadians at Dogs Naturally Magazine wrote a beautiful article on explaining the importance of supporting the gut biome in your dog and how to do such.

Karen Becker DVM gives an explanation on her Mercola Healthy Pets blog of how to introduce ferments to your pets and the dosage, for both dogs and cats.

Never hesitate to ask questions: I want you to succeed.

Here’s to wild fur-mentation for you and your pets!

In health…

Noel

noel.thurner@gmail.com


Tips for Fermenting Pumpkins and other Winter Squash

Fermenting pumpkins and other winter squash

You can make delicious fermented condiments with winter squash. You might ask why ferment winter squash? It keeps so well. The main reason is it is delicious and sometimes, if you’ve had an abundant harvest, you are sick of eating squash soup.

Way back, fermenting winter squash was one of our first forays moving beyond cabbage and basic kraut. Our neighbors grew beautiful blue Hubbard squash for seed. The organically grown seeds were the crop and the thick wall of rich flesh that surrounded the seed was the waste. We had our small farm-to-kraut company at the time and didn’t want to see all that organic food go to waste. So, we took buckets and buckets of cracked squash home and began to trial methods and flavors to ferment it.

We learned immediately placing cubes in a salt water brine and pickling them was not the way to go, which didn’t keep us from fermenting the whole jack-o-lantern this year. (As an aside here is a fun history of the pumpkin's roll in history and fairy tales. Including a mention of the pilgrims fermenting this squash into a pumpkin libation.)

While it might be too late for you to ferment your own jack-o-lantern this year, it is not too late in the season to ferment some winter squash.

Tips for making your own fermented squash recipe:

  •    For best results, choose winter meaty varieties of squash with the drier sweeter flesh—think Kobucha, Hubbard, Butternut. The lighter yellow, wetter flesh like pie/jack-o-lantern pumpkins and Delicata work but will leave you with a softer, wetter ferment.
  •    You can mix shredded squash with cabbage for a squash kraut.
  •    You can slice squash in thin slices and combine with other thinly sliced veggies.
  •    Dry brine for best results. This means using the salt that you add to the thinly-sliced or grated vegetable to get the brine, not adding brine made with salt and water. We like to use a 1.5%–2% salt ratio by vegetable weight for fermenting squash. This means for 3 – 3 ½ pounds of squash you will use a tablespoon of fine salt. In warmer climates, you may even have to boost up that ratio a little bit more. *Remember salt helps control the ferment, it helps keep the crisp and slows down the fermentation in warm weather.
  •    Use smoky, warm, and earthy spices—chipotle, turmeric, ginger—to compliment your creation.

Here’s a simple chutney to get your creative ideas flowing. If you make something wonderful we love to hear about it. Share on the comments or post on Instagram and tag us @ferment.works.

Squash Chutney

Makes a quart

4 cups shredded winter squash

1–2 tablespoons salt

½ cup raisins

2 cloves garlic, grated

1 tablespoon sweet curry powder

½ cup shredded carrot (optional)

Process in the usual way taking care to make sure the squash is submerged. Allow to ferment for one to three weeks. It is done when you smell that wonderful pickle acidity. You can store refrigerated for 6–8 months—if you don’t eat it first.


How to Ferment Asparagus Pickles Video

We love asparagus season and are always sad when it is over. Fermentation happens to be a fantastic way to extend the season and eat local asparagus for months. 

In the above video you see just how simple it is to make asparagus pickles through a simple lacto fermentation process.

Make them now, show off later

Let’s admit it. Not all vegetable ferments are visually created equal. Bring a big jar of sauerkraut from those cabbages you nurtured all summer, fighting off aphids as they slowly grew within their leaves to the point you could harvest. Yet in the jar, it looks like, you know, sauerkraut. Tastes amazing! That’s when you learn, as you watch people pass by your sauerkraut at the potluck, that people first taste with their eyes. So with that in mind, turn up the visual flavor!

Need more?

If you watch the video above and still want more before making your first batch here are two options. First, you can purchase our first book, Fermented Vegetables, which has a simple recipe for Asparagus Pickles along with at least 64 other vegetables. Alternately, you could take a personal online course from us, Here are two great choices below.

Make Basic Fermented Pepper Mash

Here is a look inside the pages of our pepper fermentation book Fiery Ferments. Make your own fermented pepper mash—the first step to many a delicious hot sauce. We created a video of this lacto fermentation hot sauce process as well.

Hot sauce is not all the same. You might think its just cholula hot sauce, crystal hot sauce or your favorite Louisiana hot sauce and if you are talking about what is available on your local store shelf maybe. But if you want to make hot sauce its a new world of opportunity. How do you make hot sauce? Its actually really easy and usually it starts with a pepper mash. Pepper mash fermentation is the key to a great hot sauce by developing the flavors of the peppers before acidifying with an acid like vinegar.

Check out our fermentation masterclass on fermented hot sauces. You will learn to ferment hot sauce with any pepper you love. Learning how to make hot sauce from scratch is fun. You can choose blazing hot or super mild peppers, fresh or dry and blend in other flavors. This fermentation class will teach you everything you need to make your own safe probiotic hot sauces. If you are new to fermentation and just trying to figure it out you might start with this article that helps you to understand it from the beginning—what is fermentation and what are the benefits of fermented foods like this basic pepper mash.

Basic Fermented pepper mash from Fiery Ferments
Mastering Basice Pepper Mash from Fiery Ferments

Fermentistas: Beware the Storage Cabbage!

Dry, tough storage cabbage that doesn't easily release a juicy brine

Dry, tough storage cabbage that doesn't easily release a juicy brine

Let’s talk about fermenting storage cabbages. Last week I taught a hands-on class. I’d bought each student a beautiful small head of cabbage. Later, that evening during the demonstration portion of the class, I realized that the students would have to make their first ferment with rebellious cabbage.

Here’s the thing: as I stand in front of the impressionable new fermenters, I am often slicing, salting and then massaging a cabbage while talking. (No, I can’t pat my head and rub my belly at the same time but I can talk and build a jar of sauerkraut at the same time.) So it throws me off when I am massaging and telling the good people about brine and the cabbage refuses to give it up. I continue to talk as I am working harder and harder, smiling, trying to make it look effortless.

In this case, they were about to use the cabbages themselves so I stopped and said, “You guys are going to have fun with this cabbage; it’s a tough storage cabbage, you will want to make sure to take your time and slice it thinly.” (Which was a challenge as the venue had provided everyone with boning knives, but that is beside the point.) “The good news is, this is about as hard as making kraut will ever be, so it’s smooth sailing from here.”

Let me digress a moment to share a story about the first time I’d learned that storage cabbages can be a problem for fermenting. The lack of inherent moisture, the thick waxy leaves, all the qualities that keep these cabbages from rotting in storage are exactly what inhibit the fermentation, because what is fermentation if not controlled rot? In the following tale of a small sauerkraut company and the Storage No. 4 cabbage variety this lesson was learned—the hard way.

This small company I speak of operates with the triple bottom line and is exceedingly committed to supporting the local foodshed by using only local ingredients when in season. So when one of the local farmers came to the company with the idea to provide cabbages for a longer season by growing a keeper that was harvested in the fall and capable of surviving storage through the spring it seemed like a win-win situation. The kraut company would have local cabbage in the late winter and early spring for production. The farm would also extend its income stream. Done. Acres and acres were planted. The cabbages did what cabbages do and grew and grew. They were harvested and stored and eventually processed and set in fermenting barrels as needed to keep supplies fresh and abundant. When the first barrels were opened after three weeks, the cabbage had not yet fermented. At first this was strange but can happen so they closed the barrel and allowed more time. Eventually, after waiting for a few months they had to concede that this kraut wasn’t going to be good.

You are most likely to run into these cabbages in grocery stores in February, March, and into April when the winter cabbages are sold and the spring cabbages have not yet matured. It is hard to tell at first glance, and even upon deeper inspection it can be confusing. I admit, when I am out buying cabbage I look for crisp and fresh, not wilted, but I don’t even think about checking the head for signs of being a storage variety cabbage. And while I want you to know all about these varietals, this post is really about what to do when you find yourself with a tough cabbage—you may discover this when you are slicing through extremely dense interiors with thicker, waxier leaves, or later when you are squishing along and not seeing brine.

Tips for a successful ferment with a dry, coarse cabbage:

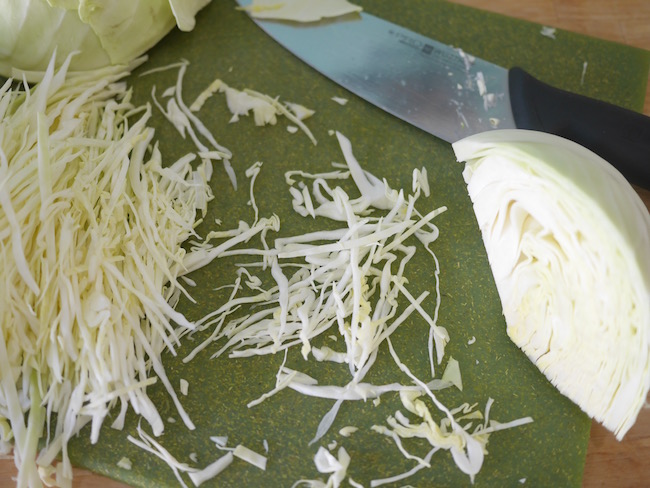
·      Slice as thinly as possible (breaking more cell walls)

·      Add salt, mix thoroughly, and allow to sit for a half hour before massaging (will break down the tough leaves and coax out moisture)

·      Make a mixed-veggie kraut instead of a plain, naked cabbage kraut (other veggies will bring their juice to the mix and help create enough brine to allow the microbes to do their job)

thin cabbage shreds for fermenting a dry cabbage
Favorite veggies for a juicier kraut: Onions, shredded carrots, shredded beets, shredded turnips (these will give you a flavor the most consistent with a plain kraut), and other shredded root veggies. Pictured here is Curtido (recipe in Fermented Ve…

Favorite veggies for a juicier kraut: Onions, shredded carrots, shredded beets, shredded turnips (these will give you a flavor the most consistent with a plain kraut), and other shredded root veggies. Pictured here is Curtido (recipe in Fermented Vegetables) it is delicious and the many onions create a juicy brine.

Make Fermented Garlic Paste

Garlic Trials at Ferment Works

Fermented garlic is the ultimate in probiotic convenience food. No, really, if you spend a little time fermenting something you want it to be garlic. Full disclosure: fermenting garlic takes a bit of time—there is all the peeling! Please don’t stop reading though a) its so worth it and b) you’ve got this!

Think about those big jars of minced garlic that are steeped in citric acid that have a flat fresh flavor, not so with fermented garlic paste. This stuff is just as easy in that you can use garlic to your hearts desire at a moments notice. However, there is no comparison on flavor and the added bonus is its live and probiotic. I know, sounding a bit like a used car salesman, but I want you to try lacto fermenting garlic. We are totally addicted to the stuff. One more small advantage to fermented garlic is that in the way it the part of garlic that lingers in your mouth and on your breath. (This has to do with the allicin being an unstable compound, but there are many chemical things at work here.) The important part is you can get away with eating raw garlic without turning everyone away! (Garlic lovers—how cool is that?

This post is to encourage you and to share a recipe for fermented garlic paste, but it is more fun than that. Last fall my farmer friend (and instigator) Mary, brought over 9 types of garlic. She grows seed garlic at Whistling Duck Farm. We did some trials to see how garlic changed with the different varieties. You can see some detailed results on a post I did for Mother Earth News . We used a pound of each variety to ferment in brine as whole clove pickle. And used another pound for fermented garlic paste. We did it all in one day to keep all the factors as even as possible, and for those of you doing the math—that was 18 pounds of garlic peeling!

One of the most fascinating parts of the experiment was seeing the distinguishing characteristics of a fresh variety of garlic might come out totally different when fermented. Fermenting brings out entirely new flavors—even within the same variety the whole clove ferment vs. the fermented paste can be very diverse. The first variance was that the jars all fermented at their own rate. A week in we had an array of colors among the pastes from unchanged to light pink and yellow yet after the fermentation period they all settled on a coppery orange color.  Some of the spiciest varieties mellowed out and some of the sweetest varieties took on some heat. The take away, though, is ferment your garlic—all varieties are good! (And for those of you reading this and sad that it is springtime and all the fresh cloves are past you can also ferment the scapes (the flower stem of garlic that is clipped in order to send more energy to the bulb.)

Garlic Paste

Yield: about 1 pint

6–8 heads garlic, cloves separated, peeled, and minced in a food processor

2 teaspoons salt

Process the garlic and the salt to a paste consistency in a food processor. This paste has a sticky, thick gooey consistency. You won’t see a release of brine, in fact you won’t really see a change. Don’t worry—it will work.

Top the ferment with a quart-sized ziplock bag. Press the plastic down onto the top of the ferment, and then fill it with water and seal. This will act as both follower and weight. Set aside out of direct sunlight in a cool spot (55 to 75°F), for 14 to 21 days.

While you monitor this ferment watch for air pockets. While there isn’t much lift action by the CO2 there is some, you will want to press down as needed. We have found that sometimes you can get a bitter, or even chemical flavor which seems to be a result of the trapped CO2 pockets. If you find this has happened stir the paste, press down, and allow it to ferment a few more days. It will right itself. If it still tastes bitter. Again stir the paste, this time place in fridge for a week and the undesirable flavor will dissipate.

Test the ferment on day 14. It's ready when the garlic is milder than when it’s raw, and has a mild acidity.

Tighten the lid and store in the fridge. This ferment will keep refrigerated for a year, though you will use it up much sooner than that.


Make *KIMCHI* The Video

Formidable Vegetable Sound System's new single, 'KIMCHI' (from their forthcoming kids' permaculture album 'Grow Do It') is out on August 19 and can be downloaded here.

We are pretty excited to post this video clip and interview with Charlie Mgee of Formidable Vegetable Sound System a music group with fun antique-beats and a fantastic message!

FermentWorks:  It sounds like you grew up with an unusual childhood. Did food play a part in defining you? Did you grow up with fermentation? (Until recently that alone would be grounds for middle school social suicide—a fermenting crock on the counter. For me (Kirsten), it was being sent to school with garlicky hummus sandwiches that sent the garlic odor wafting from my desk through the classroom. It was the early eighties in rural Arizona...)

Charlie Mgee: I actually didn't discover fermentation until my mid twenties! The only fermentation I remember as a child was my Dad forgetting about the apple juice and opening it up a month later to find it had turned into cider. (We didn't have refrigeration, so this happened on more than one occasion.) I thought it was gross and actually had a bit of food paranoia growing up. Discovering fermentation certainly changed that!

FK: Formidable Vegetable immediately struck us as sounding like fermented vegetable and for some people a fermented vegetable is a formidable thing indeed—daunting, disturbing, and frightening—though that is changing quickly. We are curious how the name Formidable Vegetable Sound System came about?

CM: Haha! I've often considered changing our name to the "Fermentable Vegetable"! I came up with the band name pretty much on the spot as we were getting on stage for the first time and the MC wanted to know what to call us. It was just a random concoction of words that I blurted out! Seems to have stuck, though.

FK: Why kimchi? How does FVSS see kimchi as a fun solution to our toughest challenges?

CM: I see the production and preservation of our own healthy foods (fermented and otherwise), grown and prepared in our own homes as an incredibly fun and rewarding solution to some of the challenges we face globally. For instance, we'd reduce carbon emissions by making our own kimchi from locally grown produce instead of importing it pre-made from Korea or elsewhere. If people ate more fermented foods, the general health and wellbeing of the population would most likely improve, which could take a lot of pressure off the health system! On a deeper level, (and anyone who has ever fermented anything may have experienced this) there is some kind of profound, intangible meaning you get out of connecting with your food by inoculating it with the local, indigenous strains of bacteria and yeast and then consuming these into your body. I see it as a way to sort of become 'native' to any place where you live by literally 'eating the culture'! Also, it's just yum! There are just so many benefits from this simple food!

FK: It looks like you guys had so much fun with this song and the video. We would love to hear the backstory on how a kimchi how to song came about?

CM: After touring the world in 2013 with our first album, Permaculture: A Rhymer's Manual (link: http://music.formidablevegetable.com.au/album/permaculture-a-rhymers-manual-2 ), I decided to write an album for kids that would encourage them to grow and eat healthy food. You might think it a challenge to get a 4 year old to eat kimchi, but I'm happy to say that it can, and has been done! One of the ways to get kids to eat good food is to make it super fun, and maybe even a bit silly - which is exactly what we did with the Kimchi song! Getting covered from head to toe in radish, chilli and fish-sauce on a stinking hot Australian midsummers day is not the most comfortable experience, but the result was hilarious! Suffer for your art, I say!

FK: On the serious side FVSS has a real mission through “pounding sustainability deep into our consciousness in the funkiest way possible.” It is great to see a positive spin on getting the ideas of sustainability that in FVSS’s case are rooted in permaculture principles. (Christopher is trained in permaculture and we have a food forest on our farm.) Where do you see it all going?

CM: I'm really excited to explore the kids' show idea a bit further, so we're looking to do a heap more in that area. After playing mostly adult festivals for three years and somewhat 'preaching to the converted', I realised that the people who most need to know this stuff are the kids! Permaculture has some incredibly helpful solutions to solving problems of climate change and energy-descent that would no-doubt be of great use to kids growing up in these uncertain times. I really feel like it's our obligation to empower them as much as we can to take care of the planet and other people better than we have!

FK: We invite you to share your fermentation story. Where did it begin? What is your best flavor invention? And because one always has to ask—any epic fermentation fails?

CH: Kimchi is where it all began for me. After a friend gave me a jar she'd made, but could no longer stomach, due to her being pregnant, I was hooked! I have this wild theory that fermented food also inoculates your brain, leaving you craving more, so I was on a mission to try out as many different styles as possible after that. My favourite invented flavour I think was a berry kombucha I made once using flavoured herbal teabags... It tasted like healthy, probiotic soda! There have been oh-so-many epic kimchi fails! On entering a festival in Canada, we were given a warning that they weren't letting any glass into the campground, so I frantically jumped into the back of the van and stashed all of my nicely-bubbling jars of kimchi into my rolled-up futon mattress to hide them from security. We got them in, but on going to bed that night, I discovered to my dismay that they'd exploded all over the place, leaving me with the pungent odour of kimchi juice to lull me to sleep for the next few weeks on the road!
 

Grow Do It will be out on September 2 here!

Mastering Basic Cheesemaking: The Fun and Fundamentals of Making Cheese at Home by Gianaclis Caldwell

Fromage Blanc made from Gianaclis's new book in a class here at our farm. The students had a grand time decorating the cheeses with flowers and herbs from the garden.

Fromage Blanc made from Gianaclis's new book in a class here at our farm. The students had a grand time decorating the cheeses with flowers and herbs from the garden.

Before vegetables there was cheese—at least when it comes to big fermenting projects on our homestead. Well, that is not totally true—let me back up a moment. We fermented a bit of sauerkraut in a crock early on, but the full on “let’s do this!” commitment came later. In the meanwhile, I spent many years teaching myself cheesemaking.

The year was 1999 and I had my “Little House” fantasy. Just like Ma, I would pull perfect cheeses from the press while my wide-eyed children gazed in wonder at the awesomeness. Making your own cheese—romantic right? Imagine unwrapping a cheesecloth-swathed bundle to reveal the perfect creamy dense alchemy that took place in the pot between the milk, rennet and bacteria.

I, of course, had no clue how to make cheese. And believe me the reality is that without proper guidance this nuanced process can quickly go from dream to frustration.  At the time, there were no local folks making cheese, neither old-timers nor back-to-the-landers. There were no classes at the extension and there was only one book for the beginning home cheesemaker.

The one and only how-to book gave recipes and instructions but it was not instructional. I followed along but did not learn. And when things went wrong I had no clue why, and therefore had no idea how to fix it or make sure it didn’t happen again. My determination to create our homespun life outweighed the frustrations—or was it the milk literally kept flowing?  Meanwhile, cheesemaking was becoming a thing. I bought each new book and gleaned a little more knowledge from each and slowly taught myself.

So when I read, and I mean read every page, of Gianaclis Caldwell’s new book Mastering Basic Cheesemaking: The Fun and Fundamentals of Making Cheese at Home, I kept wishing that this was the book I started with.

Gianaclis expertly guides the fledgling cheesemaker through the craft in an accessible manner. Gianaclis’s writing and presentation is clear and informative.  She begins with understanding the ingredients and the tools, making it clear that you can make cheeses without all of the expensive equipment, and explains the options. In other words this book makes this culinary art accessible!

This user-friendly approach takes the reader through a progression of the process, unlike some that are too scientific, overwhelming, and hardly accessible. Others don’t move the reader beyond dabbling in vinegar cheeses and other unripened fresh cheeses. Mastering Basic Cheesemaking is different and it is as the title suggests—Fun!

Each of the cheeses is set up as a lesson; each type of cheese is designed to build skill, confidence, and knowledge. Gianaclis includes what is happening with the milk as it acidifies with each of the cheeses so that the new cheesemaker is learning the craft. The first cheeses are simple with acidification happening through added acids such as vinegar. Then it’s on to cultured soft cheeses, fresh cheeses, semi-firm cheeses and finally aged hard cheeses. Each lesson outlines what you will need, gives the process in a nutshell, then the step-by-step instruction and perhaps the most useful detail—a recap and trouble-shooting.  With all the reassuring instruction you will not stare at your aged Gouda, so beautiful on the outside and then upon opening, full of small holes and splits. Instead you will know what happened, whether it is safe to eat, and how to not make that mistake again.

I see this book as becoming the new classic in beginning cheesemaking. You won’t be disappointed in Mastering Basic Cheesemaking: The Fun and Fundamentals of Making Cheese at Home.

Fermented Valentine! Chocolate Cranberry Mole

Fermented Chocolate Cranberrry Mole

If you are looking for something new and crazy, a bit spicy, a bit sweet, but complete with requisite Valentine’s chocolate, look no further—it is time for saying love with a fermented valentine.

Love your sweetie—love their guts!

Chocolate Cranberry Mole

Yield: About 1½ pints

4 cups (1 pound) fresh cranberries

1 cup dried cranberries

½ cup dried unsweetened cherries (or increase dried cranberries)

5 tablespoons (2 ounces) pasilla chile powder

2¼ teaspoons cocoa powder

¾ teaspoon salt

½ cup fresh orange juice

Process all of the ingredients to a paste consistency in a food processor. Sprinkle in the salt, since the cell walls of the ingredients are already broken down the paste will become moist right away. However, this type of ferment will not look juicy, instead it will be drier than you think is possible. Press the paste into your favorite fermentation vessel. Follow the instructions that come with that vessel. Otherwise choose a jar that is just the right size for your paste. 

Press the mixture into the jar, there won’t be an obvious brine; when you have pressed the paste into the jar releasing any air pockets, press a piece of plastic wrap against the surface, again without trapping any air. Screw a lid tightly on the jar.

Put this in a corner of the kitchen to cure. Watch for air pockets forming in the paste. If you see them open the lid and press the paste back down. If the lid starts to bubble up, simply open the lid for a moment to “burp” the ferment.

Allow to ferment for 7–10 days. You will know it is ready when the cranberries have a delightful lemony flavor and all the elements have mingled together.

Keep a small round of plastic or wax paper directly on top of the paste to prevent evaporation and contamination. Tighten the lids, then store in the fridge. This ferment will keep refrigerated for 12 months.

Fermenting Carrots 3 Ways

These three easy carrot ferments (no crock, no cabbage) are delicious. The demonstrate how fermented vegetable flavor magic can be changed simply by changing the chop. How you treat your veggies can give you a completely different end result. This video and accompanying blog post shares an example of this action. These recipes use different ingredients but we encourage you to use the Carrot Salad ingredients in the grated krautstyle ferment or the Carrot Kraut ingredients sliced like the salad to see what a difference chop can make.


What is a fermentation airlock and should I use one?

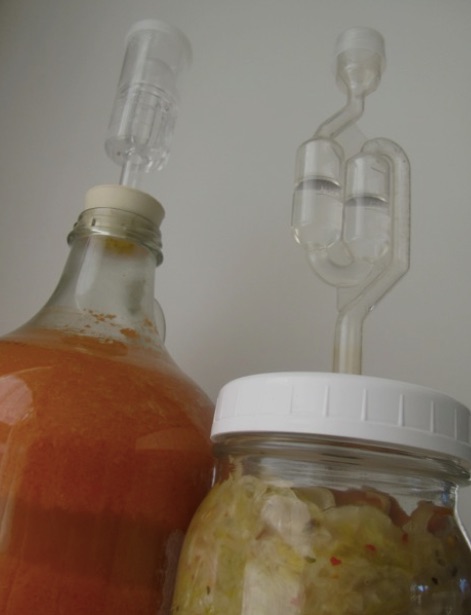
In fermentation an airlock is a set up that allows the carbon dioxide gas created as the bacteria break down the sugars and starches to escape the fermentation vessel, without letting new air into the environment. They have been common standard equipment in alcohol fermentations but are fairly new to the lactic acid fermentation scene. This will talk about using an airlock with fermented vegetables.  There are many ways to achieve this airtight environment and it often involves a bit of water. The ceramic water-seal crocks were likely one of the first ways that humans figured out that a simple ring of water would trap the air.

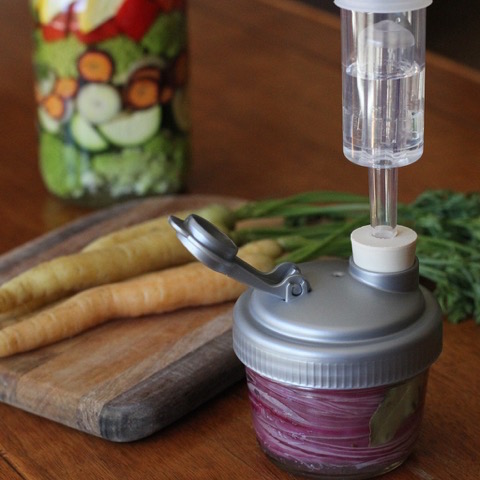
Airlocks like the ones pictured above also use water as the seal. The carbon dioxide bubbles out through the water but the outside air can’t find a path back through the water and into the ferment. Simple ones like these have been used in alcohol ferments for years but as lactic acid fermentation has gained popularity many folks have adapted these to use on canning jars.

These systems take most of the babysitting out of the curing time during the fermentation. We admit to setting ferments in their air lock topped jar and forgetting them—with delicious results. That said, its only fair that you know all ferments have a mind of their own (just like kids). So while you think they are safely sleeping in bed, they just might be under the covers reading ghost stories with a flashlight. Then they get scared and there is a whole lot of excitement…same with the microbes.

If your ferment is particularly active and your jar is particularly full this moving brine may just bubble right out of your ferment. When the ferment appears to be “making” brine what is really happening is it is expanding due to the trapped carbon dioxide. This movement in the brine is sometimes called a “heave” or a “surge.” Therefor weights are another important piece of the worry-free ferment as they help keep the veggies in place during the most active phases of fermentation. We have found out ferments are infinitely more successful if we manage the air pockets. Even if the oxygen is not present and the vessel is completely sealed in these pockets the flavor can have a bitter quality if they aren’t pressed down. This brings us back to using small weights or simply opening your ferment as needed to press the veggies back down under the brine (with a clean utensil) before sealing it up again for more fermentation.

So, the second part of the title—should you use an air lock? The answer is it depends. It depends largely on you, your style, your setup, and your comfort level with fermentation. Fermentation is an ancient, very low-tech, and forgiving process, but it’s important to note that LABs (the friendly bacteria we talked about earlier) are happiest and most productive in anaerobic environments (again, ones without oxygen). Enter the airlock systems, which allow carbon dioxide to escape from your container, while keeping oxygen out—creating the anaerobic sweet spot needed to foment your ferment. This takes some of the babysitting out of the process, allowing you to forget about your jar a bit while the good bacteria process the fruits and veggies. While airlocks aren’t necessary, they can give newbies the confidence they need to get hands-on fermenting experience. They also made to fit nicely on any wide-mouth Mason jar, making them a cost-effective solution with a relatively small footprint.

It is important to note that not airlocks are foolproof. Though it’s unlikely, even with an airlock, scum (mold and yeast) can still make their way into the jar. We have built these troubleshooting pages just to help you out. If you want to master vegetable fermentation and feel confident in fermenting any vegetable with or without an airlock be sure to check out our fermentation masterclasses, especially Mastering Fermented Vegetables, where we look at all kinds of fermentation vessels and their pros and cons.

Fermenting Scorzonera

scorzonera ready for fermentation .JPG

Looking to ferment something new? Try Scorzonera hispanica, also called black salsify, is a member of the sunflower family, has quite a few folk names; two of the more colorful are viper’s grass and goat’s beard. Having sons, we saw viper’s grass as an opportunity to entice them with a fermented creation. Snaky words usually appeal to the boy-child set: hence, our Viper Kraut.

Although native to southern Europe, black salsify is eaten predominantly in Germany and the Netherlands. Scorzonera is a perennial, and as long ago as the 1600’s it became more popular than white salsify, an annual. (White salsify, Tragopogon porrifolius, is also known as oyster plant, because of its flavor and texture.) Unlike white salsify, black salsify stays firm when you handle or cook it. Raw, it’s crunchy, with a texture almost like that of coconut with a flavor slightly reminiscent of asparagus. That same crunch and texture makes it an excellent candidate for fermentation.

Okay, here is where we admit it is rare—as in hard to find at the market. So much so that this delicious little carrot shaped root was cut from our book. That said, it is none-the-less out there. We often see it at farmers’ markets—look for the farmer that has the unique and unusual veggies—there is always one that is pushing outside the heirloom tomato box. Of course, you can grow your own.

The roots of scorzonera, or black salsify, are black, sticky, usually dirty, and a bit gnarled, so as a food, in a word, ugly. As a bonus (for the kids, maybe not for the cook), as you clean and peel, your hands will turn sticky and icky colored (orange or brownish black) as well, though that comes off easily when you wash.

Have fun with this ugly duckling: it turns into a swan in the crock.

As soon as you peel the roots, drop them in cool water with lemon juice; this will keep them from turning gray.

You can make a tasty, pure scorzonera ferment, but because of the size of the roots (not big), it’s a lot of work for a small return. Instead, shred the root or make ribbon-like strips with a peeler to dress up a plain sauerkraut. These universal kraut instructions are for just that.

Use the roots peeled and whole in brine pickles as part of a vegetable medley or solo with your favorite pickling spices.

Here is a refresher on how to set up a jar to ferment your veggies.

Fermented Fennel Cranberry Chutney

Lacto fermented fennel recipe below

Lacto fermented fennel recipe below

I taught a class where we made fermented Fennel Cranberry Chutney at the Farm to Fermentation Festival* in Santa Rosa, CA. This festival is near and dear to my heart as it is the first fermentation festival I’d ever been to back in 2011. In 2011 it was called the Freestone Fermentation Festival, which I wrote about extensively on this blog—the symposium, the feast, and the fest. The event has changed but is at its core still a wonderful way for people to explore the wonderful world of fermented foods and libations. 

The best part—always—is meeting and teaching you, the people, how to ferment vegetables.  [Since this post the world has moved to pandemic measures and no in person gathering. I miss the gatherings and live classes but I do love that my teaching is now available to anyone with an internet connection. Click here for my online vegetable fermentation classes hosted at Fermentation School.)

This recipe is in Fermented Vegetables but I made a pint size version for the class that I want to share here.This ferment is mild, sweet, and delicious and a friendly flavor for those who are less sure about fermented vegetables in their diet. This is particularly good with poultry—as an addition to a chicken salad or along side grilled chicken.

Fermented Fennel Chutney


Makes 1 pint

This version uses optional pure cranberry juice. The juice adds a little more flavor complexity, pink color and brine. The recipe works either way.

1 bulb fennel, sliced finely, tough parts of core removed
1 small to medium sweet onion, slice finely
3 cloves garlic, minced
¼ cup dried cranberries
2 tablespoons raisins
1 teaspoon salt
optional:
2 tablespoons pure cranberry juice (the kind with nothing added)

Remove the fennel stalks (save for adding to soup stock) and any tough parts of the core. Slice the fennel and onions as thinly as possible; mince the garlic and place in bowl. Sprinkle in the salt and massage it in to release the juices. Add the cranberries and raisins. At this point you should have a moist mixture. Press into your favorite fermentation vessel. Follow the instructions that come with that method. Otherwise choose a jar that is just the right size.


Press the vegetables into the jar; there will be only a small amount of brine. Don’t worry if it “disappears” between pressings. As long as the relish is damp, you have enough. At this point you can add the optional cranberry juice—it will give you more brine and a nice pink color.
When you have pressed the chutney into the jar releasing air pockets, press a piece of plastic wrap against the surface, again without trapping any air. Screw a lid tightly on the jar.


Put this in a corner of the kitchen to cure. Watch for air pockets forming in the paste. If you see them, open the lid and press the paste back down. If the lid starts to bubble up, simply open the lid for a moment to “burp” the ferment. 


Allow to ferment for 7 days. You will know it is ready when the color of the ferment has become dull and there is a slight pickle-y flavor.


During storage, the less airspace above a ferment the longer it will last, so fill the jars to the rim and transfer the ferment to smaller jars as you use it. Keep a small round of plastic wrap or wax paper directly on top of the paste to prevent evaporation and contamination. Tighten the lids and store in fridge. This ferment will keep refrigerated for 6 months.

*Since the writing of this post this festival in any form is no longer happening.

Preserving Mint with Fermentation

Fermented Mint and Ferment'n Home Fermentation Kit

The idea of foraged and found ferments has been on my mind a lot lately. I have been experimenting with more and more wild ferments in my own corner of the world while out there my global Internet buddies are doing the same. Colleen Codekas is working with cattails and Annie Levy is also experimenting with foraged ferments.

Finding small nourishment from wild plants is seasonal eating at its finest. It is interesting to watch the plants (and animals) and see how they react with the subtle changes in seasonal conditions. A good friend of mine spent a lot of time rehabilitating the creek on her property (translated this means a few years of tenacious blackberry removal.) I watched as the native plants came back to the land—trillium, California spikenard, hedge nettle, cleavers, and many others. One summer we were inundated with thick smoke from forest fires for over a month.  It was then that she noticed that the coltsfoot completely disappeared. She then observed a lone squirrel inside a thicket of willow stems tearing off small strips of the coltsfoot leaves and eating one after the other. Herbal medicine recognizes coltsfoot as a lung herb.

Our days have been unseasonably hot this summer and hovering around 15° F above normal—today it will be 108° F. (We live in Oregon not the Sonoran Desert.) Luckily our mountain mornings are still cool if we get up early enough. We do our chores and any gardening before breakfast. Recently, I was back inside bracing for another scorching day when Christopher came into the house like a cool minty breeze—literally. He had been out foraging for the goats* and had tramped through a patch of wild mint. That smell reminded me of the cooling nature of mint. Mint is refreshing and finds its way into many cuisines where the climate dishes out heat.

As soon as breakfast was consumed I went out to the small spring fed riparian area below our house and picked a basket of mint. It has been fermenting for two weeks and is now finding its way into all sorts of cool no-cook meals—most recently a chilled cucumber yogurt soup. Without further ado I present you with a recipe for fermented mint leaves.

Fermented Wild Mint
Makes about a half pint

Find wild mint along water ways; if you don’t have access to that, garden mint works just as well. The most important thing is that the mint has not begun to flower. Be sure to use the larger leafed mint (link) and not the small leafed wild pennyroyal (link), which can be toxic. The other thing about the wild mint that I have been using is that it is drier and the leaves did not release enough water to even dissolve the salt properly—hence the brine. 

8 ounces mint leaves, stems removed
½ teaspoon salt dissolved in 1/8 cup of unchlorinated water

Roughly chop the mint leaves and add salt-water solution. Massage this brine into the leaves (your hands will smell great) and allow to sit in a bowl, covered for about a half hour to work out more brine. 

Press into a jar. Top with a ziplock bag, or pack tightly into a small jar for the burp method, or use your favorite fermenting system. 

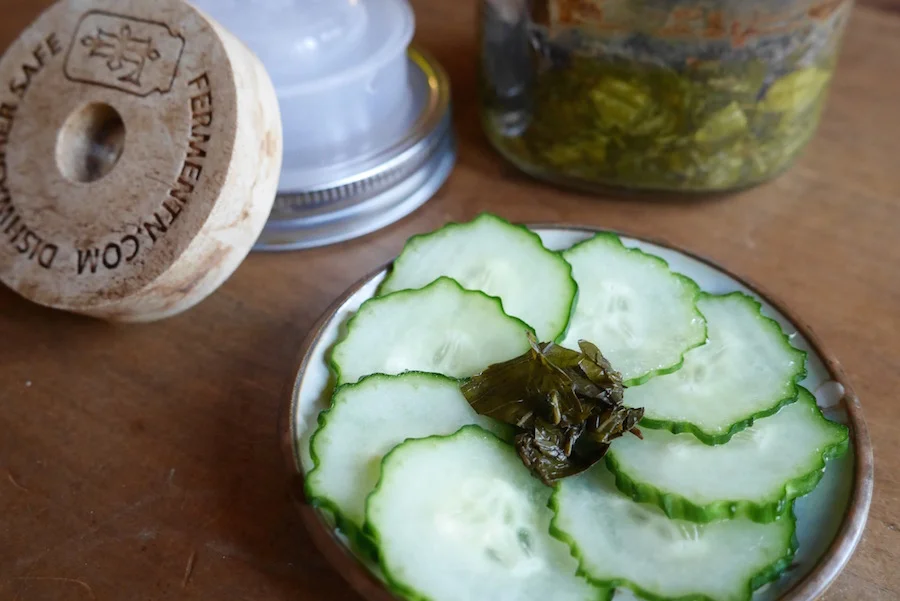
This will need to ferment about 2 weeks. You will know it is ready when the mint has turned color from the bright dark green freshness to a dull dark green, as in the photo above. It will taste lightly acidic. Refrigerate when ready to store. It will keep for at least one year. 

The ferment kit pictured here fermenting the mints appears to no longer be available.

*I know that sounds a little crazy but when we are on top of things we stack functions, in other words we feed our goats the blackberry canes that are always threatening to hide our fences and choke our waterways. It is better food for the goats than baled hay and helps us keep up with the blackberries an armload at a time. It’s also important to note we are not homestead overachievers we are generally not that organized.


Fermented Nettle Kimchi

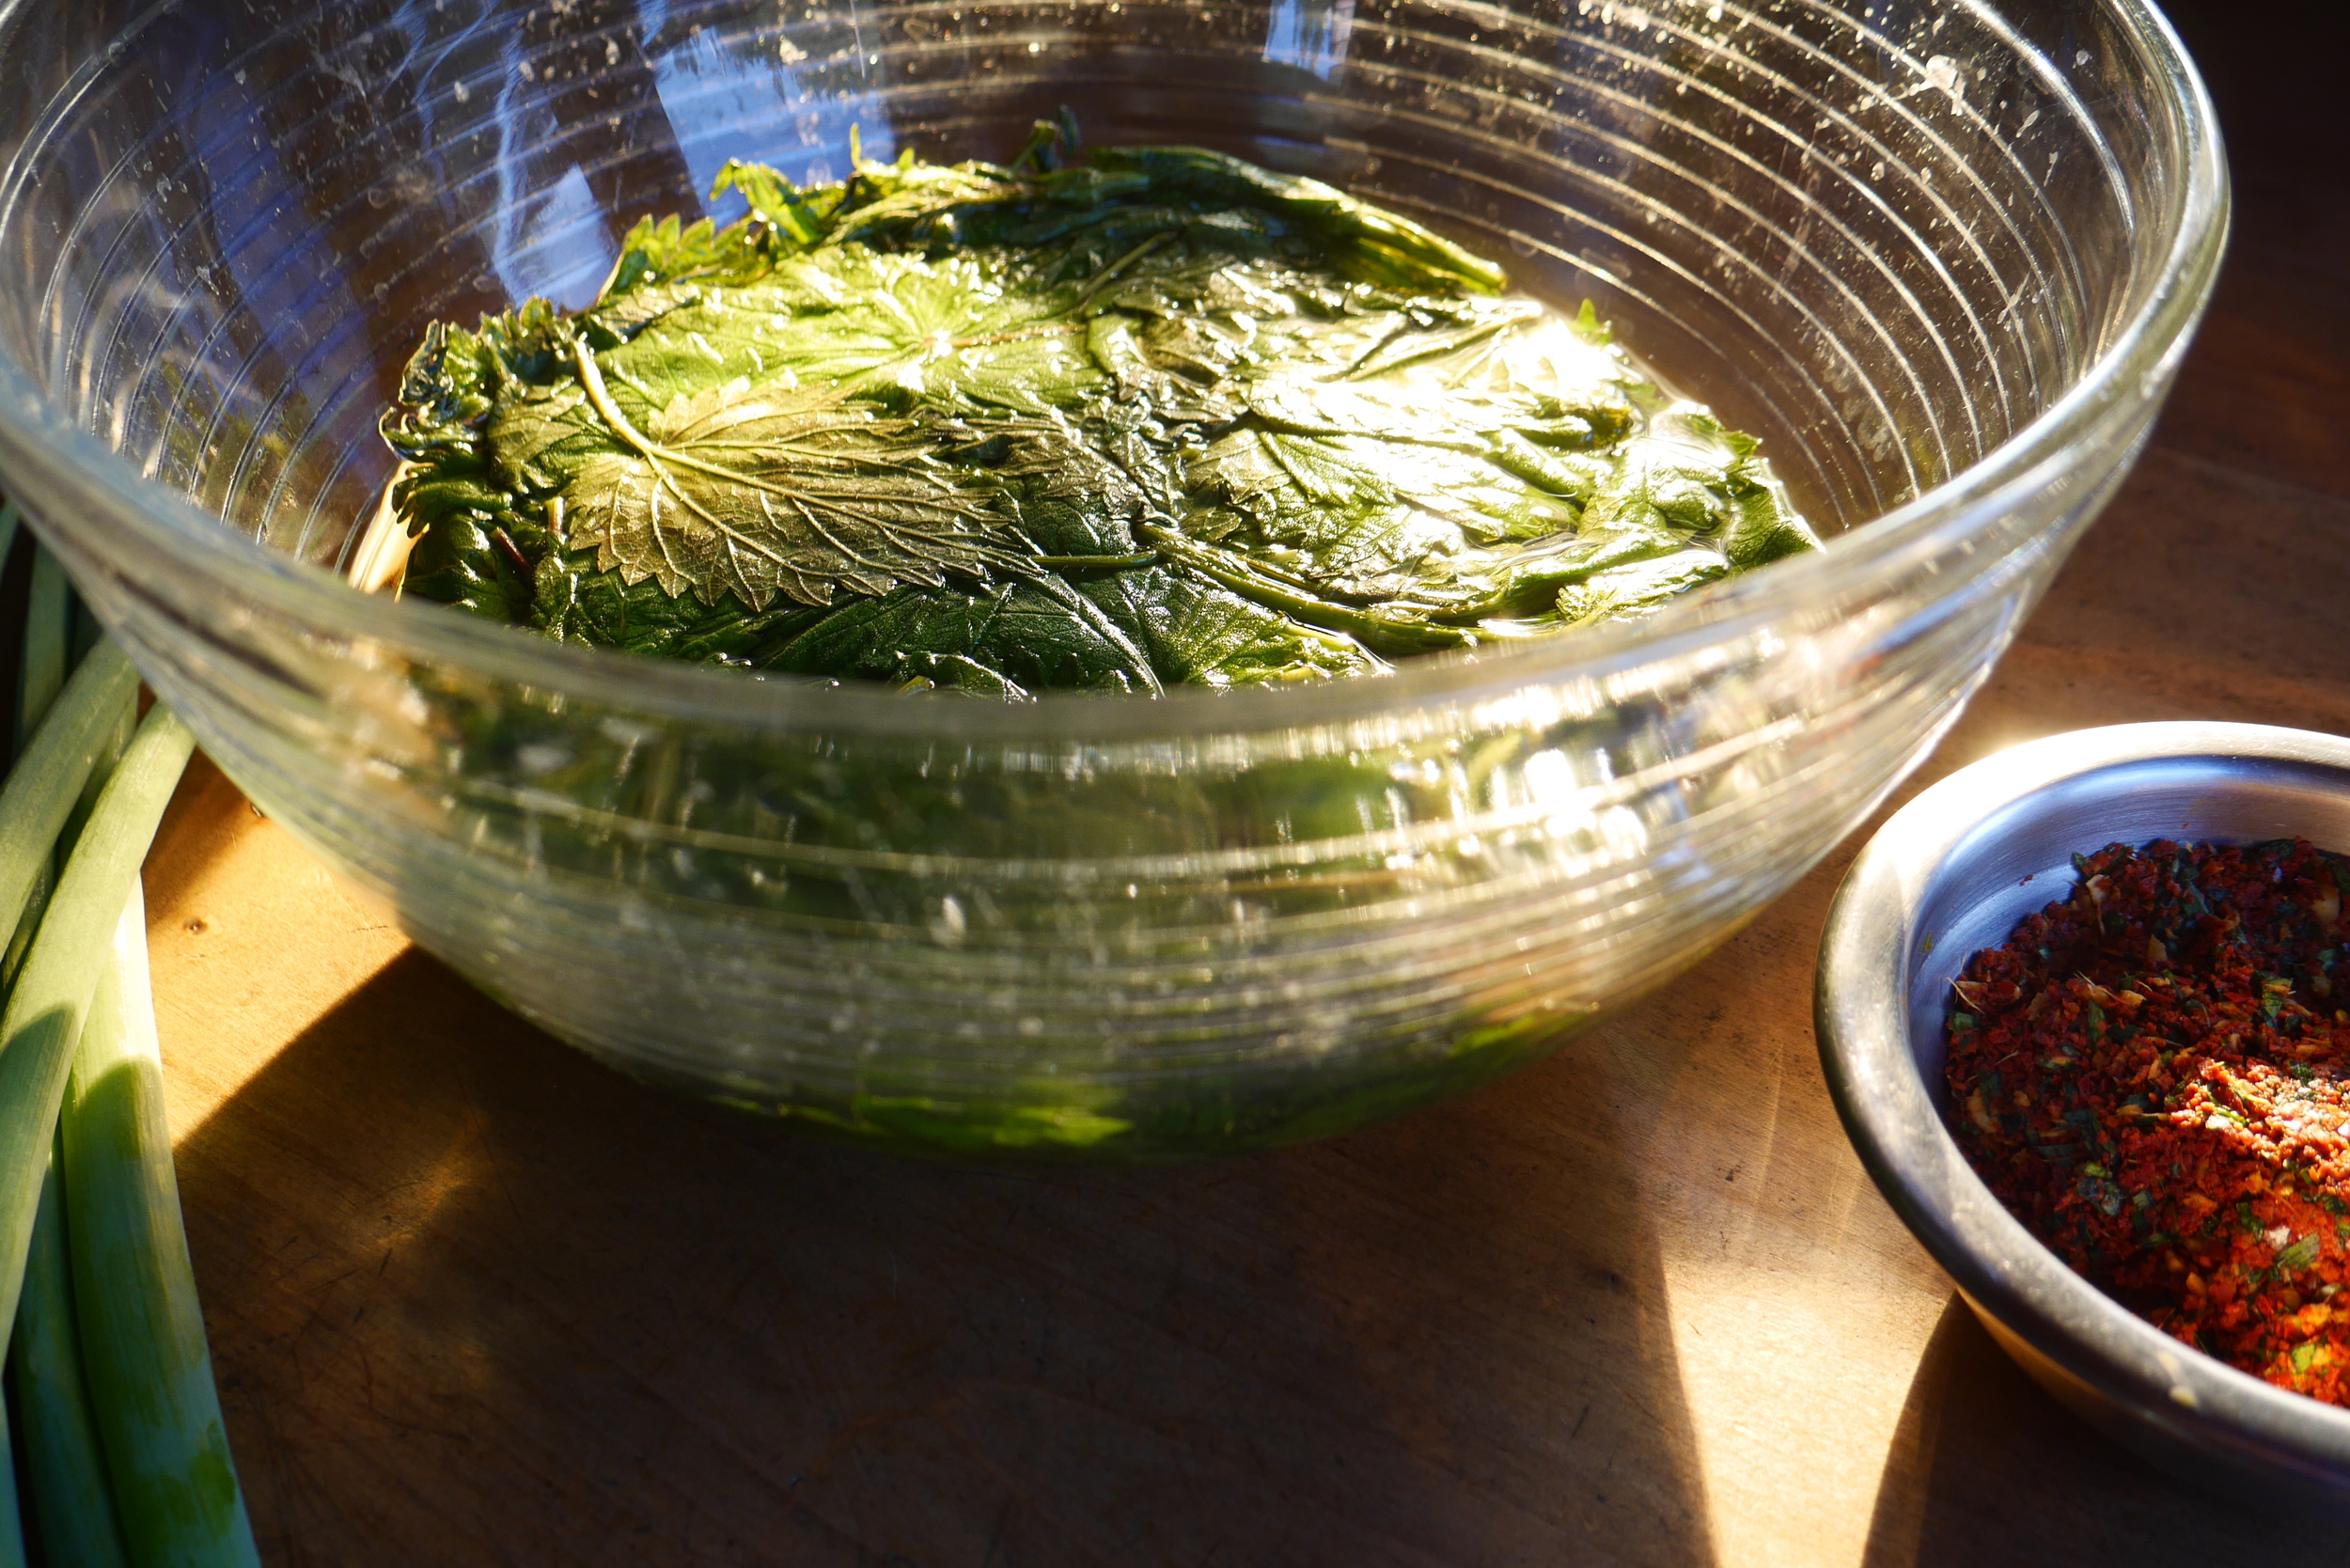
The morning after...nettle leaves soaking in a brine bath overnight—ready to become kimchi.

The morning after...nettle leaves soaking in a brine bath overnight—ready to become kimchi.

Living as we do on land at the edge of wilderness, has infused a much closer relationship to the rhythms of the year and subtleties of each individual season. This year, for example, our landscape donned the growth of spring a full month earlier. An important early harvest is the wild nettles that grow in a patch along the creek that runs through our property. Nettle kraut is a standard favorite and it is easy to stick to what I know we love. This year I knew it was time to do something different. On a bright morning Christopher and I headed to the creek with snips, a basket, each wearing long sleeves and good gloves. 

I find harvesting nettles thrilling (maybe we’ve lived out here too long); on this day there was extra excitement. As we walked through the thicket of young cedars we happened upon two freshly killed wild turkeys; one was half-eaten, the other was still warm. It was the middle of the day and we wondered what predator we might have scared off—likely a coyote. However, we do live in cougar country and when we got to the nettle bed there was a trampled down area that looked as if something of significant size had been bedded down there. There was an unmistakable odor of cat and suddenly the nettle patch seemed much less benign. As I cut nettles, Christopher surveyed the trees towering over us for a large kitty. I doubt there was a cougar anywhere near, but once our minds imagined there might be, the activity became extreme foraging.

I decided to make a pure nettle ferment and a kimchi-style ferment (and a nettle kraut just in case).  We were pleased with the results of both new ferments.


Nettle Kimchi

Yield: About 1 pint

Nettle kimchi is delicious in the magic pungency that is created by the combination of garlic, ginger and chiles, and yet the nettles hold their own. This recipe requires a little advanced thinking as the nettles are soaked overnight. Nettles grow in the early spring. If you are gardener and have a patch of garlic greens add them to the mixture. And remember to use your glove working with the nettles; they still can sting after sitting at room temperature in salt water for 10 hours.


About ½ pound of nettles, the first 2 – 3 rows of leaves still attached to stems

Soaking brine 
½ cup salt
2 quarts unchlorinated water

Kimchi mixture
 4 green onions, sliced crosswise in ½ inch pieces
1 tablespoon fresh ginger, ground or minced
3–4 cloves garlic
1–2 tablespoons chile flakes or gochugaru powder 
    Note: As always, adjust the spiciness to your palate. Also the gochugaru is not as hot at the chile flakes and may require more for desired heat.

In a crock or a large bowl, combine the brine ingredients and stir to dissolve. Rinse the nettles in cold water then immerse in the brine solution. Use a plate as a weight to keep the veggies submerged. Set aside, at room temperature for 6–8 hours. 


Using a colander set over a large bowl, drain the nettles reserving the liquid. Combine the ingredients of the kimchi mixture, blending thoroughly. Set aside. The nettles will clump together. Take this whole clump and roll it up to cut crosswise into 1 – 2 inch pieces and put it in a large bowl. Massage in the kimchi mixture.

Follow the instructions for the type of fermentation vessel you are using. If using the simple jar method select a mason jar with a tight fitting lid that is sized appropriately to the amount of mash. Place the mash inside the jar leaving about an inch of airspace. Add reserved brine as needed to make sure the ferment is juicy and veggies stay submerged. Tighten lid. Set aside, somewhere nearby and out of direct sunlight, in cool spot, for 10 – 14 days. 

Check daily to make sure there aren’t CO2 bubbles developing and that the vegetables are submerged; simply press down as needed. If using a plain jar, burp once a day or more often if you see pressure under the lid. Using a utensil, test the kimchi on day 10. You will know it is ready when the flavors have mingled and the pungency is pleasantly fused with acidic tones. The red color will have gotten deeper while the green of the nettle leaf turns a translucent brown khaki green color.

You can let this sit another week in the refrigerator with the lid on to allow the flavors to continue to develop.  This will store in the refrigerator for 8 – 12 months.

Fermenting Vegetables in a Mason Jar :: 2 Basic Techniques

These 3 ferments are each fermenting simply in a jar that is sealed tight and burped daily. From L  to R, brining peppers for hot sauce, nettle kimchi, garlic scape paste.

These 3 ferments are each fermenting simply in a jar that is sealed tight and burped daily. From L  to R, brining peppers for hot sauce, nettle kimchi, garlic scape paste.

“Submerging in Brine—Conquers Evil Every Time!” Wise words from Fermento and Brine, superheroes of the vegetable underworld.

I know I sound like a broken record. Is that still a saying? Eek…Broken iPod stuck on repeat just doesn’t have the same ring. Anyway, point is keeping your ferments anaerobic is the trick to a successful ferment. How you go about that is a personal preference more than anything.  And nearly every day I see a creative new lid or weight or contraption to help you keep the ferment submerged, let the CO2 and any contaminants out. I have already reviewed a few things on this blog, like simple handmade jar weights, and I hope to continue to share interesting ways of solving this problem.

In this post, though, I want to share the two low-tech, simple, no cost methods that I use regularly when fermenting my experimental batches. I use these methods for ferments that are 1-quart or smaller. I have used both of these methods in ferments that are in half-pint jars. These tiny ferments are not juicy cabbage or veggie ferments but instead concentrated herbal or super spicy ferments that tend to be dry.

This nettle ferment has been fermenting for 2 days under a water-filled bag for weight. It is looking good, notice the color of the nettles darkening.

This nettle ferment has been fermenting for 2 days under a water-filled bag for weight. It is looking good, notice the color of the nettles darkening.

One popular way is to use the water bag method.  It works well for very small ferments and very large ferments. I know a few folks who use this same method in 55-gallon drums of kraut, just a much bigger tougher bag.  The important thing with this method is to leave space for the bag in the jar—a good rule of thumb is to fill the jar about ¾ full and leave the top quarter for the bag. You will top the pressed ferment with a quart-sized ziplock bag; the heavier freezer style bag is preferred.  To do this open the bag and place it in the jar on top of the vegetable mixture, pressing it onto the surface and around the edges. Fill the bag with water; you will see it seal the ferment as it adds weight. When the water is at the level of the top of your jar, seal the bag.

Note: Some folks are more comfortable filling the bag with brine so that if the bag leaks the water won’t weaken the ferment. This is not a concern for me. It has only happened once, in the hundreds of times I have done this, and it just isn’t worth the cost of the salt. I do use heavy bags and if I am reusing one I fill the bag over the sink first to test.
As you are fermenting you will watch the ferment for air-pockets; you can often adjust the bag, pushing a little to release the air. Sometimes you will need to remove the bag and press the ferment back down. Then you will rinse the bag with water and replace.

This is a ginger ferment with a bag on top, you can see the air-pockets in the ferment and bubbling out along the side of the plastic bag. There are very few air-pockets and the ferment is actively pushing them out. I would watch and if more develop…

This is a ginger ferment with a bag on top, you can see the air-pockets in the ferment and bubbling out along the side of the plastic bag. There are very few air-pockets and the ferment is actively pushing them out. I would watch and if more develop press out  by removing the bag and pressing with a clean utensil. Rinse outside of bag and replace. There are so few air-pockets you could also by run a chop-stick between the bag and the side of the jar and gently press to allow air to escape

Notice the air spaces on the upper part of this fermenting garlic scape paste, open the lid and press down with clean utensil. Replace lid tightly for the burping jar method

Notice the air spaces on the upper part of this fermenting garlic scape paste, open the lid and press down with clean utensil. Replace lid tightly for the burping jar method

The other method, which I am calling the burping jar method for lack of a better name, I have only started using in the last 9 months. For the very small, very thick ferments I have decided this is great—about as simple as it gets. I have used it successfully with (or in) everything from juicy kimchi and briney pickle ferments to dry herbal rubs. (Sometimes with these dry ferments I like to cartouche the top of the ferment—which is topping it with a piece of plastic sealed tightly against the surface.) What I haven’t done is used this method in anything larger than a 2-quart ferment. This is not to say it doesn’t work, I just haven’t tried. Once I get to the larger ferments I love my water-seal crocks. I have found the trick to this method is leaving very little air space.

Simply fill a jar that is appropriately sized to the ferment mixture you have. Place the ferment in the jar, pressing out all air-pockets. Seal tightly with the lid. Place on counter to ferment. Check your ferment daily and crack the seal just a bit to allow the gases to escape and reseal. Some ferments may be more active and you may need to do this twice a day. You will know this if your lid is bulging or if when you release the gas, brine bubbles out. Be sure to press down this or any other ferment that is forming air-pockets. Generally you don’t have to press down the ferment as often as you have to release gas bubbles. Some ferments will hardly create any gas and need much less burping; don’t let that concern you—the process is still working.

In both methods just watch for the air-pockets and don't feel shy about getting into your ferment and pressing it down with a clean utensil.

Easy, right? You got this. Here are some fun recipes to get you started. Carrot Burdock KimchiFermented Celery Mint Salad, or Fermented Sweet Potatoes. If you feel like you need to step back and just get a handle on fermentation or have the comfort of a class that you can take whenever you like and watch as many times as you like, its all your journey and we are always here to help.


Fermented Vegetables :: A Retrospective :: New Year’s Resolutions and E-books

 Once upon a brine...

 Once upon a brine...

Once upon a brine a husband had the idea to write a vegetable fermentation book. The wife told him that she already had a project but he should go right ahead. In a short time he lured her into his project. Over the next two years they spent time together playing with their food and writing words. Oh, the romance. Meanwhile the book that grew and grew and grew had no home. They had submitted it to one publisher who talked to them and another who sent a form letter rejection. (the indignity) They were not deterred and the book neared completion. This husband and wife were consummate DIYers and they thought—why don’t we become a small indie press while we are at it? (bad idea)

In January 2013 the husband’s New Year’s resolution (he does that) was to create an e-book to release in February. This was after the wife had spent a few months talking to freelance editors, designers, and printers. That was when they realized an indie press might be a harder way to make a living than a small family farm, and they already had one of those. They finished the e-book but never released it. A friend, who believed in the project, encouraged them to submit it a few more times first.

Fast forward to January 2015. Happy New Year! (Christopher might have a few New Year resolutions, among which might be a “hot” new book project. We can’t say more.) 2014 was amazing! Storey Publishing released the book Fermented Vegetables in October which hit a Pacific Northwest best seller list in December. While we appreciate all that we taught ourselves, we are thankful for all that we have learned from the team that made this happen.

If your New Year’s resolution is to try fermenting vegetables because you want to and just haven’t taken a plunge into the brine, this is your chance and it will only cost you $2.99. Storey Publishing and Workman's Blue Plate Special are offering the e-book version of Fermented Vegetables for the entire month of January. Or, you can get it from any of your favorite e-book retailers.

Snapshot of a draft cover of Fermented Vegetables before it was the beautiful book we know and love. The husband and wife do find it apropos that this special price is happening on the anniversary of their short e-book publishing career

Snapshot of a draft cover of Fermented Vegetables before it was the beautiful book we know and love. The husband and wife do find it apropos that this special price is happening on the anniversary of their short e-book publishing career


What came first, the ferment or the pot?

Traditional style fermentation crock made by Jeremy Ogusky. The lid on this design functions as a follower and must be weighted with a water filled jar and topped with a cloth. If you shop talk to Jeremy about the lid style that best fits your needs. 

A few lucky folks are given a fermentation crock as a gift and they think, hmmm, maybe I should try this thing called vegetable fermentation. They often end up at our classes (or learning with our book at their side). However for most of us, when the fermentation bug hits, the first thing we do is find a vessel—a jar or a crock. This often means a visit to the local kitchen store or online shopping. For Jeremy Ogusky, a Boston potter, this wasn’t an issue. He simply made himself a crock. (Who doesn’t wish they could do that.) He then made a few more for friends and family. After awhile a tiny housewares company, Williams-Sonoma, contacted him and offered to contract with him for hand-thrown clay crocks. You can watch him here.  He said yes and realized this is fermentation’s moment to shine. Instead of just sitting in the studio turning out hundreds of crocks, Jeremy leapt into the brine—championing fermentation as well. 

When I spoke to Jeremy what struck me most was his intense interest and skill in collaboration and connections. Fermentation pulls people together. Jeremy found the paths of folks with very different interests intersecting with fermentation.  When he explained this I imagined roads—the thought paths of science, health, food lovers, food makers, artists, farmers, preservationists, urban homesteaders, DIY—converging from all directions at a giant handmade clay crock of fermented vegetables. (A bit like all the roads that led to Rome.)

For the past five years Jeremy has cultivated his role as a thought leader in the fermentation renaissance by collaborating with many folks around Boston to bring this delicious food to the forefront. He is responsible for the group known as Boston Ferments which started out as a loose band of fermentation enthusiasts and has grown to a group that hosts the Boston Fermentation Festival, fermentation workshops, fermentation themed dinners in restaurants, and Kraut Mobs. (Yes, “mobsters” show up at farmer’s markets or food festivals with 50 pounds of cabbage, cutting boards, knives, bowls, salt and jars and invite people to make sauerkraut.) 

For Jeremy, who's first career path was public health, the clay work blends well with his interest in nourishing food. He is interested in the intersections of his own work with clay and fermentation. Clay working is one of our oldest crafts—born solely for function, vessels in which to cook, serve and store (or preserve) foodstuffs. You can see where this is going. If fermentation is one of the oldest methods of preservation, one has to ask what came first? Did we ferment once we had pots or did we create vessels to help our fermentations?

Handmade stoneware began as utility but now it is often sold as art. As many of my readers know I appreciate functional art. I find that these fun and beautiful tools with a story inspire the food I create. 
 
On our counter, Jeremy’s faded denim-colored crock boldly proclaims, “ferment.” This is more than just a label of the contents within—this word also reminds us to slow down and take time. Find the comfort in allowing your ideas and projects, (or vegetables) to sit quietly before breaking out in a bubbling frenzy of creativity (or taste).